ValueError: numpy.ndarray size changed, may indicate binary incompatibility
Last updated: Apr 10, 2024
Reading time·5 min

# ValueError: numpy.ndarray size changed, may indicate binary incompatibility
The "ValueError: numpy.ndarray size changed, may indicate binary incompatibility" occurs because there was a change in NumPy's C API in version 1.20.0.
To solve the error, upgrade your version of the numpy module.
ValueError: numpy.ndarray size changed, may indicate binary incompatibility. Expected 88 from C header, got 80 from PyObject
There was a change in the C API of NumPy in version 1.20.0 which is the cause of the error.
# Upgrade your version of the numpy module
To resolve the issue, upgrade numpy to the latest version.
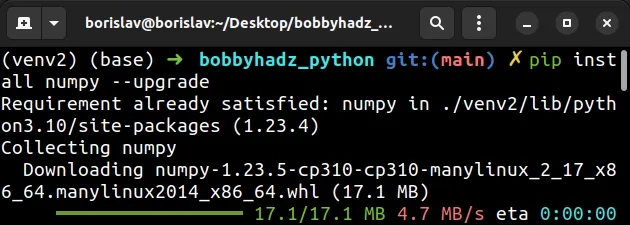
Open your terminal and run the following command to update your NumPy version.
pip install numpy --upgrade pip3 install numpy --upgrade python -m pip install numpy --upgrade python3 -m pip install numpy --upgrade py -m pip install numpy --upgrade # 👇️ For Anaconda conda update numpy # 👇️ For Jupyter Notebook !pip install numpy --upgrade
The --upgrade option upgrades the specified package to the newest available version.
When you run the command, you might get an error that states "ERROR: pip's dependency resolver does not currently take into account all the packages that are installed.".
# Uninstall and reinstall NumPy
If the error is not resolved, try to uninstall and then reinstall numpy.
# 👇️ Uninstall numpy pip uninstall numpy pip3 uninstall numpy python -m pip uninstall numpy python3 -m pip uninstall numpy py -m pip uninstall numpy # 👇️ For Anaconda conda remove numpy
Now install the latest version of NumPy.
pip install numpy --upgrade pip3 install numpy --upgrade python -m pip install numpy --upgrade python3 -m pip install numpy --upgrade py -m pip install numpy --upgrade # 👇️ For Anaconda conda install -c conda-forge numpy
# Update the contents of your requirements.txt file
If the error is resolved after reinstalling numpy, update your
requirements.txt file
with the following command.
pip freeze > requirements.txt
The command will update the contents of your requirements.txt file, so that
the next time you run pip install -r requirements.txt, your project will be in
a working state.
# Reinstalling the pycocotools module
If the error persists, try to reinstall the pycocotools module.
pip uninstall pycocotools pip install --no-cache-dir pycocotools pip3 uninstall pycocotools pip3 install --no-cache-dir pycocotools
Using the --no-cache-dir option disables pip's cache.
If you still get the error, try to pin your pycocotools version to 2.0.0.
pip install pycocotools==2.0.0 pip3 install pycocotools==2.0.0 python -m pip install pycocotools==2.0.0 python3 -m pip install pycocotools==2.0.0
If none of the suggestions helped, try creating a virtual environment.
# Try installing the module with the --no-binary option
Another thing you can try is to install the package with the --no-binary
option.
For example, if the error is caused by the hdbscan package, you would run the
following command.
pip install hdbscan --no-cache-dir --no-binary :all: pip3 install hdbscan --no-cache-dir --no-binary :all:
When the --no-binary option is set to :all:, it disables all binary
packages.
If the error persists, try to upgrade your version of the numba package.
pip install numba --upgrade pip3 install numba --upgrade
# Create a virtual environment
If the error persists, try creating a virtual environment.
- Create a virtual environment.
- Activate the virtual environment.
- Run the
pip installcommand with the virtual environment active.
# 👇️ Use the correct version of Python when creating VENV python -m venv venv # 👇️ Activate on Unix or MacOS source venv/bin/activate # 👇️ Activate on Windows (cmd.exe) venv\Scripts\activate.bat # 👇️ Activate on Windows (PowerShell) venv\Scripts\Activate.ps1 # 👇️ Install the specific package in the virtual environment pip install opencv-python
If the python -m venv venv command doesn't work, try the following 2 commands:
python3 -m venv venvpy -m venv venv
Your virtual environment will use the version of Python that was used to create it.
If the error is resolved after installing numpy in a virtual environment,
update your requirements.txt file with the following command.
pip freeze > requirements.txt
# Additional Resources
You can learn more about the related topics by checking out the following tutorials:
- Convert a NumPy array to 0 or 1 based on threshold in Python
- How to get the length of a 2D Array in Python
- TypeError: 'numpy.ndarray' object is not callable in Python
- TypeError: Object of type ndarray is not JSON serializable
- IndexError: too many indices for array in Python [Solved]
- How to filter a JSON array in Python
- AttributeError module 'numpy' has no attribute array or int
- NumPy RuntimeWarning: divide by zero encountered in log10
- ValueError: x and y must have same first dimension, but have shapes
- SystemError: initialization of _internal failed without raising an exception
- TypeError Invalid comparison between datetime64[ns] and date
- How to replace None with NaN in Pandas DataFrame
- You are trying to merge on int64 and object columns [Fixed]
- Could not broadcast input array from shape into shape [Fix]
- ValueError: object too deep for desired array [Solved]
- Only one element tensors can be converted to Python scalars
- Copy a column from one DataFrame to another in Pandas
- ValueError: cannot reindex on an axis with duplicate labels
- ValueError: Length mismatch: Expected axis has X elements, new values have Y elements
- AttributeError: Can only use .str accessor with string values
- ValueError: zero-dimensional arrays cannot be concatenated
- ValueError: all the input array dimensions for the concatenation axis must match exactly
- ValueError: cannot reshape array of size X into shape Y
- lbfgs failed to converge (status=1): STOP: TOTAL NO. of ITERATIONS REACHED LIMIT
- How to draw empty circles on a Scatter Plot in Matplotlib
- TypeError: Image data cannot be converted to float [Solved]
- OverflowError: Python int too large to convert to C long
- How to use numpy.argsort in Descending order in Python
- Object arrays cannot be loaded when allow_pickle=False
- ufunc 'add' did not contain loop with signature matching types
- ValueError: Found array with dim 3. Estimator expected 2
- RuntimeWarning: overflow encountered in exp [Solved]
- Columns have mixed types. Specify dtype option on import
- Boolean index did not match indexed array along dimension 0
- Shape mismatch: objects cannot be broadcast to a single shape
- How to flatten only some Dimensions of a NumPy array
- Check if all values in a Column are Equal in Pandas
- Remove the Duplicate elements from a NumPy Array
- NumPy: Apply a Mask from one Array to another Array
- How to iterate over the Columns of a NumPy Array
- Pandas: Find an element's Index in Series [7 Ways]
- NumPy RuntimeWarning: invalid value encountered in divide
- All the input arrays must have same number of dimensions
- Only integer scalar arrays can be converted to a scalar index
- ValueError: Index contains duplicate entries, cannot reshape

