How to display Directory & File structure in Markdown Files
Last updated: Apr 5, 2024
Reading time·4 min

# Table of Contents
- How to display Directory & File structure in Markdown Files
- Different formatting options when using the tree command
- Using a VS Code extension to generate a file tree
# How to display Directory & File structure in Markdown Files
The easiest way to display a project's directory and file structure in markdown files is to:
- Open your terminal in the specific directory.
- Issue the
treecommand.
tree
The tree command can also be run in Windows (in CMD and PowerShell).
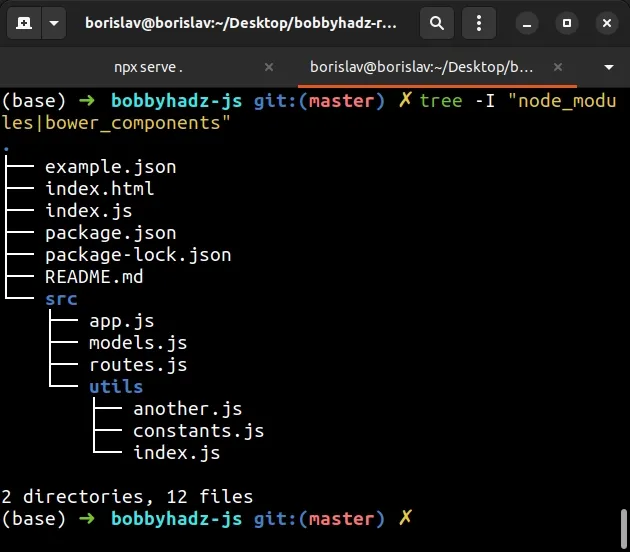
On Windows and Linux, you can also exclude one or more directories from the command's output.
tree -I "node_modules|bower_components"
The command excludes the output of the node_modules and bower_components
directories.
- Use three backtick (`) characters to define a block of code in your markdown file.
Here is an example README.md markdown file that renders a directory and file
structure.
``` ├── example.json ├── index.html ├── index.js ├── package.json ├── package-lock.json ├── README.md └── src ├── app.js ├── models.js ├── routes.js └── utils ├── another.js ├── constants.js └── index.js ```
Notice that the directory structure is wrapped in three backtick characters.
You can find the backtick character above the Tab key, to the left of 1 on
your keyboard.
Three backtick characters are used to display a code snippet.
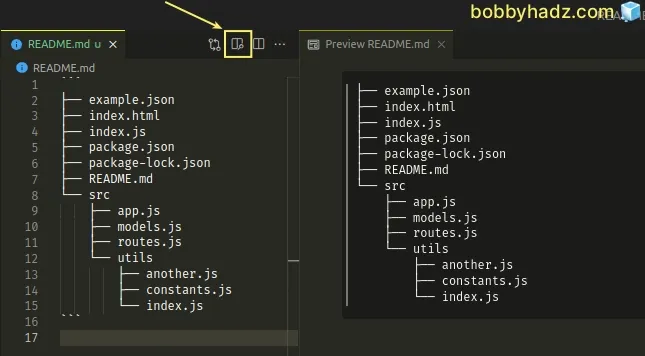
If you use Visual Studio Code, once you open a markdown file, you can click on the Open Preview to the Side button at the top to display your markdown file in preview mode.
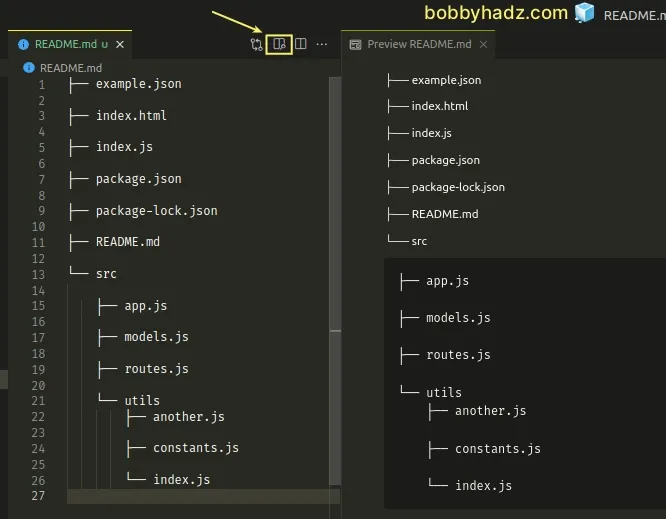
You must wrap the directory tree in backticks, otherwise, the spacing will likely not be preserved.
pre tags.<pre> ├── example.json ├── index.html ├── index.js ├── package.json ├── package-lock.json ├── README.md └── src ├── app.js ├── models.js ├── routes.js └── utils ├── another.js ├── constants.js └── index.js </pre>
The pre HTML element is used to display preformatted text. The text is rendered exactly as it is displayed in the HTML (or markdown) file.
You could also use the Enter key to separate the entries with a newline
character if you prefer the formatting.
├── example.json ├── index.html ├── index.js ├── package.json ├── package-lock.json ├── README.md └── src ├── app.js ├── models.js ├── routes.js └── utils ├── another.js ├── constants.js └── index.js
# Different formatting options when using the tree command
Here are some examples of different formatting options when using the tree
command.
# macOS and Linux tree -I "node_modules|bower_components" | sed 's/├/\+/g; s/─/-/g; s/└/\\/g'
The output of the command looks as follows.
``` +-- example.json +-- index.html +-- index.js +-- package.json +-- package-lock.json +-- README.md \-- src +-- app.js +-- models.js +-- routes.js \-- utils +-- another.js +-- constants.js \-- index.js ```
The example only uses ASCII characters to display the directory structure.
Here is another ASCII-only character format you could use.
``` +-- example.json +-- index.html +-- index.js +-- package.json +-- package-lock.json +-- README.md +-- src | +-- app.js | +-- models.js | +-- routes.js | +-- utils | +-- another.js | +-- constants.js | +-- index.js +-- assets | +-- style.css | +-- cat.png +-- example.com ```
You could also set the --charset argument to unicode when issuing the tree
command.
tree -I "node_modules|bower_components" --charset unicode
The command produces the following output.
``` |-- example.json |-- index.html |-- index.js |-- package.json |-- package-lock.json |-- README.md `-- src |-- app.js |-- models.js |-- README.md |-- routes.js `-- utils |-- another.js |-- constants.js |-- index.js `-- README.md ```
# Using a VS Code extension to generate a file tree
You can also use a VS Code extension to generate a file tree.
- Click on Extensions in the left sidebar.
- You can also open the Extensions menu by pressing:
Ctrl+Shift+Xon Windows or LinuxCommand+Shift+Xon macOS
- Type file-tree-generator.
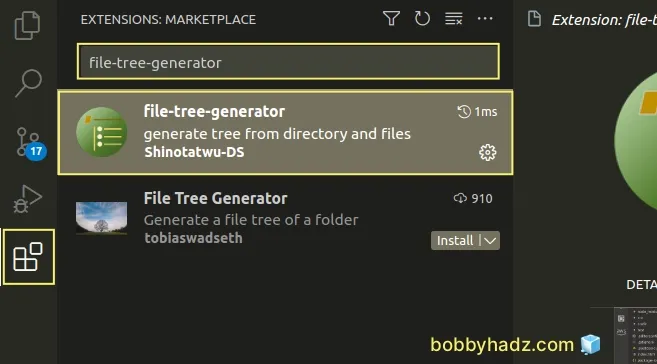
- Click on the Install button.
Make sure to install the correct file-tree-generator extension.
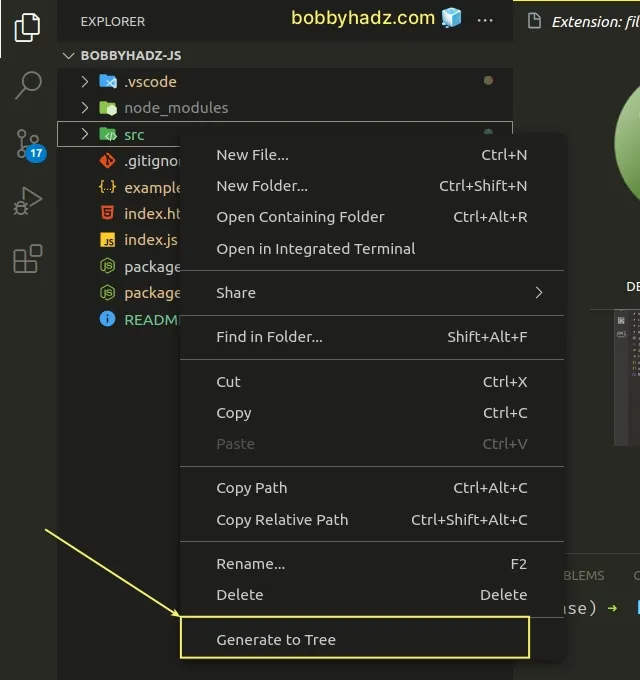
- Right-click on the folder for which you want to generate a tree.
- Click Generate to tree.
If you can't get the extension to work, try to restart VS Code.
Once you generate the directory structure, you can select the output and copy it.
If you want to remove the icons, click on the icon off button.
Now, paste the output into your markdown file and don't forget to wrap it in three backticks as in the previous examples.
``` 📦src ┣ 📂utils ┃ ┣ 📜README.md ┃ ┣ 📜another.js ┃ ┣ 📜constants.js ┃ ┗ 📜index.js ┣ 📜README.md ┣ 📜app.js ┣ 📜models.js ┗ 📜routes.js ```
You could also use the pre tag if you can't get the backtick characters to
work.
<pre> 📦src ┣ 📂utils ┃ ┣ 📜README.md ┃ ┣ 📜another.js ┃ ┣ 📜constants.js ┃ ┗ 📜index.js ┣ 📜README.md ┣ 📜app.js ┣ 📜models.js ┗ 📜routes.js </pre>
If you can't get the extension to work when trying to generate a directory and file structure for your entire project:
- Open VS Code one directory up.
- Click on your project folder.
- Select Generate to tree.
The extension doesn't always work when you click on the empty space in Explorer. It works much more reliably if you right-click a specific folder before selecting Generate to tree.
I've also written a detailed article on how to add images and links to files in Markdown in VS Code.
# Additional Resources
You can learn more about the related topics by checking out the following tutorials:
- Emmet not working in Visual Studio Code issue [Solved]
- How to view and edit Binary files in Visual Studio Code
- How to open, view and query SQLite in VS Code
- Using VS Code as default Git editor, difftool and mergetool
- How to open, view and query SQLite in VS Code
- VS Code taking too much Memory or CPU issue [Solutions]
- How to generate Lorem Ipsum in Visual Studio Code
- How to add a new line in a Jupyter Notebook markdown cell
- Display images Side by Side in GitHub Markdown (README.md)
- Right-align, justify-align and center text in Markdown
- How to create an Alert/Admonition Box in GitHub Markdown
- How to change the color of specific Text in Markdown
- How to write Lists inside a Table in Markdown
- How to add a GIF to a Markdown file (Github and Vanilla)
- How to embed a Video into GitHub README.md (Markdown)
- How to Create a Table without a Header in Markdown

