How to add a GIF to a Markdown file (Github and Vanilla)
Last updated: Apr 5, 2024
Reading time·5 min

# Table of Contents
- How to add a GIF to a Markdown file (Github and Vanilla)
- Adding a GIF from a URL to a markdown file
- Adding a local GIF to a markdown file
- Resizing the GIF in your markdown file
- Adding a GIF to your markdown file with a reference
# How to add a GIF to a Markdown file (Github and Vanilla)
To add a gif to a markdown file:
- Use the following format
. - You can either specify a path to a local
.giffile or an external URL that points to a gif. - Make sure the file or URL has a
.gifextension.
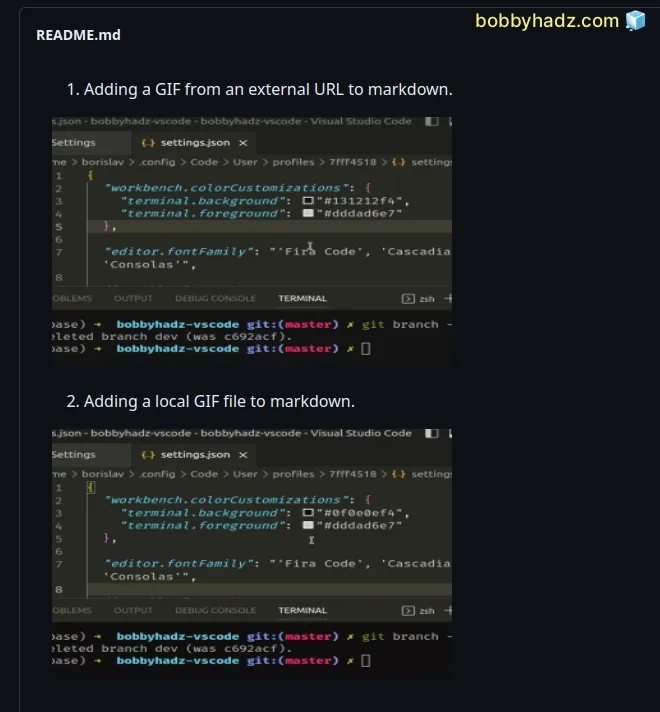
1. Adding a GIF from an external URL to markdown.  2. Adding a local GIF file to markdown. 
The examples work in vanilla markdown files and GitHub markdown.
# Adding a GIF from a URL to a markdown file
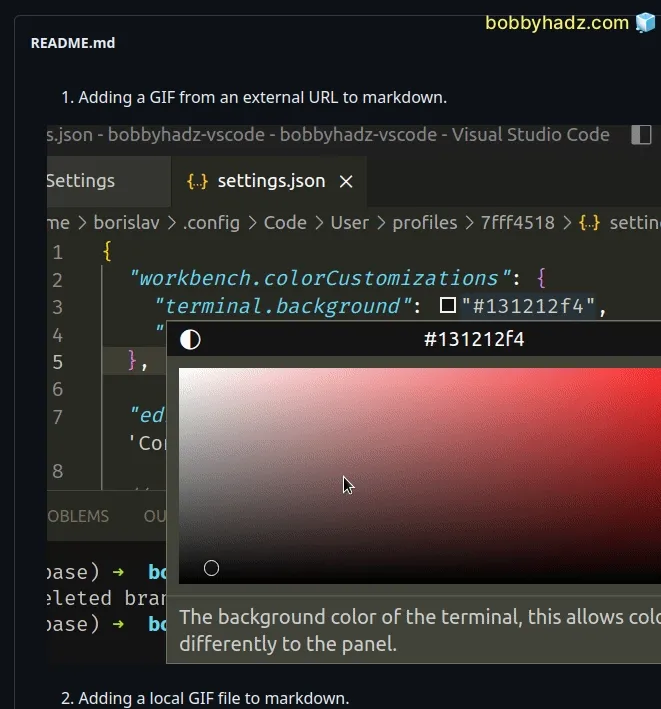
The first example shows how to add a GIF from an external URL to a markdown file.
You simply have to specify the complete URL that points to the file, including the file's extension (.gif).
1. Adding a GIF from an external URL to markdown. 
If you click on the URL, you should be able to load the GIF in your browser.
Note that the protocol has to be included (https:// or http://) for the GIF
to load properly.
The most common reasons for GIFs from remote URLs to not load in markdown are:
- Forgetting to specify the protocol in the URL.
- Forgetting to specify the
.gifextension.
The easiest way to copy a URL that points to a GIF is to right-click on the GIF and select Copy image address.
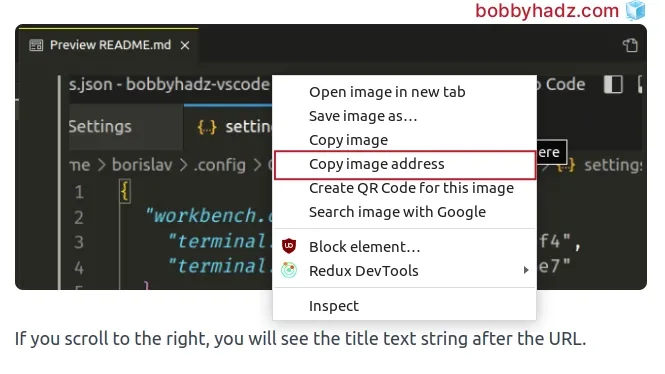
You can also specify the title text for the GIF at the end, after the URL.

If you scroll to the right, you will see the title text string after the URL.
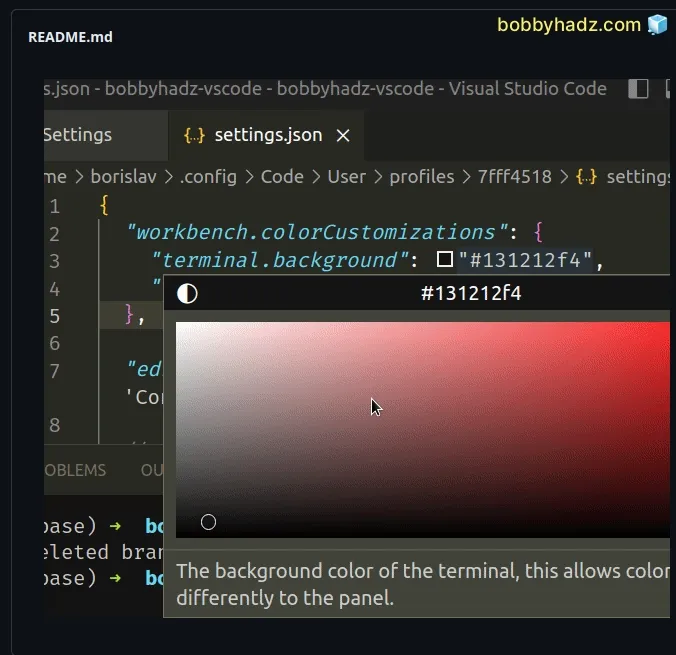
If you hover over the GIF, the title text is shown.
# Adding a local GIF to a markdown file
The second example shows how to add a local GIF file to a markdown file.
It assumes that you have a GIF file named hover-over-color.gif in the same
directory as your markdown file.
You can download the following GIF file for testing purposes.
Right-click on the GIF and select Save image as... to download it.

Place it in the same directory as your .md file and include it as follows.

The text between the square brackets [] is the alt text for the .gif.
The test between the parentheses () specifies the path to the .gif file.
You can also specify the title text that is shown when the user hovers over the GIF.

The title text is specified after the path to the GIF.
The example above assumes that your .gif file is located in the same directory
as your README.md file.
my-project/ └── README.md └── hover-over-color.gif
If you have the following folder structure.
my-project/ └── README.md └── my-gifs/ └── hover-over-color.gif
You would have to specify the complete path to the .gif file in order to add
it to your markdown file.
2. Adding a local GIF file to markdown. 
Notice that we specified the complete path to the file, including the directory and the file's extension (.gif).
Specifying the path to the GIF is quite easy if you use VS Code as your code editor.
- Select the file in explorer (the left sidebar) and drag it to your markdown file.
- Press
Shifton your keyboard and hold it. - Drop the file where you want to insert the GIF.
I've written a detailed guide on how to add images and links to files in Markdown in VS Code.
# Resizing the GIF in your markdown file
If you need to resize the gif, use an img tag and set the width and
height attributes on the image.
1. Adding a GIF from an external URL to markdown. <img width="400" height="250" alt="color picker" src="https://bobbyhadz.com/images/blog/change-vscode-integrated-terminal-colors/hover-over-color.gif" /> 2. Adding a local GIF file to markdown. <img width="400" height="250" src="hover-over-color.gif" alt="color picker" />
This approach works in both vanilla and GitHub markdown files.
The width and height attributes are used to set the width and height of the
GIF.
You can use an img tag to add a GIF to your markdown file even without
adjusting the GIF's width or height.
1. Adding a GIF from an external URL to markdown. <img alt="color picker" src="https://bobbyhadz.com/images/blog/change-vscode-integrated-terminal-colors/hover-over-color.gif" /> 2. Adding a local GIF file to markdown. <img src="hover-over-color.gif" alt="color picker" />
# Adding a GIF to your markdown file with a reference
You can also add a GIF to your markdown file with a reference.
![color picker][my-gif] [my-gif]: https://bobbyhadz.com/images/blog/change-vscode-integrated-terminal-colors/hover-over-color.gif
Notice that the first line uses 2 sets of square brackets [] and not square
brackets [] and parentheses ().
The Last 2 lines set the name of the reference (my-gif) and the path to the
GIF.
You can imagine that my-gif in the first line gets replaced with the URL that
points to the external GIF.
This approach works in vanilla and GitHub markdown.
If you use VS Code as your IDE, check out the following article:
# Additional Resources
You can learn more about the related topics by checking out the following tutorials:
- How to display Directory & File structure in Markdown Files
- Right-align, justify-align and center text in Markdown
- How to create an Alert/Admonition Box in GitHub Markdown
- How to change the color of specific Text in Markdown
- How to write Lists inside a Table in Markdown
- How to embed a Video into GitHub README.md (Markdown)

