Display images Side by Side in GitHub Markdown (README.md)
Last updated: Apr 5, 2024
Reading time·3 min

# Display images Side by Side in GitHub Markdown (README.md)
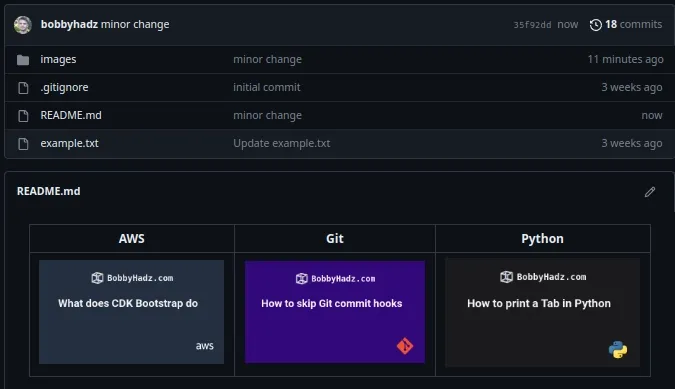
The easiest way to display images side by side in GitHub markdown is to use a table.
You can define a table of N columns in your README.md file where each column stores an image.
Here is an example.
| Cat pics | Dog pics | | ----------------------------------- | ----------------------------------- | |  |  |
The text between the square brackets [] is the alt text for the image.
You can use the same approach when working with local images.
| Cat pics | Dog pics | | ---------------------- | ---------------------- | |  |  |
The example assumes that your folder structure looks as follows.
├── images │ ├── cat.png │ └── dog.png └── README.md
Here is an example of how the images look on GitHub.

The same approach can be used if you need to place more than two images side by side.
Simply add more columns to the table.
| Cat pics | Dog pics | Lizzard | | ----------------------------------- | ----------------------------------- | ------------------------------------------- | |  |  |  |

You can also specify a title for each image, so that when the user hovers over the image, the text is displayed.
| AWS | Git | | ----------------------------------------------------- | --------------------------------------------- | |  |  |
Notice that the title is specified in quotes after the path to the image.

# Using HTML tags to display your images side by side in GitHub Markdown
You can also use HTML tags to display your images side by side directly in GitHub markdown.
<p float="left"> <img src="https://bobbyhadz.com/images/blog/python-print-tab/thumbnail.webp" width="33%" /> <img src="https://bobbyhadz.com/images/blog/what-aws-cdk-bootstrap-do/thumbnail.webp" width="33%" /> <img src="https://bobbyhadz.com/images/blog/aws-cdk-subnet-tags/thumbnail.webp" width="33%" /> </p>

The code sample displays 3 images side by side.
Notice that the width attribute is set to 33%.
<img src="..." width="33%" />
You have to adjust this if you need to display more or fewer images.
For example, if displaying only 2 images, you'd use a width of 49%.
For 4 images, you'd use a width of 24%, etc.
The same approach can be used to display multiple local images side by side.
<p float="left"> <img src="images/dog.png" width="33%" /> <img src="images/cat.png" width="33%" /> <img src="images/lizzard.png" width="33%" /> </p>
If you run into issues when working with local images, check out my other article:
The example assumes that your folder structure looks as follows.
├── images │ ├── cat.png │ ├── lizzard.png │ └── dog.png └── README.md
You can also set the width in pixels, it doesn't have to be set using percentages.
<p float="left"> <img src="images/dog.png" width="250" /> <img src="images/cat.png" width="250" /> <img src="images/lizzard.png" width="250" /> </p>
You can also set the height of the images.
<p float="left"> <img src="images/dog.png" height="150" width="250" /> <img src="images/cat.png" height="150" width="250" /> <img src="images/lizzard.png" height="150" width="250" /> </p>
You can use any other CSS styles when styling your images, e.g. flex.
<div style="display: flex; flex-direction: row;">> <img src="images/aws-bootstrap.webp" width="250" /> <img src="images/git-hooks.webp" width="250" /> <img src="images/python-tab.webp" width="250" /> </div>
You can also use the character sequence if you need to
add whitespace between the
images.
<p float="left"> <img src="images/aws-bootstrap.webp" height="150" width="250" /> <img src="images/git-hooks.webp" height="150" width="250" /> <img src="images/python-tab.webp" height="150" width="250" /> </p>

You can add as many or as few character sequences as necessary.
# Additional Resources
You can learn more about the related topics by checking out the following tutorials:

