#include errors detected. Please update your includePath
Last updated: Apr 6, 2024
Reading time·5 min

# #include errors detected. Please update your includePath
The VS Code C++ error "#include errors detected based on information provided
by the configurationProvider setting" occurs when the path to the MinGW
include folder is not added to your includePath setting.
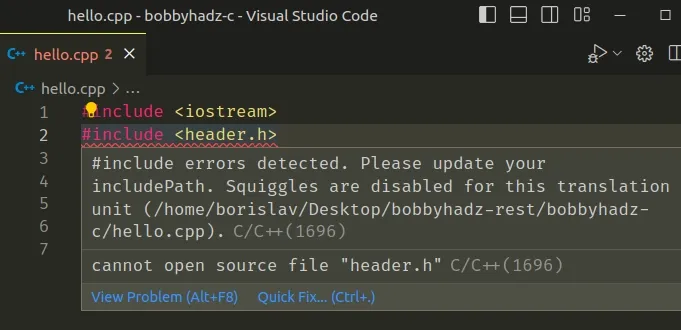
Here is the complete error message.
#include errors detected based on information provided by the configurationProvider setting. Squiggles are disabled for this translation unit (/home/borislav/Desktop/bobbyhadz-rest/bobbyhadz-c/hello.cpp).C/C++(1696) cannot open source file "header.h"C/C++(1696)
# Try restarting VS Code
The first thing you should try is to restart VS Code.
The editor often glitches and shows the error for no good reason.
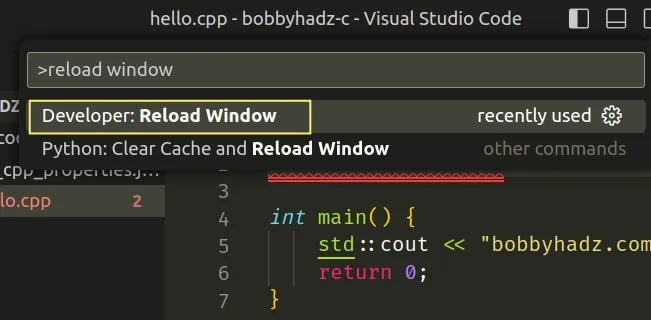
- Press:
Ctrl+Shift+Pon Windows and Linux.Command+Shift+Pon macOS.
F1 to open the Command Palette.- Type Reload Window and select Developer: Reload Window.
If the error persists, try to close VS Code completely and reopen the editor by
issuing the code . command from your terminal.
code .
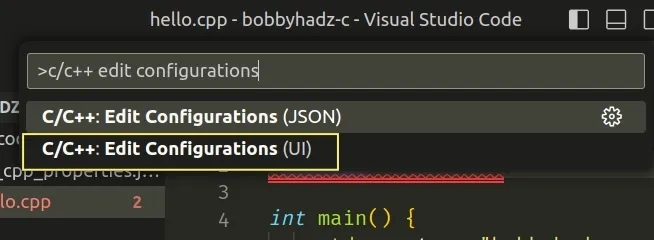
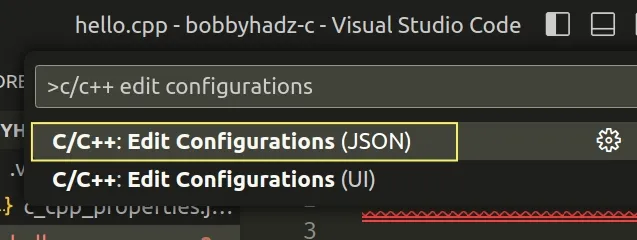
Note that you can also open the C/C++ configuration UI using the Command Palette:
- Press:
Ctrl+Shift+Pon Windows and Linux.Command+Shift+Pon macOS.
F1 to open the Command Palette.- Type c/c++ edit configurations and select C/C++: Edit Configurations (UI).
# Using the Add to Include Path setting to automatically configure C/C++
Depending on your operating system, you might be able to use a setting that automatically configures the C/C++ extension correctly.
Click on the error message in your
.cppfile.A yellow light bulb icon should appear.
Click on the light bulb icon.
![]()
- If you see the add to "includePath":/some/path setting, click on it to automatically update your C/C++ extension config.
This should resolve the error. If the error persists, try restarting VS Code.
If you don't see the add to "includePath":/some/path setting, follow the
instructions from the next subheading to manually update your includePath.
# Adding the path to MinGW to your includePath array on Windows
To add the path to MinGW to your includePath array on Windows:
- Place your cursor on the error message and click on it.
- A yellow light bulb icon should appear.
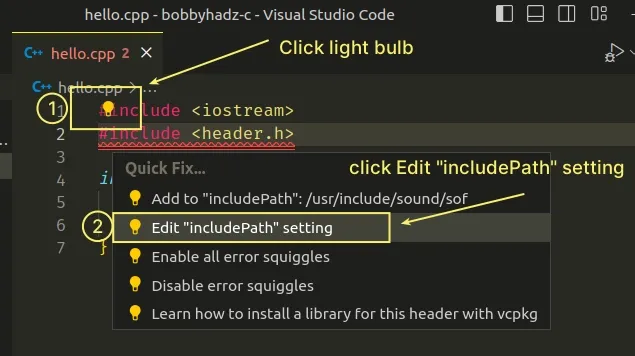
Click on the light bulb icon.
Click on "Edit "includePath" setting.
Here is a short clip that demonstrates the process.
![]()
.cpp file in a folder before selecting the 'Edit "includePath" setting', otherwise, you'd get the "Open a folder first to edit configurations" error.My hello.cpp file for the example is as simple as follows.
#include <iostream> #include <header.h> int main() { std::cout << "bobbyhadz.com"; return 0; }
The file is located in a bobbyhadz-c directory.
You can open your project folder by navigating to it with your terminal and
issuing the code . command.
code .
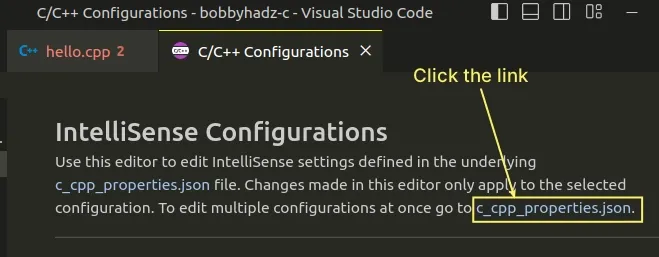
Once you click on the 'Edit "inclduePath" setting' option, the C/C++ Configuration settings window opens.
In the IntelliSense Configurations section at the top, click on the
c_cpp_properties.jsonlink.
- The next step is to locate the
MinGWdirectory on your machine.
On Windows, the directory is most commonly under C:\MinGW or
C:\Program Files\MinGW.
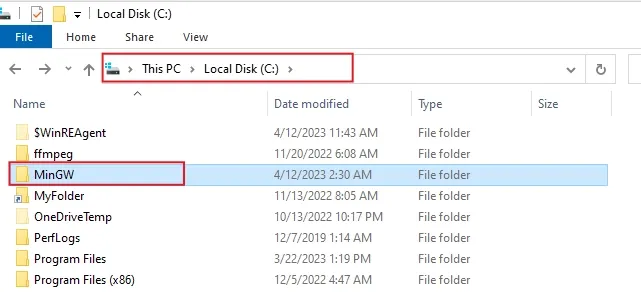
- Open the
MinGWdirectory and then open theincludedirectory.
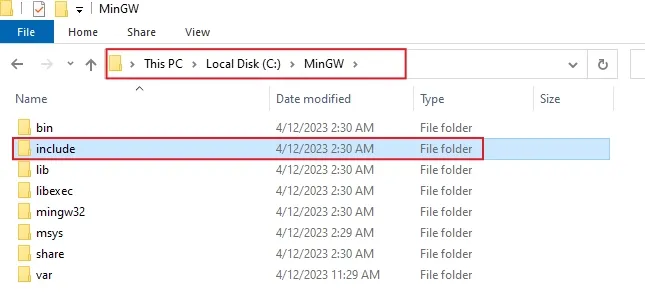
- Click in the address field and copy the path to the
includedirectory.
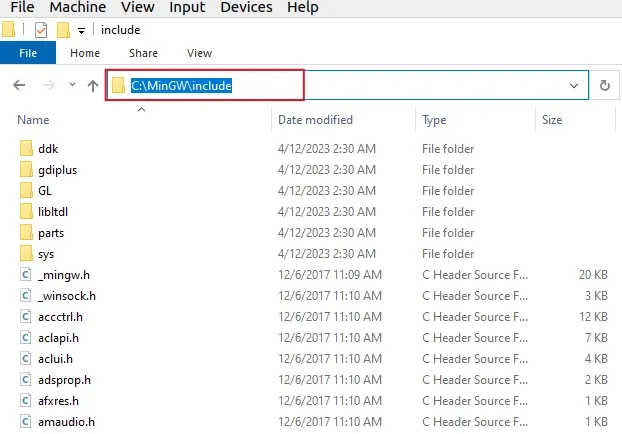
For me, the path is C:\MinGW\include.
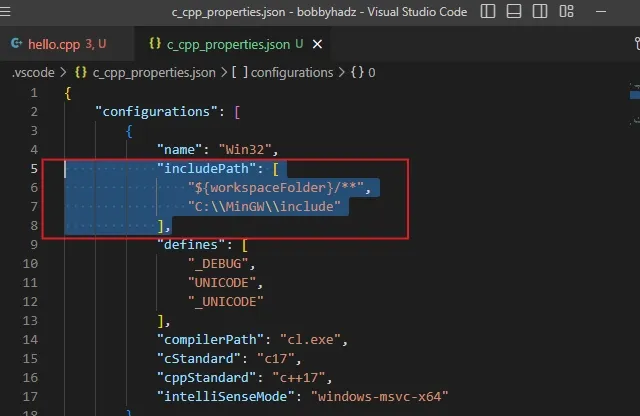
Open the c_cpp_properties.json file in VS Code and add the path to the
includePath array.
Note: each backslash must be escaped with a second backslash.
{ "configurations": [ { "includePath": [ "${workspaceFolder}/**", "C:\\MinGW\\include" ] } ] }
Note that each backslash must be escaped with a second backslash in the path.
This way, backslash characters are treated as literal characters and not as escape characters.
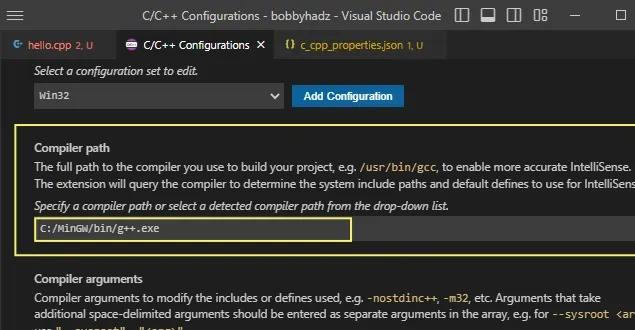
Open your C/C++ Configuration UI settings again by clicking on the light bulb icon and selecting 'Edit "inclduePath" setting'.
Under the Compiler path setting, click on the arrow to show the dropdown menu and select:
- "C:/MinGW/bin/g++.exe" if you code in
C++. - "C:/MinGW/bin/gcc.exe" if you code in
C.
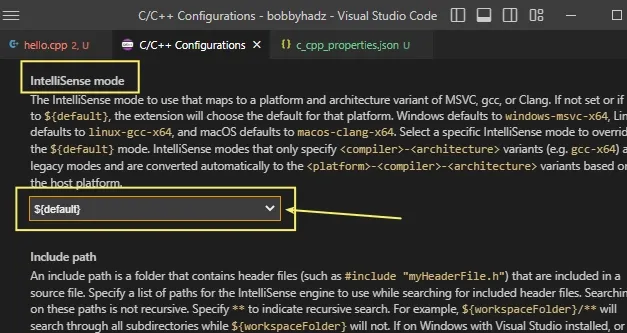
- Scroll down to the IntelliSense mode setting in the C/C++ Configurations GUI settings.
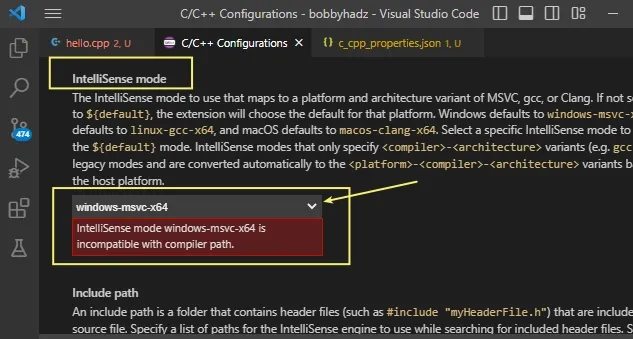
- Select
${default}from the dropdown menu.
Now restart your VS Code editor.
- Press:
Ctrl+Shift+Pon Windows and Linux.Command+Shift+Pon macOS.
F1 to open the Command Palette.- Type Reload Window and select Developer: Reload Window.
Issue the following command to compile your file.
g++ hello.cpp
# Update xcode-select and install g++
If you are on macOS and the error persists, try to run the following command to
install the Apple version of git.
xcode-select --install
If you are on Linux, install g++ and build-essential.
sudo apt install g++ sudo apt install build-essential
# Set the configurationProvider setting
If the error persists, try setting the configurationProvider setting to
ms-vscode.cpptools.
- Press:
Ctrl+Shift+Pon Windows and Linux.Command+Shift+Pon macOS.
F1 to open the Command Palette.- Type c/c++ edit configurations and select C/C++: Edit Configurations (JSON).
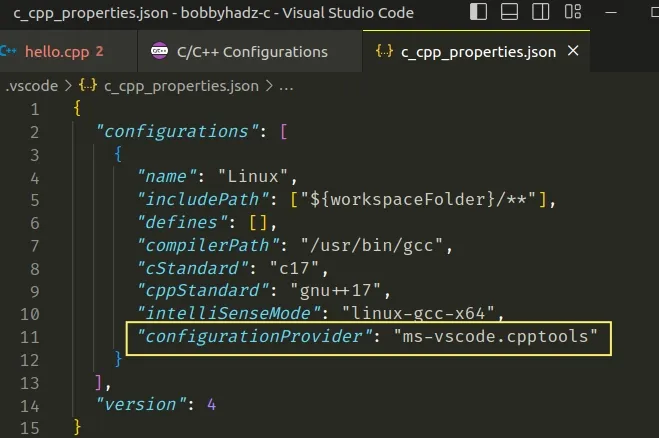
- Set the
configurationProviderproperty toms-vscode.cpptools.
{ "configurations": [ { "name": "Linux", "includePath": ["${workspaceFolder}/**"], "defines": [], "compilerPath": "/usr/bin/gcc", "cStandard": "c17", "cppStandard": "gnu++17", "intelliSenseMode": "linux-gcc-x64", "configurationProvider": "ms-vscode.cpptools" } ], "version": 4 }
- Restart VS Code after setting the property.
- Check if the error has been resolved.
# Make sure the C/C++ extension is installed and enabled
Make sure the C/C++ extension is installed and enabled.
- Click on Extensions in the left sidebar.
- You can also open the Extensions menu by pressing:
Ctrl+Shift+Xon Windows or Linux.Command+Shift+Xon macOS.
- Type c/c++.
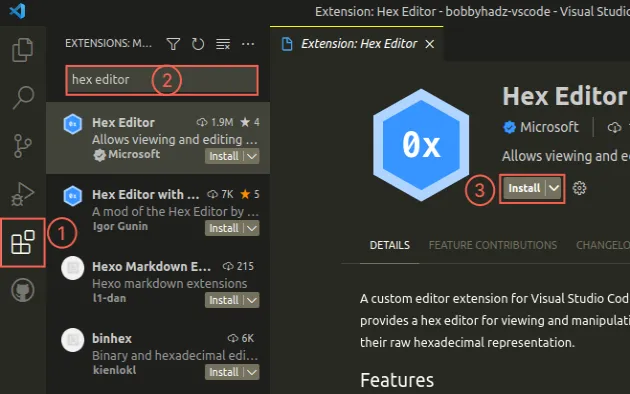
- Make sure the extension is installed and enabled.
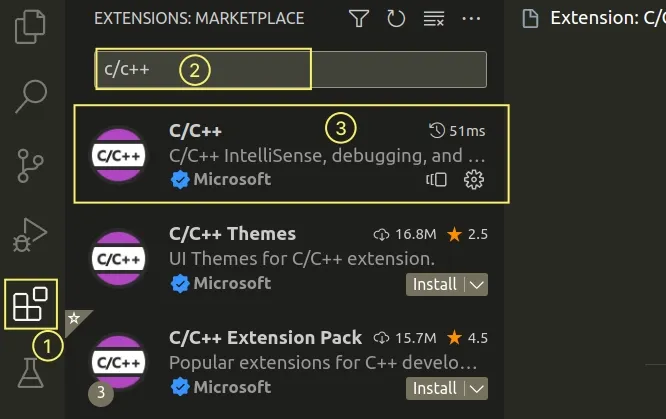
You should have the C/C++ extension from Microsoft installed.
You can try to disable it and reenable it.
I've also written an article on how to install an older version of an extension in VS Code if you got the error after updating the extension.
# Conclusion
To solve the "#include errors detected based on information provided by the configurationProvider setting" VS Code C++ error:
- Make sure the
includePathsetting in yourc_cpp_properties.jsonfile is configured correctly. - Make sure you have
xcode-select(macOS) and install g++ (Linux) installed. - Make sure the C/C++ extension is installed and enabled.
# Additional Resources
You can learn more about the related topics by checking out the following tutorials:
- Check your VS Code version and Update to the Latest release
- How to add a Run Button in Visual Studio Code
- Code is already running / Cannot edit in read-only editor
- Error loading webview: Could not register service workers
- Linter pylint is not installed error in VS Code [Solved]
- How to enable Error Squiggles in Visual Studio Code
- Find and view the VS Code Extension error and Global Logs
- Fix: Visual Studio Code unins000.exe Access is denied error
- How to Collapse all Folders in Explorer in VS Code
- Visual Studio Code: Live server not working issue [Solved]
- Type annotations can only be used in TypeScript files
- Failed to save file: Insufficient permissions. Select Retry as Admin to retry as administrator

