How to install an Older Version of an Extension in VS Code
Last updated: Apr 6, 2024
Reading time·3 min
# How to install an Older Version of an Extension in VS Code
To install an older version of an extension in VS Code:
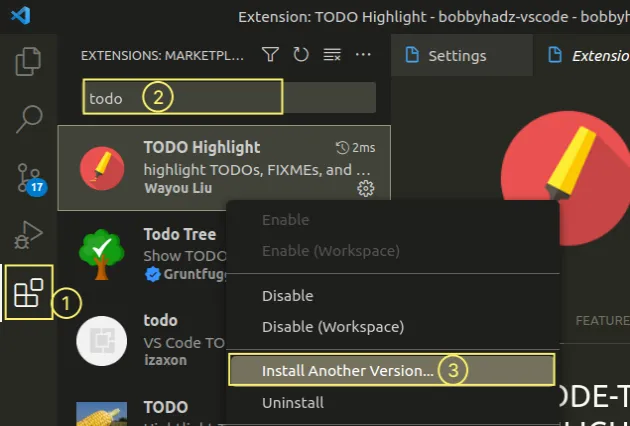
- Click on Extensions in the left sidebar.
- You can also open the Extensions menu by pressing:
Ctrl+Shift+Xon Windows or Linux.Command+Shift+Xon macOS.
- Search for the extensions you want to roll back.
@installed or @enabled to only search in your installed or enabled extensions.For example, @installed todo only searches for a todo extension in your
installed extensions.
Make sure the extension in question is installed.
Right-click on the installed extension and select Install Another Version.
- A menu with a list of the extension's versions and how long ago they were published is shown.
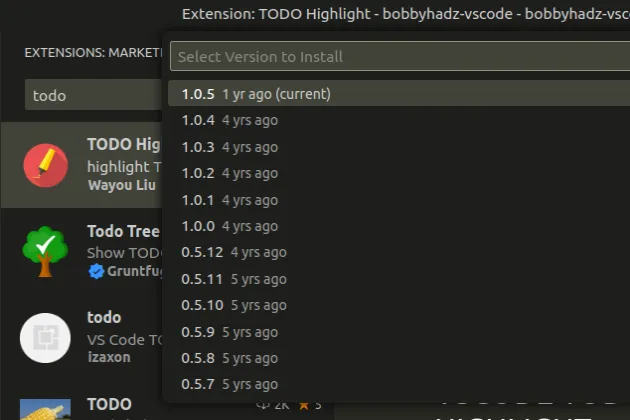
Select another version using the arrow keys and hit
Enterto install it.Once you install the older version, you will be prompted to reload the IDE.
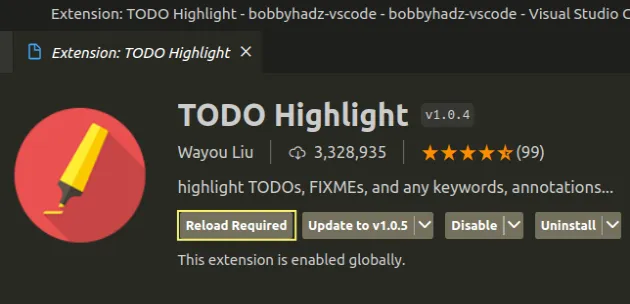
- Click on the Reload Required button and the older version of the extension is installed.
Here is a short clip that demonstrates how this works.
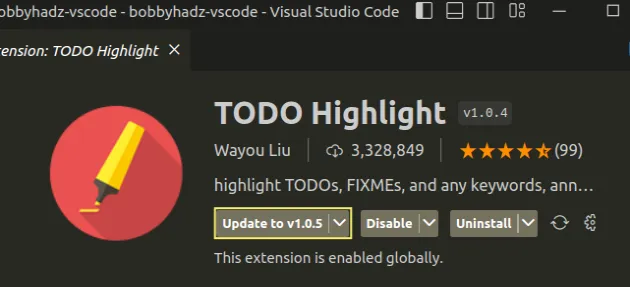
If you open the extension's page, you will now see an Update to vX.Y.Z button.
The Install Another Version... command is also accessible if you click on the cogwheel icon in the list of extensions.
![]()
You can also access the command if you open the extensions page in VS Code and click on the arrow next to the Uninstall button.
![]()
# VS Code automatically updates most extensions
By default, VS Code automatically updates extensions but it doesn't update extensions for which you've installed an older version.
If you install an older version of an extension, it gets skipped when automatically updating.
However, in some rare cases, you might encounter issues with extensions automatically updating, so it's good to know how to change this behavior in your settings.
- Press
Ctrl+Shift+P(orCommand+Shift+Pon macOS).
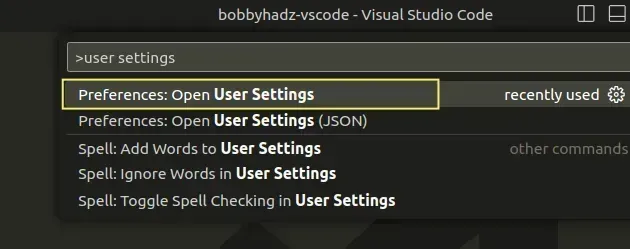
F1 to open the Command Palette.- Type user settings and select Preferences: Open User Settings.
You can also open the settings screen by pressing Ctrl + , on Windows and
Linux or Cmd + , on macOS.
- Type extension auto update.
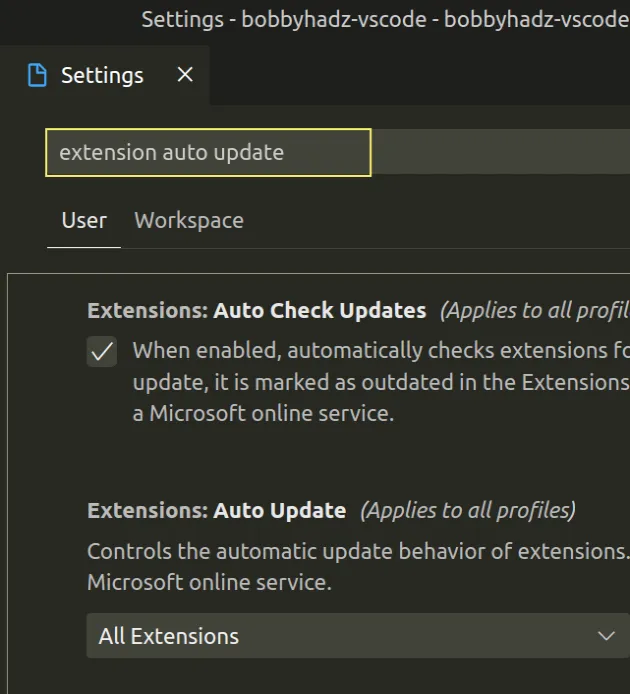
When the Extensions: Auto Check Updates setting is enabled, extensions are automatically checked for updates.
If a newer version of an extension is available, the extension is marked as outdated in the Extensions view.
The Extensions: Auto Update setting controls the automatic update behavior of extensions.
It has 3 possible values:
- All extensions - automatically update all extensions (except for ones that you have explicitly rolled back).
- Only enabled extensions - automatically update only enabled extensions.
- None - extensions are not automatically updated.
As previously noted, VS Code doesn't automatically update extensions for which you've installed an older version.
However, if you run into issues with extensions unexpectedly updating, you can
set the Extensions: Auto Update setting to None to disable this behavior.
Then you would have to manually click on the Update button on the selected extensions to update them.
I've also written an article on how to export your settings and extensions in VS Code.
# Additional Resources
You can learn more about the related topics by checking out the following tutorials:
- Check your VS Code version and Update to the Latest release
- Exporting Settings and Extensions in Visual Studio Code
- Find and view the VS Code Extension error and Global Logs
- How to Uninstall or Disable Extensions in VS Code
- Visual Studio Code: Live server not working issue
- #include errors detected. Please update your includePath

