The purpose of the exclamation mark (!) in Jupyter Notebook
Last updated: Apr 10, 2024
Reading time·4 min

# Table of Contents
- The purpose of the exclamation mark (!) in Jupyter Notebook
- Prefix the pip install command with ! to install a module
- Assigning the output of a shell command to a Python variable
- Using the magic command %cd in in Jupyter notebook
# The purpose of the exclamation mark (!) in Jupyter Notebook
The exclamation mark (!) in Jupyter Notebook is used to issue a shell command.
When a command is prefixed with !, it is run as a shell command instead of a
Python script.
- Open your terminal and issue the
jupyter-notebookcommand to start your server.
jupyter-notebook
- Click on New and select Python 3 (ipykernel).
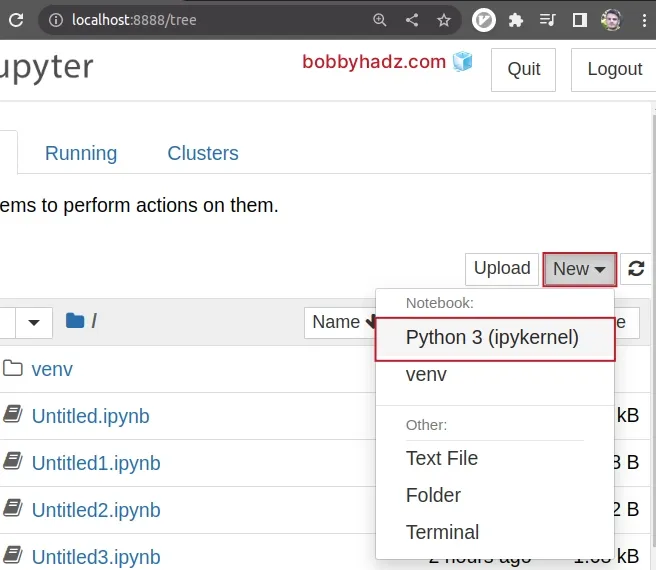
- Type
!lsand click on the> Runbutton to run the command.
!ls
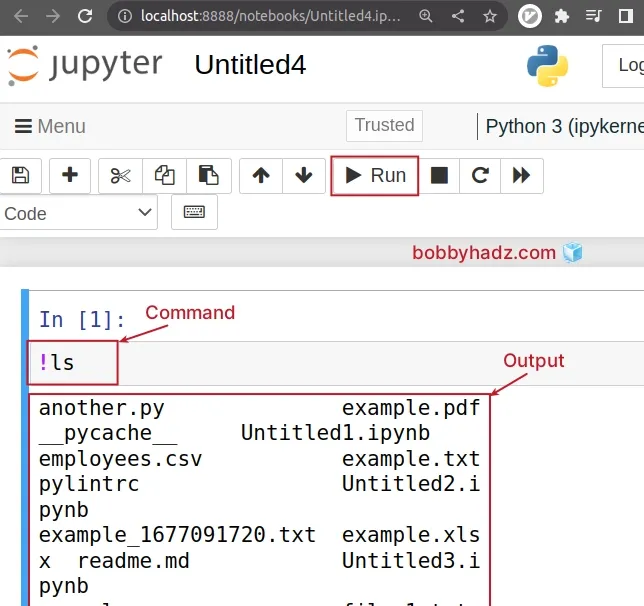
The command will list the files and folders in the current directory.
ls is not a valid Python command but prefixing the command with an exclamation mark signals to Jupyter Notebook that the command should be run in the terminal and not using the Python interpreter.You can run the code in the cell by pressing Ctrl + Enter or clicking on the
> Run button.
# Prefix the pip install command with ! to install a module
Something you often have to do is prefix the pip install command with an
exclamation mark to install a Python module in Jupyter Notebook.
!pip install requests
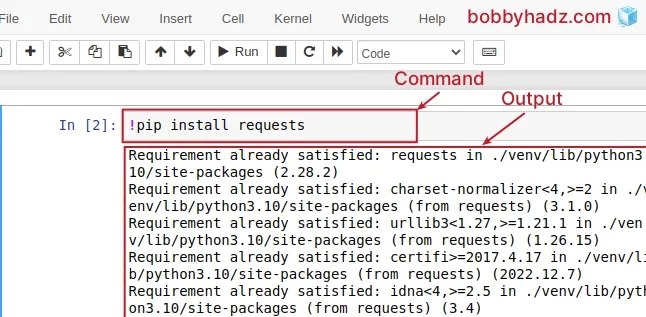
You can press Ctrl + Enter to run the installation command.
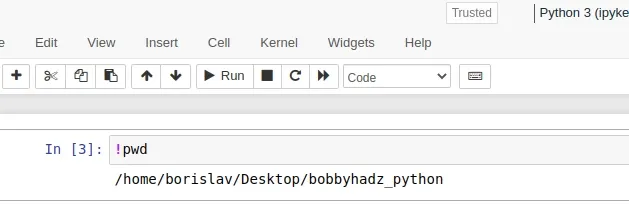
If you need to print the path to the working directory, prefix the pwd command
with an exclamation mark.
!pwd
Note that the Jupyter Notebook shell allows you to run UNIX/Linux commands even if you are on Windows.
The only thing that should be noted is that in order to signal to Jupyter
Notebook that you want to run a shell command and not a Python script, you have
to prefix the command with an exclamation mark !.
Another thing to keep in mind is that each command is executed in its own subshell.
This means that the output of the previous command is not available.
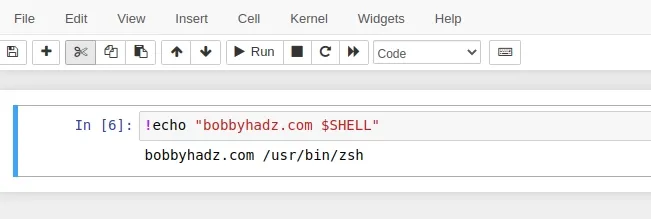
You can use the !echo command to print messages and environment variables.
!echo "hello world"
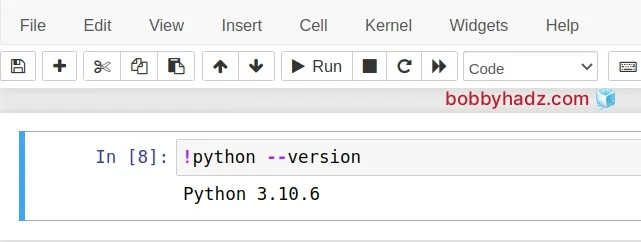
If you need to print the version of the Python interpreter, use the
!python --version command.
python --version
You can also use flags when issuing shell commands.
!ls -s
Output:
total 128 4 another.py 8 example.xlsx 4 test_sample.py 4 employees.csv 4 file-1.txt 16 thumbnail.webp 4 example_1677091720.txt 4 file-2.txt 4 Untitled1.ipynb 4 example.csv 4 main.py 4 Untitled2.ipynb 4 example.json 4 __pycache__ 4 Untitled3.ipynb 4 example.mdx 20 pylintrc 4 Untitled4.ipynb 4 example.pdf 4 readme.md 4 Untitled.ipynb 4 example.txt 4 requirements.txt 4 venv
The -s flag of the ls command displays the size of files and directories
next to their names.
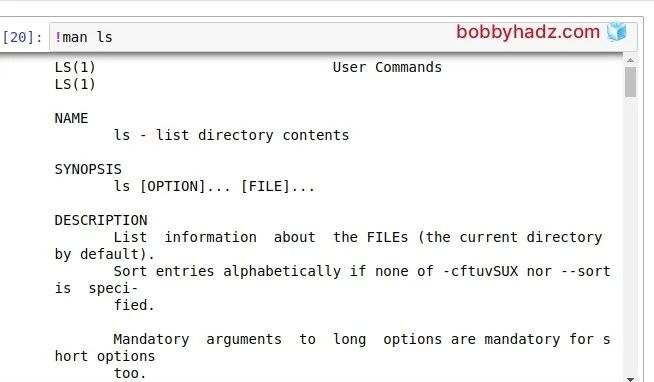
If you need to print all options and flags of a given command, use the man (manual) pages.
!man ls
# Assigning the output of a shell command to a Python variable
You can also assign the output of a shell command to a Python variable.
You just have to prefix the shell command with an exclamation mark in the assignment.
current_dir = !pwd print(current_dir)
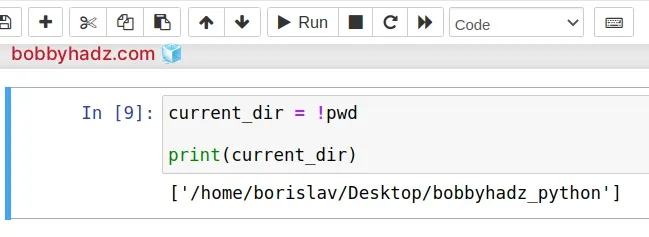
Notice that the pwd command is prefixed with an exclamation mark !.
The Jupyter Notebook interpreter runs the shell command and stores its output in
the current_dir Python variable.
The variable stores a list that contains the path to the current working directory.
Here is an example that uses the same approach to assign the output of the ls
command to a Python variable.
contents = !ls print(contents)

As the screenshot shows, the names of the files in the current directory as stored in the Python list.
# Using the magic command %cd in in Jupyter notebook
As previously noted, the Jupyter Notebook shell runs each command in a subshell.
So you don't have access to the output of the previous commands.
Here is an example that better demonstrates this using the cd (change
directory) command.
!pwd !cd .. !pwd
Output:
/home/borislav/Desktop/bobbyhadz_python /home/borislav/Desktop/bobbyhadz_python
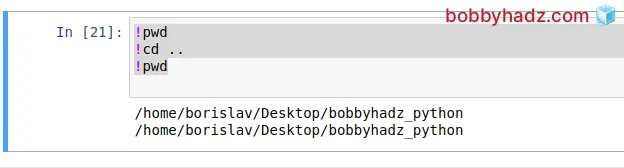
If you run the command you will see that issuing the cd command didn't work.
You can use the magic %cd command if you need to change to another directory
permanently.
!pwd %cd .. !pwd
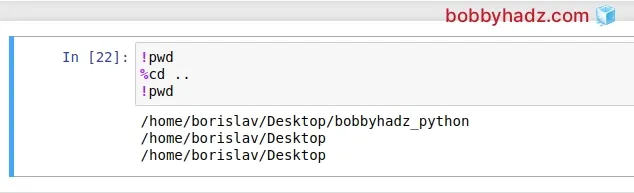
Notice that we prefixed the cd command with a percent % sign and not an
exclamation mark.
# Additional Resources
You can learn more about the related topics by checking out the following tutorials:
- How to add a new line in a Jupyter Notebook markdown cell
- Error executing Jupyter command 'notebook': [Errno 2] No such file or directory
- VS Code: Change Python version & select correct Interpreter
- How to check your Python version in Jupyter Notebook
- Error executing Jupyter command 'notebook': [Errno 2] No such file or directory
- jupyter is not recognized as an internal or external command
- Wrap code/text into multiple Lines in Jupyter Notebook
- How to show (or hide) the Line Numbers in Jupyter Notebook
- How to Clear Cell Output in Jupyter Notebook
- How to display Lists as a Table in Jupyter Notebook
- How to show a PIL Image in Jupyter Notebook
- How to measure Cell execution Time in Jupyter Notebook
- [Solved] Jupyter Notebook not running code Stuck on In [*]
- Reload a module and its submodules in Jupyter Notebook
- IOPub data rate exceeded in Jupyter Notebook [Solved]

