How to upload Files to S3 in React using presigned URLs
Last updated: Jan 27, 2024
Reading time·9 min
# Uploading Files with Pre Signed URLs in React
We are going to upload files to an S3 bucket in a React.js application using pre-signed URLs.
We are going to deploy a CDK stack that will provision the following resources:
- S3 bucket that will store our uploads.
- API Gateway with Lambda integration.
- Lambda function that creates and returns pre-signed URLs to our React.js frontend.
The flow is going to be:
- The frontend makes a request to the API gateway endpoint.
- The API endpoint has Lambda integration. The lambda function makes a request to S3 to get a pre-signed URL, which is then returned to the frontend.
- The frontend uses the pre-signed URL to upload a file to S3.
# Prerequisites
- Have the AWS CLI installed and configured.
# Project setup
Clone the github repository.
Install the dependencies.
npm run setup
- Create the CDK stack.
npm run cdk-create-stack
At this point, our stack named presigned-url-dev is created and you can view its resources in the Cloudformation console.
Start the react application. Note: it's very important that you run the react application on
http://localhost:3000because that's the URL we've set up CORS for.
npm run dev
You can view the region where the stack was created, as well as the bucket
name by opening the src/cdk-exports-dev.json file. This is where we store
the outputs from the CDK stack creation.
Let's now test the application. Initially, we see a File input and an Upload to s3 button:
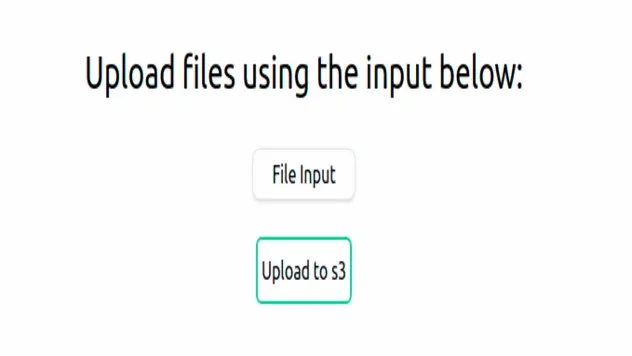
Click on the File Input, select an image of up to 1 MB size and click on the Upload to s3 button to upload the image:
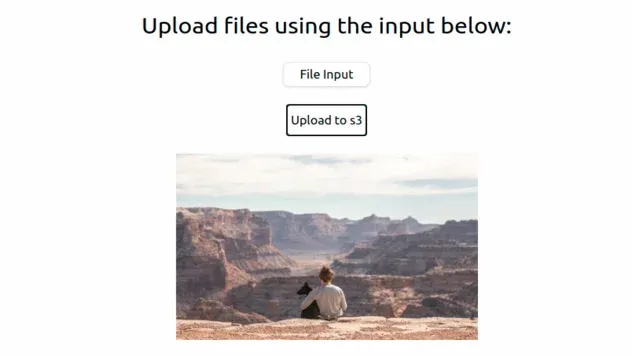
The image will be rendered below the Upload to s3 button. At this point we know our application works, so let's go over the moving parts.
# Backend code
Let's start with the backend. Open the backend/infra/app.ts file. This is the
entry point of our application. Here we initialize our PresignedUrlStack.
new PresignedUrlStack(app, `${STACK_PREFIX}-${DEPLOY_ENVIRONMENT}`, { stackName: `${STACK_PREFIX}-${DEPLOY_ENVIRONMENT}`, env: { region: DEPLOY_REGION, }, tags: { env: 'dev', }, });
Let's look at the contents of the stack at
backend/infra/presigned-url-stack.ts.
The first resource we create is the s3 bucket which will store our uploads.
const s3Bucket = new s3.Bucket(this, id, { accessControl: s3.BucketAccessControl.BUCKET_OWNER_FULL_CONTROL, objectOwnership: s3.ObjectOwnership.OBJECT_WRITER, blockPublicAccess: { blockPublicAcls: false, blockPublicPolicy: false, ignorePublicAcls: false, restrictPublicBuckets: false, }, cors: [ { allowedMethods: [ s3.HttpMethods.GET, s3.HttpMethods.POST, s3.HttpMethods.PUT, ], allowedOrigins: [FRONTEND_BASE_URL], allowedHeaders: ['*'], }, ], });
We've set up cors for the bucket because
we're going to access it from our frontend at http://localhost:3000.
Setting the CORS configuration is important when you access resources from a
different domain. Since the s3 bucket is going to be hosted on the domain
https://amazonaws.com and our frontend is currently hosted at
http://localhost:3000, these are two different domains and we must set up
CORS.
The next resource we create is the API:
const httpApi = new apiGateway.HttpApi(this, 'api', { description: `___${DEPLOY_ENVIRONMENT}___ Api for ${STACK_PREFIX}`, apiName: `${STACK_PREFIX}-api-${DEPLOY_ENVIRONMENT}`, corsPreflight: { allowHeaders: ['Content-Type', 'X-Amz-Date', 'Authorization', 'X-Api-Key'], allowMethods: [ apiGateway.CorsHttpMethod.OPTIONS, apiGateway.CorsHttpMethod.GET, apiGateway.CorsHttpMethod.POST, apiGateway.CorsHttpMethod.PUT, apiGateway.CorsHttpMethod.PATCH, apiGateway.CorsHttpMethod.DELETE, ], allowCredentials: true, allowOrigins: [FRONTEND_BASE_URL], }, });
Again, nothing special about the API configuration. The majority of the code is the CORS configuration. We have to add our frontend URL to the allowed origins so it can access our API, which is on a different domain.
The next resource we define is the Lambda function, which is responsible for talking to S3 and getting a pre-signed URL:
const getPresignedUrlFunction = new NodejsFunction(this, 'get-presigned-url', { runtime: lambda.Runtime.NODEJS_18_X, memorySize: 1024, timeout: cdk.Duration.seconds(5), handler: 'main', entry: path.join(__dirname, '/../src/get-presigned-url-s3/index.ts'), environment: {BUCKET_NAME: s3Bucket.bucketName}, }); s3Bucket.grantPut(getPresignedUrlFunction); s3Bucket.grantPutAcl(getPresignedUrlFunction);
We pass in the bucket name as an environment variable because we'll make use of it in the lambda code.
These are the permissions we need for the creation of pre-signed URLs. If the Lambda doesn't have those permissions, you would get a 403 Unauthorized error when you try to upload a file from your frontend because the pre-signed URL would be invalid.
The last thing we need to do for our infrastructure is to add the Lambda
function as an integration for the API GET route at /get-presigned-url-s3.
httpApi.addRoutes({ path: '/get-presigned-url-s3', methods: [apiGateway.HttpMethod.GET], integration: new apiGatewayIntegrations.HttpLambdaIntegration( 'get-url-integration', getPresignedUrlFunction, ), });
Now that we're done with the infrastructure let's move to the code, open up
backend/src/get-presigned-url-s3/index.ts.
Our main function is the entry of our lambda. We first check for the
fileType query parameter and if it isn't provided we throw an error:
if (!event.queryStringParameters?.fileType) throw new Error( 'Querystring parameter fileType must be provided when creating a presigned URL, i.e. ?fileType=image/png', );
We are going to use the fileType query parameter to force the frontend into
specifying the exact type of image the user intends to upload. That way we can
constrain the pre-signed URL to only image/png or image/jpeg, etc.
The next thing we do is generate a random name for the image:
const filePath = generateId(); function generateId() { let result = ''; const characters = 'ABCDEFGHIJKLMNOPQRSTUVWXYZabcdefghijklmnopqrstuvwxyz0123456789!-.*()'; const length = 10; const charactersLength = characters.length; for (let i = 0; i < length; i += 1) { result += characters.charAt(Math.floor(Math.random() * charactersLength)); } const date = new Date().toISOString().split('T')[0].replace(/-/g, ''); return `${date}_${result}`; }
The generateId function generates a random name for the file. We don't want
users to be able to overwrite the images uploaded by others, so we just
randomize the name. You could use a UUID function or change the implementation
to something more robust.
The next thing we do in our main function is to call the createPresignedPost
function, passing in the fileType and the generated name:
const presignedPost = await createPresignedPost({fileType, filePath}); export function createPresignedPost({ fileType, filePath, }: GetPresignedPostUrlParams): Promise<S3.PresignedPost> { const params = { Bucket: process.env.BUCKET_NAME, Fields: {key: filePath, acl: 'public-read'}, Conditions: [ // content length restrictions: 0-1MB] ['content-length-range', 0, 1000000], // specify content-type to be more generic- images only // ['starts-with', '$Content-Type', 'image/'], ['eq', '$Content-Type', fileType], ], // number of seconds for which the presigned policy should be valid Expires: 15, }; const s3 = new S3(); return s3.createPresignedPost(params) as unknown as Promise<S3.PresignedPost>; }
The createPresignedPost function talks to s3 and grabs the pre-signed URL that
we have to then return to our frontend.
acl to public-read, which means that all users on the internet are able to view this file.We also set certain conditions for the pre-signed URL. The content length range restriction is set to 1 Megabyte, which means that we only allow users to upload files of up to 1 Megabyte.
Then we set a condition for the Content-Type of the file, it must be equal to
the provided from the frontend fileType query parameter.
Finally, we set the pre-signed URL to expire in 15 seconds. The pre-signed URL can be used at most once. Based on our configuration if it's not used within 15 seconds, it automatically expires and becomes invalid.
We have covered all of our backend code, at this point we have all our infrastructure in place and a Lambda function, which is able to talk to s3 and generate pre-signed URLs.
# Frontend code
Let's now look at the Frontend code, open src/pages/index.page.tsx, which is
the / route of our application.
Since we are going to be uploading images to s3, we know we'll need an input
type='file'. The first lines of code in our Home component make use of the
useFileChange hook.
const { fileError, fileName, fileContents, fileType, fileDispatch, handleFileChange, } = useFileChange();
The handleFileChange function is the onChange handler for our input type file.
Let's take a look at what it does. It is defined in the
src/pages/use-file-change.ts file:
const handleFileChange = (event: React.ChangeEvent<HTMLInputElement>) => { const fileObj = event.target.files && event.target.files[0]; if (!fileObj) { return; } console.log('fileObj is', fileObj); const [type] = fileObj.type.split('/'); if (!type || type !== 'image') { fileDispatch({ type: 'FILE_CHANGE_FAILURE', fileError: 'You can only upload image files.', }); return; } if (fileObj.size > MAX_FILE_SIZE_BYTES) { fileDispatch({ type: 'FILE_CHANGE_FAILURE', fileError: `File is too large, file size is ${bytesToMb( fileObj.size, ).toFixed(2)} MB, maximum allowed size - 1 MB.`, }); return; } // eslint-disable-next-line no-param-reassign event.target.value = ''; fileDispatch({ type: 'FILE_CHANGE_SUCCESS', fileName: fileObj.name, fileSize: fileObj.size, fileType: fileObj.type, fileContents: fileObj, }); };
It first grabs the first file from the event object, and then it checks whether the file is of type image. If the file is not an image, we display an error to the user that they should only upload image files.
Next, we check if the file the user selected is larger than 1 Megabyte if it is display an error message that they should upload files of up to 1 Megabyte.
We know that if the user were to upload a file larger than 1 Megabyte they would get an error because we've specified a condition for our pre-signed URL, but we're placing this check just to shorten the feedback loop.
Lastly, if the file is an image of size less than 1 megabyte, we dispatch a success event.
Let's look at the submit handler, open src/pages/index.page.tsx.
const handleSubmit = async (e: FormEvent<HTMLFormElement>) => { e.preventDefault(); try { if (fileType && fileContents) { const filePath = await uploadToS3({fileType, fileContents}); setS3FileUrl(`${S3_BUCKET_URL}/${filePath}`); console.log('filePath is', filePath); fileDispatch({type: 'RESET_FILE_STATE'}); } } catch (err) { console.log('error is', err); } };
In our submit handler, we first call the uploadToS3 function, located in
src/pages/upload-file.ts.
export async function uploadToS3({ fileType, fileContents, }: { fileType: string; fileContents: File; }) { const presignedPostUrl = await getPresignedPostUrl(fileType); const formData = new FormData(); formData.append('Content-Type', fileType); Object.entries(presignedPostUrl.fields).forEach(([k, v]) => { formData.append(k, v); }); formData.append('file', fileContents); // The file has be the last element const response = await axios.post(presignedPostUrl.url, formData, { headers: {'Content-Type': 'multipart/form-data'}, }); return presignedPostUrl.filePath; } type PresignedPostUrlResponse = { url: string; fields: { key: string; acl: string; bucket: string; }; filePath: string; }; const GET_PRESIGNED_URL_API_PATH = 'get-presigned-url-s3'; async function getPresignedPostUrl(fileType: string) { const {data: presignedPostUrl} = await axios.get<PresignedPostUrlResponse>( `${API_BASE_URL}/${GET_PRESIGNED_URL_API_PATH}?fileType=${fileType}`, ); return presignedPostUrl; }
The uploadToS3 function first gets the pre-signed URL by making a get request
to our backend API.
FormData to construct a set of key-value pairs representing the fields and values from the pre-signed URL. Note that the file must be the last element of the FormData object.Then the function makes a POST request to the pre-signed URL passing in the
FormData and setting the Content-Type as multipart/form-data.
Going back to src/page/index.page.tsx our submit handler sets the s3 image URL
in the state, so we can render it:
setS3FileUrl(`${S3_BUCKET_URL}/${filePath}`);
Every time the file input changes the file will be set in the state, and every time the submit button is clicked we get a pre-signed URL from our API and then use it to upload an image to s3.
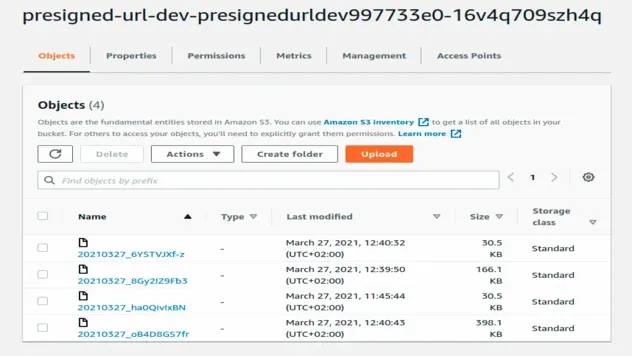
You can check the contents of your s3 bucket by opening the
src/cdk-exports-dev.json file to get the name of the bucket and then selecting
the bucket in the AWS S3 console.
# Cleanup
npm run cdk-destroy
Note that in order to delete the s3 bucket you have to first empty its contents and then delete it.
# Conclusion
Let's summarize some of the things we have to be mindful of when using pre-signed URLs:
- The s3 bucket must have
corsenabled, for us to be able to upload files from a web application, hosted on a different domain. - The lambda function that talks to s3 to get the pre-signed URL must have
permissions for
s3:PutObjectands3:PutObjectAclon the bucket. - To make the uploaded files publicly readable, we have to set the
aclto public-read:
const params = { Bucket: bucketName, Fields: { key: filePath, acl: 'public-read', }, Conditions: [ // content length restrictions: 0-1MB] ['content-length-range', 0, 1000000], // specify content-type to be more generic - images only // ['starts-with', '$Content-Type', 'image/'], ['eq', '$Content-Type', fileType], ['starts-with', '$key', identityId], ], // number of seconds for which the pre-signed policy should be valid Expires: 15, };
The conditions that we specify must be met by the frontend, i.e. the file size, otherwise an error is thrown.
The default expiration for pre-signed URLs is 15 minutes, but you can set a shorter one by passing in the
Expireskey.
I've also written a guide on how to upload files to S3 in React using presigned URLs.
# Further Reading
- AWS Amplify Auth with React - complete tutorial
- AWS CDK Tutorial for Beginners - Step-by-Step Guide
- How to use Parameters in AWS CDK
- Get the Size of a Folder in AWS S3 Bucket
- How to Get the Size of an AWS S3 Bucket
- Configure CORS for an AWS S3 Bucket
- Allow Public Read access to an AWS S3 Bucket
- Copy a Local Folder to an S3 Bucket
- Download a Folder from AWS S3
- How to Rename a Folder in AWS S3
- How to Delete a Folder from an S3 Bucket
- Count Number of Objects in S3 Bucket
- S3 Access Denied when calling PutObject

