AWS Amplify Auth with React - complete tutorial
Last updated: Jan 27, 2024
Reading time·12 min

# Amplify Auth with React - provisioned with AWS CDK
We are going to implement Amplify (Cognito) Auth in a React.js application and provision the infrastructure using AWS CDK.
I have written a complete AWS Amplify authentication flow, including:
- Login
- Registration
- Forgotten password
- Change password
- Change Email
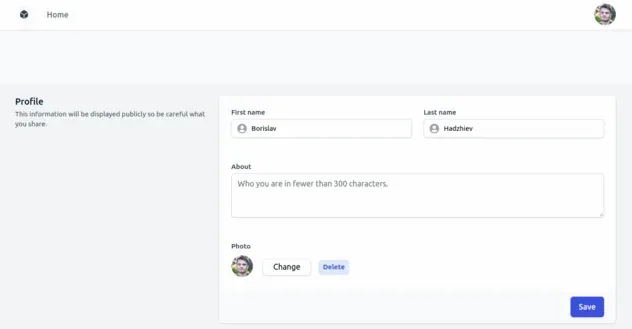
- Profile fields stored in Cognito: First name, Last name, About, Avatar, Address, etc.
- Custom Cognito Emails with a Lambda trigger
- Join User to a Cognito Group on account confirmation
- Avatar uploads to S3 using presigned post URLs
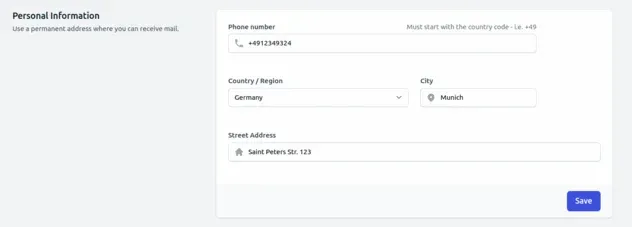
For example, the 3 sections of the user settings page look as follows.

And the registration form looks as follows.

We are going to provision the following resources with our CDK stack:
- Cognito User pool
- Cognito User pool client
- Cognito Identity pool
- S3 bucket for storing user avatars
- Lambda function for getting presigned URLs from S3, so our frontend can upload avatars to s3
- API gateway with a
/get-presigned-url-s3endpoint which has a lambda proxy integration
This project is mostly intended to be used as a reference for when you have to implement Amplify and Cognito Auth in a react.js application. I've tried to (mostly) follow best practices.
# Prerequisites
- Have the AWS CLI installed and configured.
# Project set up
Clone the github repository.
Install the dependencies.
cd aws-amplify-react-auth npm run setup
- Create the CDK stack.
npm run cdk-create-stack
If you open the AWS Console you should see the stack with the name
amplify-react-auth-devin your default region. If you are unsure which your default region is, open thesrc/cdk-exports-dev.jsonand look at the region property.Once the stack creation is complete, start the react application and open http://localhost:3000. Note: it's important that you run the react application on
http://localhost:3000because that's the URL we've set up CORS for.
npm run dev
At this point you should have the application running on port
http://localhost:3000.
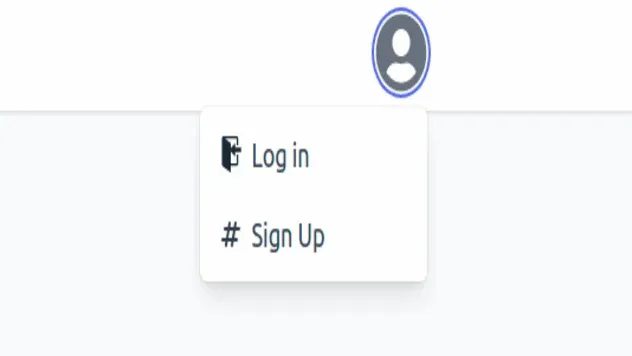
Click on the profile icon at the top right corner and select Sign Up.
After you sign up you'll get an email with an account activation link. Click on the link and you will be automatically logged in.
Note: the way we're able to automatically log in after clicking on the link from the email is by storing the password the user entered during registration in local storage. After the user is logged in, the local storage key is cleared.
Once you're logged in you can click on the profile icon again and update any of the profile attributes, including the avatar.
At this point, we have a complete auth flow with the following functionality:
- Login
- Registration
- Forgotten password
- Change password
- Change Email
- Profile fields stored in Cognito: First name, Last name, About, Avatar, Address, etc.
Let's look at the implementation.
# Backend Code
The entry point of our CDK application is at backend/infra/app.ts. This is
where we initialize our CDK stack:
new AmplifyReactStack(app, `${STACK_PREFIX}-dev`, { stackName: `${STACK_PREFIX}-dev`, env: { region: DEPLOY_REGION, }, tags: {env: 'dev'}, });
Let's take a look at the stack and the resources it provisions at
backend/infra/amplify-react-stack.ts. We first have a Cognito User Pool:
const {userPool} = new UserPoolConstruct(this, 'userpool');
In short, the User Pool is a directory where we store and manage users.
The User pool defines a postAccountConfirmationTrigger lambda function, which
simply adds the User to a group after their account has been confirmed. This is
an optional step but it is a common scenario, so it's here for reference in case
someone needs it.
const postAccountConfirmationTrigger = new NodejsFunction( this, 'post-confirmation', { runtime: lambda.Runtime.NODEJS_18_X, memorySize: 1024, timeout: cdk.Duration.seconds(6), handler: 'main', entry: path.join( __dirname, '/../../../src/cognito-triggers/post-confirmation/index.ts', ), bundling: {externalModules: ['aws-sdk']}, }, );
Next, we have a customMessagesTrigger, which is responsible for customizing
the emails that Cognito sends on user events, i.e. registration, forgotten
password, etc:
const customMessagesTrigger = new NodejsFunction(this, 'custom-messages', { runtime: lambda.Runtime.NODEJS_18_X, memorySize: 1024, timeout: cdk.Duration.seconds(6), handler: 'main', entry: path.join( __dirname, '/../../../src/cognito-triggers/custom-messages/index.ts', ), environment: { FRONTEND_BASE_URL, }, bundling: {externalModules: ['aws-sdk']}, });
Lastly, we have the Cognito User pool with all of the custom attributes specified, so that we can manage the information in the profile section:
this.userPool = new cognito.UserPool(this, 'userpool', { userPoolName: `${STACK_PREFIX}-${DEPLOY_ENVIRONMENT}`, selfSignUpEnabled: true, signInAliases: { email: true, }, autoVerify: { email: true, }, standardAttributes: { givenName: { required: true, mutable: true, }, familyName: { required: true, mutable: true, }, }, customAttributes: { bio: new cognito.StringAttribute({mutable: true}), country: new cognito.StringAttribute({mutable: true}), city: new cognito.StringAttribute({mutable: true}), isAdmin: new cognito.StringAttribute({mutable: true}), }, passwordPolicy: { minLength: 6, requireLowercase: true, requireDigits: false, requireUppercase: false, requireSymbols: false, }, accountRecovery: cognito.AccountRecovery.EMAIL_ONLY, lambdaTriggers: { postConfirmation: postAccountConfirmationTrigger, customMessage: customMessagesTrigger, }, });
Nothing special about the other configuration, but we have added 4 extra
attributes to our Cognito user object - bio, country, city and isAdmin.
Going back to our stack definition file at
backend/infra/amplify-react-stack.ts we next define our User Pool Client.
const {userPoolClient} = new UserPoolClientConstruct(this, 'userpoolclient', { userPool, });
The User Pool client is a part of the User Pool and it allows unauthenticated
API operations like registration, login and forgotten password. Let's take a
look at the implementation at
backend/infra/constructs/cognito/user-pool-client-construct.ts.
We define which user attributes are to be read and written by the user. In our
case, the read and write attributes are the same with the exception of the
isAdmin property which we have excluded from the write attributes because we
wouldn't want users to be able to update their isAdmin property:
const clientWriteAttributes = new cognito.ClientAttributes() .withStandardAttributes({ givenName: true, familyName: true, email: true, emailVerified: false, address: true, birthdate: true, gender: true, locale: true, middleName: true, fullname: true, nickname: true, phoneNumber: true, profilePicture: true, preferredUsername: true, profilePage: true, timezone: true, lastUpdateTime: true, website: true, }) .withCustomAttributes(...['bio', 'country', 'city']); // <-- without isAdmin
Going back to our stack definition file at
backend/infra/amplify-react-stack.ts, we next define our Identity Pool:
const {identityPool} = new IdentityPoolConstruct(this, 'identitypool', { userPool, userPoolClient, });
The Identity Pool's purpose is to grant temporary credentials to authenticated and unauthenticated users to access AWS services.
In our identity pool at
backend/infra/constructs/cognito/identity-pool-construct.ts, we define 3
different roles:
- for Authenticated Users
- for Anonymous Users
- for Admins
In our case, all these roles do is grant the default
AWSLambdaBasicExecutionRole policy, but for a more full-featured applications
the permissions of the roles would differ.
Note that when specifying roles for an identity pool, we have to set an integer
for precedence. The role of the group with the lowest precedence takes effect.
new cognito.CfnUserPoolGroup(this, 'users-group', { groupName: 'Users', userPoolId: userPool.userPoolId, description: 'The default group for authenticated users', precedence: 3, // the role of the group with the lowest precedence - 0 takes effect and is returned by cognito:preferred_role roleArn: isUserCognitoGroupRole.roleArn, });
In case your Cognito user is in multiple groups, the role with the lowest
precedence would be set as the user's cognito:preferred_role.
Going back to our stack definition at backend/infra/amplify-react-stack.ts, we
then define our API:
const {httpApi, httpApiCognitoAuthorizer} = new HttpApiConstruct( this, 'http-api', { userPool, userPoolClient, }, );
The purpose of the API is to route requests made from our frontend to the lambda function that generates presigned URLs for S3 uploads, so that we can store the avatars of our users.
Let's look at the implementation at
backend/infra/constructs/apigateway/apigateway-construct.ts:
this.httpApi = new apiGateway.HttpApi(this, 'api', { description: `___${DEPLOY_ENVIRONMENT}___ Api for ${STACK_PREFIX}`, apiName: `${STACK_PREFIX}-api-${DEPLOY_ENVIRONMENT}`, corsPreflight: { allowHeaders: ['Content-Type', 'X-Amz-Date', 'Authorization', 'X-Api-Key'], allowMethods: [ apiGateway.CorsHttpMethod.OPTIONS, apiGateway.CorsHttpMethod.GET, apiGateway.CorsHttpMethod.POST, apiGateway.CorsHttpMethod.PUT, apiGateway.CorsHttpMethod.PATCH, apiGateway.CorsHttpMethod.DELETE, ], allowCredentials: true, allowOrigins: [FRONTEND_BASE_URL], }, }); const {userPool, userPoolClient} = props; this.httpApiCognitoAuthorizer = new apiGatewayAuthorizers.HttpUserPoolAuthorizer( 'api-cognito-authorizer', userPool, { userPoolClients: [userPoolClient], identitySource: ['$request.header.Authorization'], }, );
The bulk of the API configuration is the CORS settings. Since our frontend is hosted on a different domain than our API, we have to set up CORS.
Note that we have also created an Authorizer for our API, which we'll later use to get the Cognito identityId of the user who's making a request to update their avatar.
We need their identityId because we'll be storing the files generated from
each user under a specific path in our S3 bucket, so the files from one user
don't interfere with the files from the others.
Going back to our stack definition at backend/infra/amplify-react-stack.ts, we
then define the S3 bucket that will store the user avatars:
const {s3Bucket} = new UploadsBucketConstruct(this, 's3-bucket'); // backend/infra/constructs/s3-construct.ts this.s3Bucket = new s3.Bucket(this, id, { cors: [ { allowedMethods: [ s3.HttpMethods.GET, s3.HttpMethods.POST, s3.HttpMethods.PUT, ], allowedOrigins: [FRONTEND_BASE_URL], allowedHeaders: ['*'], }, ], });
The only config we provide for the s3 bucket is
CORS. Our frontend is hosted on
http://localhost:3000 and the s3 bucket is hosted at amazonaws.com, so we
need to explicitly tell the S3 bucket to allow our frontend to upload avatars.
In our stack definition at backend/infra/amplify-react-stack.ts, we define the
lambda function which is responsible for generating the presigned s3 URLs, which
we're going to use on the frontend to
upload files to S3:
const getPresignedUrlEndpoint = new EndpointConstruct( this, 'get-presigned-url-s3', { httpApi, authorizer: httpApiCognitoAuthorizer, methods: [apiGateway.HttpMethod.GET], routePath: '/get-presigned-url-s3', assetPath: 'get-presigned-url-s3/index.ts', environment: { ...defaultLambdaEnvVars, BUCKET_NAME: s3Bucket.bucketName, REGION: DEPLOY_REGION as string, }, }, ); s3Bucket.grantPut(getPresignedUrlEndpoint.lambda); s3Bucket.grantPutAcl(getPresignedUrlEndpoint.lambda);
We defined a Lambda function and hooked it up to our API endpoint at
/get-presigned-url-s3. Notice that we grant the function permissions to PUT
objects in the s3 bucket and modify the Access control list of the objects in
the bucket.
We are going to set the avatars of users to be with an ACL of public-read so
that all users on the internet can access the images.
At the endpoint construct at
backend/infra/constructs/endpoint/endpoint-construct.ts we first define the
lambda function:
import {NodejsFunction} from 'aws-cdk-lib/aws-lambda-nodejs'; this.lambda = new NodejsFunction(this, id, { runtime: lambda.Runtime.NODEJS_18_X, memorySize: 1024, timeout: cdk.Duration.seconds(5), handler: 'main', entry: path.join(__dirname, `/../../../src/${assetPath}`), environment: environment && environment, layers: layers && layers, bundling: { minify: false, // modules already available in a layer should not be bundled externalModules: externalModules ? ['aws-sdk', ...externalModules] : ['aws-sdk'], }, logRetention: logs.RetentionDays.ONE_DAY, });
Notice that we use the aws-lambda-nodejs package, which uses
esbuild under the hood because we want to be able
to write our lambda code using TypeScript.
Then we hook the lambda function to the API endpoint passing in the authorizer,
which based on the Authorization token from the header will get the Cognito
user's identityId.
this.endpoint = httpApi.addRoutes({ path: routePath, methods, integration: new apiGatewayIntegrations.HttpLambdaIntegration( `${id}-integration`, this.lambda, ), authorizer, });
Lastly, we define some outputs that will be written to
a file that will be accessed by our frontend - src/cdk-exports-dev.json.
This is the file we use to store some of the identifiers of AWS services like the API URL, s3 bucket name, AWS region, user pool id, etc.
The purpose of storing these environment variables in a file is to keep the resource identifiers in sync between our frontend and backend.
new cdk.CfnOutput(this, 'userPoolId', { value: userPool.userPoolId, }); new cdk.CfnOutput(this, 'userPoolClientId', { value: userPoolClient.userPoolClientId, }); new cdk.CfnOutput(this, 'identityPoolId', { value: identityPool.ref, }); new cdk.CfnOutput(this, 'region', { value: cdk.Stack.of(this).region, }); new cdk.CfnOutput(this, 'apiUrl', { // eslint-disable-next-line @typescript-eslint/no-non-null-assertion value: httpApi.url!, }); new cdk.CfnOutput(this, 'bucketName', { value: s3Bucket.bucketName, });
The command that spits out the src/cdk-exports-dev.json file is located in our
backend/package.json.
{ "cdk-deploy": "npx aws-cdk deploy amplify-react-auth-dev --outputs-file ../src/cdk-exports-dev.json" }
At this point, we are done with provisioning the infrastructure. We are not
going to cover the get-presigned-url-s3 lambda function because I have
a detailed article on it and I don't want
for this article to get too long.
# Frontend Code
We have a Next.js application for our frontend. For our purposes, this could
have been a vanilla React.js project, but I find myself struggling with trying
to customize create-react-app and I don't want to manage the Webpack config
myself, so Next.js it is.
Other than developer experience, Next.js offers many other benefits including static site generation by default, intuitive server-side rendering and so on, but for our little project, we don't need any of that.
Our home page is located at src/pages/home/home.tsx. We have a function
component that renders some presentational content.
Next, we're going to look at the registration page at
src/pages/auth/register/register.tsx. Here we have our registration form with
inputs for email, password, password confirmation, first name and last name.
For all of our components, we have tried to separate the presentational and
logic layer and we extract the logic into a hook, in this case, the
useRegister hook.
const { handleSubmit, register, formErrors, passwordRef, isError, error, isSuccess, isLoading, } = useRegister();
In our useRegister hook located in the same directory we use the
react-hook-form library to manage the form inputs.
const { register, handleSubmit, watch, reset, errors: formErrors, } = useForm<FormInputs>();
And then call the AWS amplify APIs in our submit handler function.
const onSubmit: SubmitHandler<FormInputs> = async ({ email, givenName, familyName, password, }) => { await run(handleRegister()); async function handleRegister() { const result = await Auth.signUp({ username: email.trim(), password, attributes: { given_name: givenName.trim(), family_name: familyName.trim(), }, }); localStorage.setItem(TEMP_PWD_LOCALSTORAGE_KEY, password); reset(); return result; } };
That is the exact pattern we've followed for all of our authentication pages.
This is not the best idea for a real-world application, where you would at least use a hashing algorithm and not store it in plain text or use a cookie.
Next, we're going to look at the Login page at src/pages/auth/login/login.tsx,
which follows the same pattern as the registration page. We first call the
useLogin hook, to get access to the form state:
const { handleSubmit, register, formErrors, isError, error, isLoading, } = useLogin();
Then we use our useNotification hook which returns the addNotification
function. The addNotification function adds notification objects of type.
const {addNotification} = useNotification();
const exampleNotification = { type: 'SUCCESS', title: 'Registration successful!', description: "You've successfully filled out the form", };
These notifications are then stored in react context so we have access to them from every component in our application.
A common inconvenience with notifications when not stored in context is when your components unmount.
You can't render a notification on an unmounted component so you have to keep lifting the notification state up and store it in components, where it doesn't make sense. So we just store the notification state in context to not worry about it.
The handling of the form submission is the same as any other page, in our
useLogin hook we manage the form fields and in our submit handler we interact
with the Amplify API.
Note that we store the user in our authContext located in
src/context/auth/auth-context.ts. We store the user state in context because
we make use of it in multiple locations in our application, i.e. the navigation
bar where we render the avatar of the user and the settings section where we
store the profile information.
For a more featured application, it would be very likely that we have content that only admin users or only authenticated users who belong to a certain group could access.
By making use of react context, we can always make the necessary check - if the user is of type X allow/disallow him to perform action Y.
The user state we store in context looks as follows.
export type AuthState = { isLoading: boolean; error: Error | undefined; isAuthenticated: boolean; isAuthenticating: boolean; user: User | undefined; userConfig: CognitoUser | undefined; };
Where the User object has attributes of the following types is as follows.
export type User = { email: string; familyName: string; givenName: string; bio?: string; picture?: string; phoneNumber?: string; country?: string; city?: string; address?: string; isAdmin?: boolean; };
Conceptually, all of the different pages in our application do the same thing:
- We collect user inputs
- We call an Amplify API to perform an action / persist user attributes on the user object
Our settings page, located at src/pages/settings/, is split into 3 sections:
- personal section
- profile section
- security section
The flow for these 3 sections is the same:
- We collect user input
- We persist it on the user object by calling
Auth.updateUserAttributes
This way we are able to collect the information we need for each user, i.e. shipping address, country, city, phone number, etc.
Let's look at how we take care of updating the personal information section of
our settings page at
src/pages/settings/personal-information/use-update-personal-information.ts.
First, we get the functions from react-hook-form which we then use to collect the form values:
const {register, handleSubmit, setValue} = useForm<PersonalInformationInputs>();
Next, we set the form values based on the values for these attributes already present on the user object, to pre-fill the information if they already have a country selected:
const setFormValues = useCallback(() => { setValue('phoneNumber', user?.phoneNumber); setValue('country', user?.country); setValue('city', user?.city); setValue('address', user?.address); }, [setValue, user?.address, user?.city, user?.country, user?.phoneNumber]);
Lastly, in our submit handler, we make a call to Auth.updateUserAttributes to
persist the changes we've made on the user object and sync the Auth state for
our application:
const onSubmit: SubmitHandler<PersonalInformationInputs> = ({ phoneNumber, address, city, country, }) => { run(saveProfileAttributes()); async function saveProfileAttributes() { const phoneNumberWithoutSpaces = phoneNumber.replace(/\s+/g, ''); const result = await Auth.updateUserAttributes(userConfig, { phone_number: phoneNumberWithoutSpaces, 'custom:country': country, 'custom:city': city, address, }); updateUserAttributes({ phoneNumber: phoneNumberWithoutSpaces, country, city, address, }); return result; } };
# Cleanup
You can delete the CDK stack by running:
npm run cdk-destroy
Note that in order to delete the s3 bucket, which stores the avatars, you first have to empty the bucket's contents and then you can delete it.
# Conclusion
This post and repository are mostly intended to be used as a quick reference for any issues you encounter when implementing Amplify auth.
It implements the entire flow of:
- Login
- Registration
- Forgotten password
- Change password
- Change Email
- Profile fields stored in Cognito: First name, Last name, About, Avatar, Address, etc.
The majority of this functionality is something you'll have to implement if you work with Amplify Auth in a real-world project. Having a quick lookup for how to implement the flow can be quite a time saver.
Thank you for reading!
# Further Reading
- AWS Cognito & Amplify Auth - Bad, Bugged, Baffling
- Cognito User Pool Example in AWS CDK - Complete Guide
- Add SES Support to a Cognito User Pool in CDK
- AWS CDK Tutorial for Beginners - Step-by-Step Guide
- How to use Parameters in AWS CDK
- Email Address is not Verified AWS SES Error [Solved]
- How to send emails with SES in AWS CDK

