How to POST Form Data using the JavaScript Fetch API
Last updated: Apr 4, 2024
Reading time·6 min

# Table of Contents
- How to POST Form Data using the JavaScript Fetch API
- POST Form Data using the JavaScript Fetch API using URLSearchParams
- You might also see examples online that manually build the
FormData
# How to POST Form Data using the JavaScript Fetch API
To POST form data using the JavaScript fetch API:
- Add a
submitevent handler to theformelement. - Use the
FormData()constructor to create aFormDataobject. - Use the
fetch()method to send theFormDataobject over the networking, setting the HTTP method to POST.
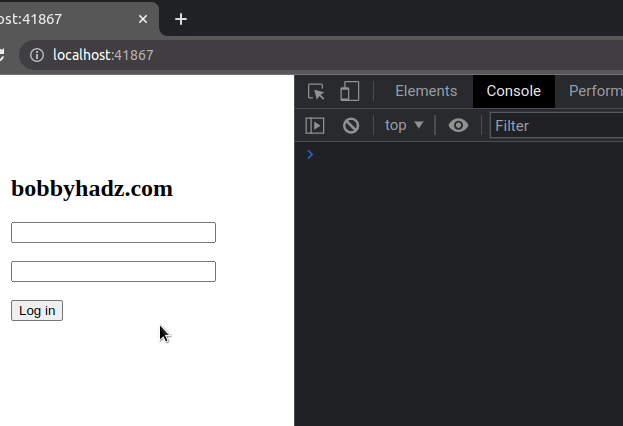
Here is the HTML for the example.
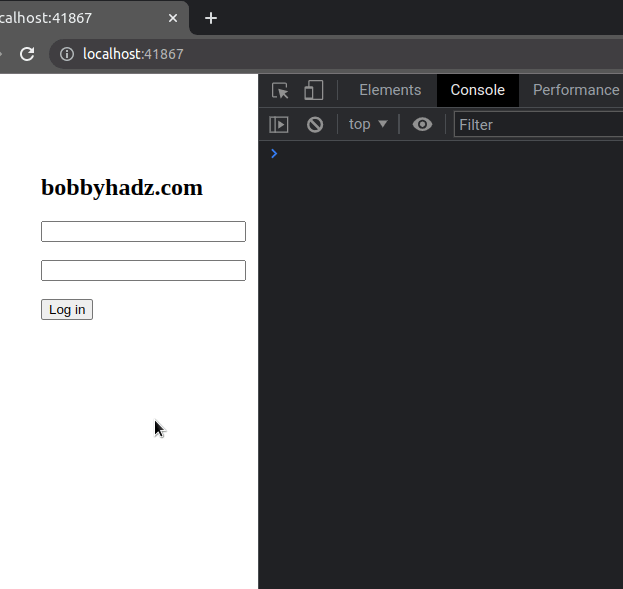
<!DOCTYPE html> <html lang="en"> <head> <meta charset="UTF-8" /> </head> <body> <h2>bobbyhadz.com</h2> <form id="form"> <input type="text" id="username" name="username" /> <br /> <br /> <input type="password" id="password" name="password" autocomplete="on" /> <br /> <br /> <button type="submit" id="submit-btn">Log in</button> </form> <script src="index.js"></script> </body> </html>
And here is the related JavaScript code.
const form = document.getElementById('form'); form.addEventListener('submit', async event => { event.preventDefault(); const data = new FormData(form); console.log(Array.from(data)); try { const res = await fetch( 'https://jsonplaceholder.typicode.com/users', { method: 'POST', body: data, }, ); const resData = await res.json(); console.log(resData); } catch (err) { console.log(err.message); } });
We used the document.getElementById()
method to select the form element and
added a submit event handler to it.
Notice that we marked the event handler function as
async to be able to use the
await keyword.
form.addEventListener('submit', async event => { // ... })
We called the event.preventDefault() method to prevent the browser from
refreshing the page.
event.preventDefault();
The next step is to use the FormData() constructor to create a FormData object.
The FormData object stores a set of key-value pairs representing form fields
and their values.
The set of key-value pairs can be sent over the network using fetch, axios,
XMLHttpRequest.send(), etc.
const data = new FormData(form); // [ // ["username", "ab"], // ["password", "cd"] // ] console.log(Array.from(data)); try { const res = await fetch( 'https://jsonplaceholder.typicode.com/users', { method: 'POST', body: data, }, ); const resData = await res.json(); console.log(resData); } catch (err) { console.log(err.message); }
Notice that we aren't using JSON.stringify() when sending over the request body.
The FormData object uses the same format a form would use if its encoding type
were set to multipart/form-data.
Notice that when the FormData object is converted to an array, it stores a
two-dimensional array.
const data = new FormData(form); // [ // ["username", "ab"], // ["password", "cd"] // ] console.log(Array.from(data));
The first element in each subarray is the key and the second is the value.
Make sure to set the method property in the options object to POST and the
body property to the FormData object.
const res = await fetch( 'https://jsonplaceholder.typicode.com/users', { method: 'POST', body: data, }, );
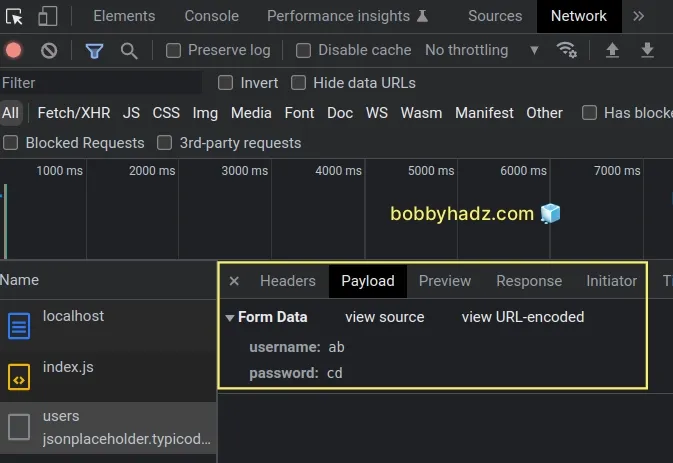
To view the request payload:
- Open your developer tools by pressing
F12. - Click on the Network tab.
- Select the request in the left sidebar under Name.
- Click on the Payload tab.
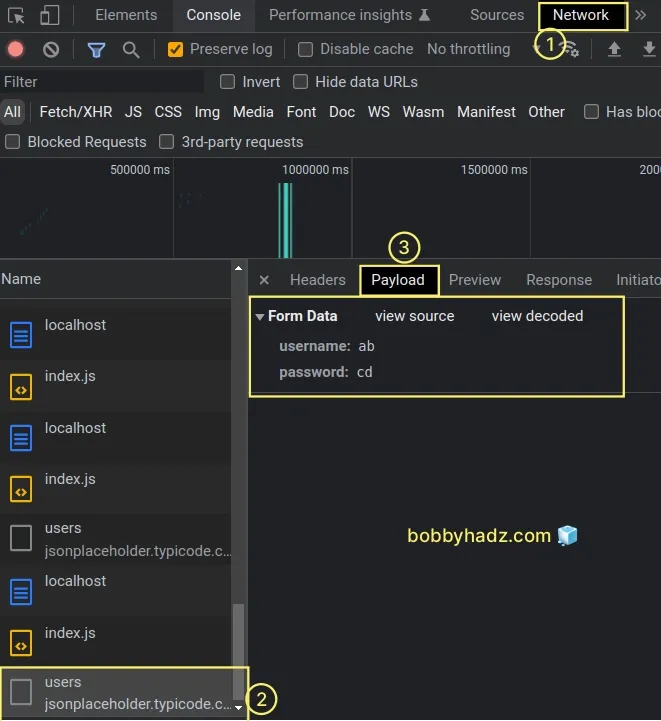
As shown in the screenshot the username field stores a value of ab and the
password field stores a value of cd at the time of making the request.
If you click on the Headers tab and scroll down to the Request Headers
section, you will see that fetch automatically sets the Content-Type header.
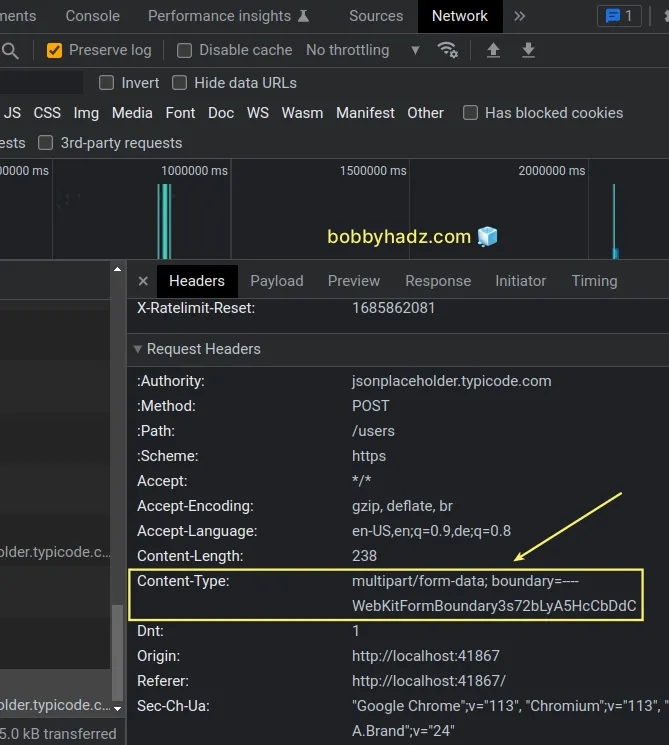
The header is automatically set to multipart/form-data; boundary=---....
If you've explicitly set the Content-Type header when calling fetch() make
sure to remove it, so it gets set automatically.
# POST Form Data using the JavaScript Fetch API using URLSearchParams
When sending text form data over the network, it is more efficient to send the
data as application/x-www-form-urlencoded by using the
URLSearchParams()
constructor.
The HTML for the example remains the same.
<!DOCTYPE html> <html lang="en"> <head> <meta charset="UTF-8" /> </head> <body> <h2>bobbyhadz.com</h2> <form id="form"> <input type="text" id="username" name="username" /> <br /> <br /> <input type="password" id="password" name="password" autocomplete="on" /> <br /> <br /> <button type="submit" id="submit-btn">Log in</button> </form> <script src="index.js"></script> </body> </html>
And here is the related JavaScript code.
const form = document.getElementById('form'); form.addEventListener('submit', async event => { event.preventDefault(); const formData = new FormData(form); // 👇️ pass form data to URLSearchParams() constructor const searchParams = new URLSearchParams(formData); // 👇️ username=ab&password=cd console.log(searchParams.toString()); try { const res = await fetch( 'https://jsonplaceholder.typicode.com/users', { method: 'POST', body: searchParams, }, ); const resData = await res.json(); console.log(resData); } catch (err) { console.log(err.message); } });
We used the FormData() constructor to create a FormData object and passed
the FormData object to the URLSearchParams() constructor.
const formData = new FormData(form); // 👇️ pass form data to URLSearchParams() constructor const searchParams = new URLSearchParams(formData); // 👇️ username=ab&password=cd console.log(searchParams.toString());
The URLSearchParams() constructor creates a URLSearchParams object.
URLSearchParams objects define utility methods that enable you to work with
the query string of a URL.
toString() method on the object returns a query string (without the leading question mark ?).If you click on the Payload tab for the specific request in the Network tab in your developer tools, you will see that the correct Form Data is sent over the network.
If you click on the Headers tab and scroll down to the Request Headers
section, you will see that the Content-Type is set to
application/x-www-form-urlencoded.

The Content-Type is set automatically by fetch, so we didn't have to
explicit set it.
const res = await fetch( 'https://jsonplaceholder.typicode.com/users', { method: 'POST', body: searchParams, }, );
The application/x-www-form-urlencoded content type is used to describe form
data that is sent in a single block in the HTTP body.
If the data is sent in the query parameters part of the URL, its size is restricted.
However, when you send the data in the request body as we did in the example, its size is unrestricted.
# You might also see examples online that manually build the FormData
You might also see examples online that manually build the FormData object.
The HTML for the example remains the same.
<!DOCTYPE html> <html lang="en"> <head> <meta charset="UTF-8" /> </head> <body> <h2>bobbyhadz.com</h2> <form id="form"> <input type="text" id="username" name="username" /> <br /> <br /> <input type="password" id="password" name="password" autocomplete="on" /> <br /> <br /> <button type="submit" id="submit-btn">Log in</button> </form> <script src="index.js"></script> </body> </html>
And here is the updated JavaScript code.
const form = document.getElementById('form'); const username = document.getElementById('username'); const password = document.getElementById('password'); form.addEventListener('submit', async event => { event.preventDefault(); const formData = new FormData(); formData.append('username', username.value); formData.append('password', password.value); console.log(Array.from(formData)); try { const res = await fetch( 'https://jsonplaceholder.typicode.com/users', { method: 'POST', body: formData, }, ); const resData = await res.json(); console.log(resData); } catch (err) { console.log(err.message); } });
Notice that this time, we created an empty FormData object.
const formData = new FormData(); formData.append('username', username.value); formData.append('password', password.value); // [ // ["username", "ab"], // ["password", "cd"] // ] console.log(Array.from(formData));
The
FormData.append()
method can be used to append a new key-value pair to the FormData object.
The first parameter the append() method takes is the name of the key and the
second is the name of the value.
If the key already exists in the FormData object, its value gets updated,
otherwise, the new key-value pair gets added to the FormData object.
However, most of the time manually constructing the FormData object is not
necessary as it can be automatically done by passing the form element to the
FormData() constructor.
const data = new FormData(form); // [ // ["username", "ab"], // ["password", "cd"] // ] console.log(Array.from(data));
You should only build the FormData object manually if you need to overwrite
the values of specific keys.
# Additional Resources
You can learn more about the related topics by checking out the following tutorials:
- How to Make HTTP requests in TypeScript
- Making HTTP requests with Axios in TypeScript
- How to fetch Data on Button click in React
- How to get the status code of an Axios HTTP error
- Get the Status Code of a Fetch HTTP Response in JavaScript
- fetch() returns empty Response Body in JavaScript [Solved]
- Chrome: How to Copy an Object or Array from the Console tab
- TypeError: Failed to execute 'fetch' on 'Window' [Solved]
- Fetch API cannot load localhost. URL scheme is not supported
- TypeError: Failed to fetch and CORS in JavaScript
- Axios Network Error when making HTTP request

