How to install a NuGet package in Visual Studio Code
Last updated: Apr 6, 2024
Reading time·6 min

# Table of Contents
- How to install a NuGet package in Visual Studio Code
- Using NuGet Package Manager GUI to install a NuGet package in Visual Studio Code
- Using the NuGet Gallery Extension to install packages in VS Code
- Using a different extension to install a NuGet package in VS Code
# How to install a NuGet package in Visual Studio Code
There are multiple ways to install a NuGet package in VS Code. You can use the integrated terminal or an extension package manager.
This article covers both approaches and shows how to use the 3 most popular NuGet package manager extensions in VS Code.
The easiest way to install a NuGet package in Visual Studio Code is to use the integrated terminal.
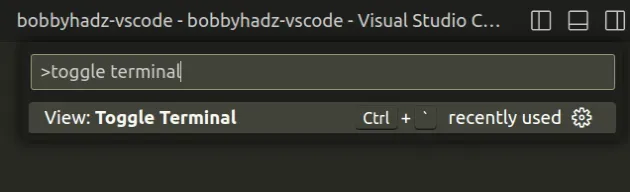
- Press:
Ctrl+Shift+Pon Windows and Linux.Command+Shift+Pon macOS.
- Type toggle terminal and select View: Toggle Terminal.
You can also open the terminal by using the keyboard shortcut:
- on Windows and Linux: press
Ctrl+ ` (backtick). - on macOS: press
Ctrl+ ` (backtick).
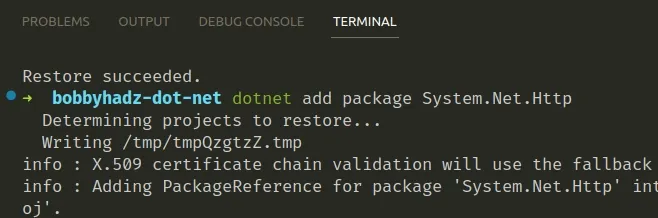
- Use the following command to install a NuGet package.
dotnet add package <PACKAGE_NAME>
For example, here's a command that installs the System.Net.Http package.
dotnet add package System.Net.Http
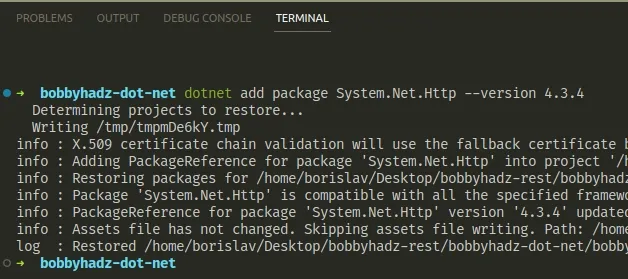
You can also install a specific version by using the --version flag.
dotnet add package System.Net.Http --version 4.3.4
You can also specify the project when issuing the dotnet add command.
dotnet add <PROJECT_NAME> package <PACKAGE_NAME>
For example, assuming your project's name is MyApp and you want to install the
System.Net.Http package.
dotnet add MyApp package System.Net.Http
You can use the nuget.org website if you need to search for .NET packages.
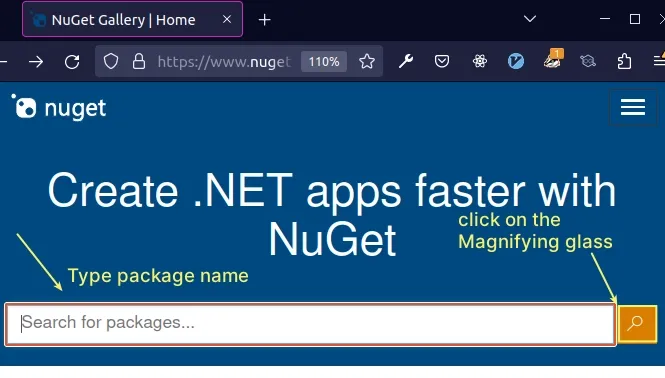
When you click on a specific package, make sure the .NET CLI tab is selected and copy the command.
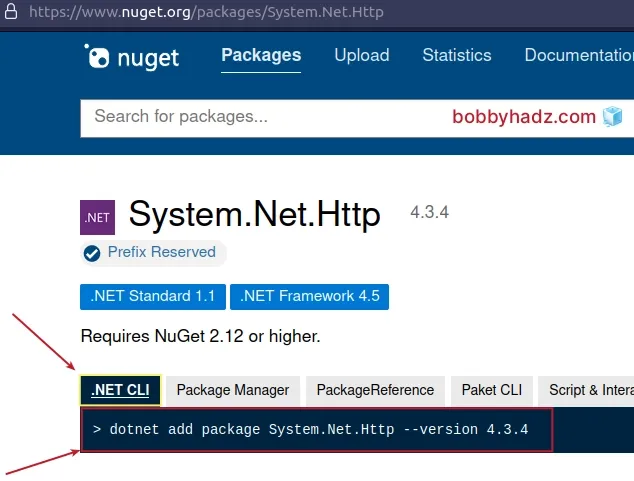
Paste the command in your VS Code integrated terminal to install the NuGet package.
# Using NuGet Package Manager GUI to install a NuGet package in Visual Studio Code
Alternatively, you can use the NuGet Package Manager GUI extension.
The extension is quite popular and easy to use. It enables you to install, update or remove NuGet packages directly in VS Code.
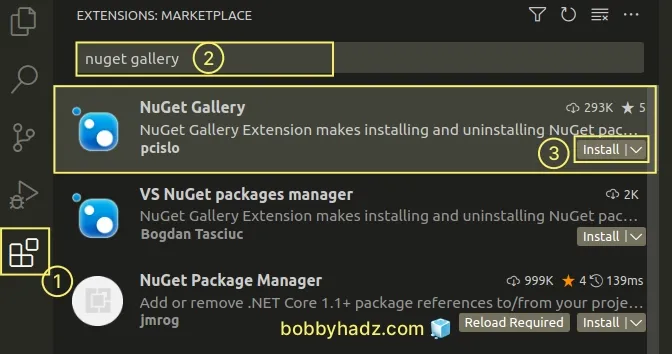
- Click on Extensions in the left sidebar.
- You can also open the Extensions menu by pressing:
Ctrl+Shift+Xon Windows or Linux.Command+Shift+Xon macOS.
- Type NuGet Package Manager GUI.
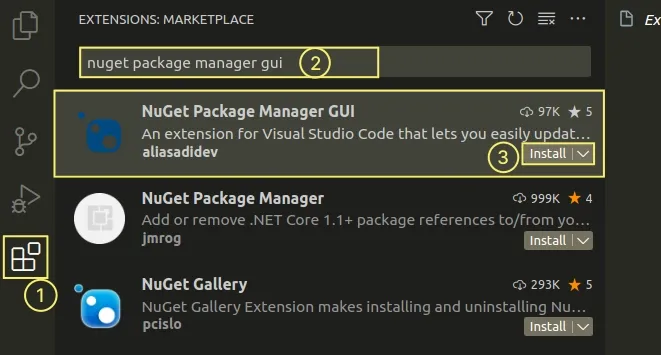
- Select the extension and click on the Install button.
Make sure to install the correct NuGet Package Manager GUI extension as shown in the screenshot.
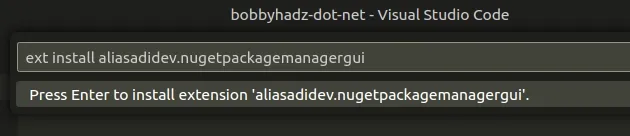
You can also use the Quick Open functionality to install the extension:
- Press:
Ctrl+Pon Windows and Linux.Command+Pon macOS.
- Type the following command and press
Enter.
ext install aliasadidev.nugetpackagemanagergui
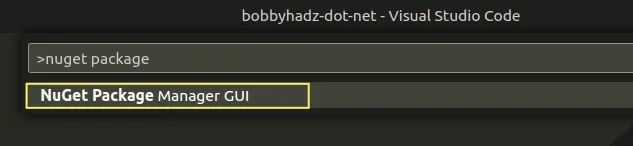
Once you install the extension:
- Press:
Ctrl+Shift+Pon Windows and Linux.Command+Shift+Pon macOS.
F1 to open the Command Palette.- Type NuGet package and select NuGet Package Manager GUI.
- Click on the Install New Package button in the top bar.
Note: If you need to update or remove packages, click on the Update / Remove Packages button.
- Start typing the name of the package and press
Enteror click on the Search button.
If you can't find any packages with the given name, you probably forgot to click on the Install New package button at the top.
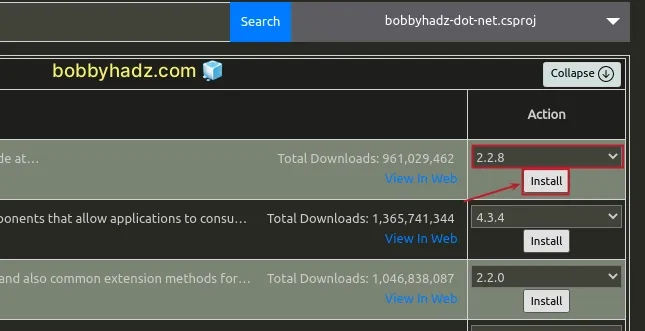
- Once you find the package you want to install, click on the Install button.
You can also optionally select a version from the dropdown menu.
- If you need to update or remove a package, click on the Update / Remove Packages button at the top.
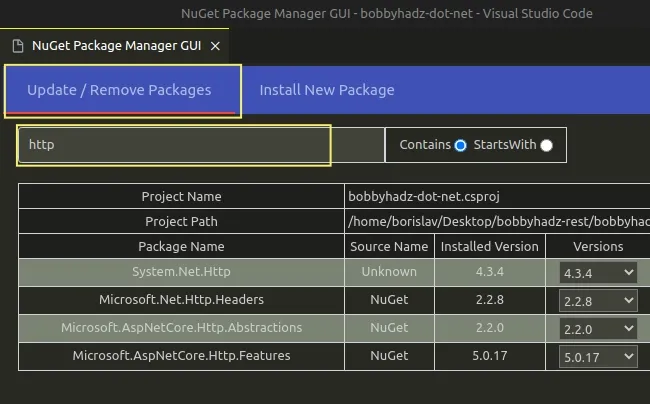
Start typing the name of the package and press
Enter.Click on the Update or Update All buttons for the specific package if you need to update the package.
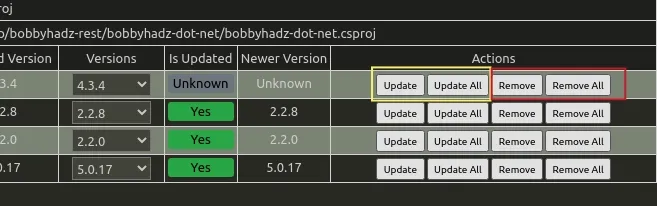
If you need to remove the package, click on Remove or Remove All.
# Using the NuGet Gallery Extension to install packages in VS Code
If you didn't like the previous extension, you can also try the NuGet Gallery extension which also enables you to install NuGet packages in VS Code.
- Click on Extensions in the left sidebar.
- You can also open the Extensions menu by pressing:
Ctrl+Shift+Xon Windows or Linux.Command+Shift+Xon macOS.
- Type NuGet Gallery.
- Select the extension and click on the Install button.
You can also install the extension using a command.
- Press:
Ctrl+Pon Windows and Linux.Command+Pon macOS.
- Type the following command and press
Enter.
ext install patcx.vscode-nuget-gallery
Once you install the extension:
- Press:
Ctrl+Shift+Pon Windows and Linux.Command+Shift+Pon macOS.
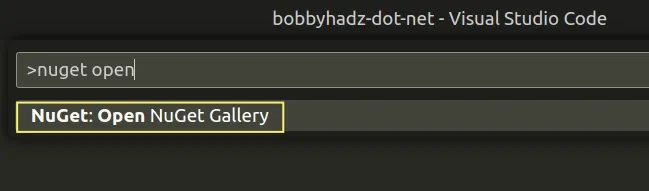
F1 to open the Command Palette.- Type NuGet open and select NuGet: Open NuGet Gallery.
- Type the name of the package in the Search field and press
Enter.
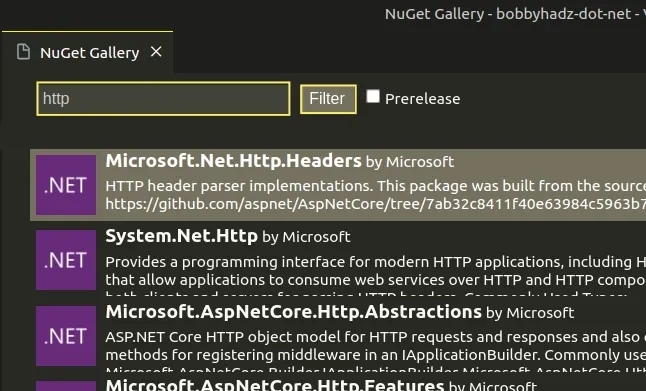
- Left-click on the package you'd like to install.
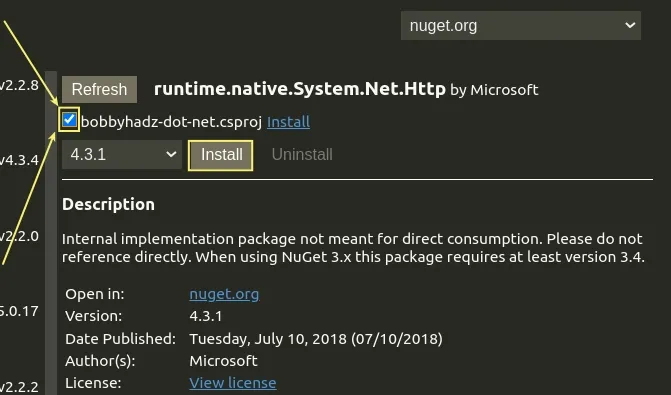
- Check the checkbox for the
.csprojfile as shown in the screenshot. - Select the version of the package you'd like to install from the dropdown menu.
- Click on the Install button.
The extension will run the installation command directly in your VS Code integrated terminal.
If you need to uninstall a NuGet package, click on the Uninstall button.
If you need to update a package or install an older version, select the version from the dropdown menu and click Install.
# Using a different extension to install a NuGet package in VS Code
There is also a NuGet Package Manager extension that enables you to install NuGet packages in VS Code.
However, using the extension is not recommended because it is not well maintained.
- Click on Extensions in the left sidebar.
- You can also open the Extensions menu by pressing:
Ctrl+Shift+Xon Windows or Linux.Command+Shift+Xon macOS.
- Type NuGet Package Manager.
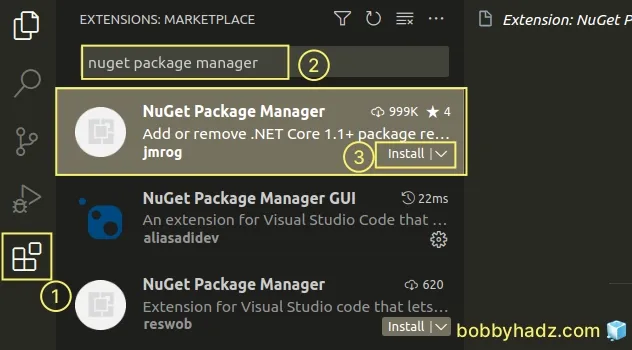
- Select the extension and click on the Install button.
Make sure to install the correct
NuGet Package Manager
extension from the user jmrog.
You can also install the extension using a command.
- Press:
Ctrl+Pon Windows and Linux.Command+Pon macOS.
- Type the following command and press
Enter.
ext install jmrog.vscode-nuget-package-manager
Once you install the extension:
- Press:
Ctrl+Shift+Pon Windows and Linux.Command+Shift+Pon macOS.
F1 to open the Command Palette.- Type NuGet package manager.
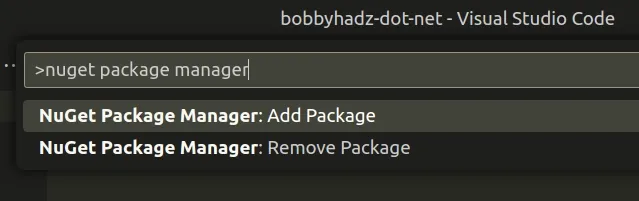
Click on NuGet Package Manager: Add Package.
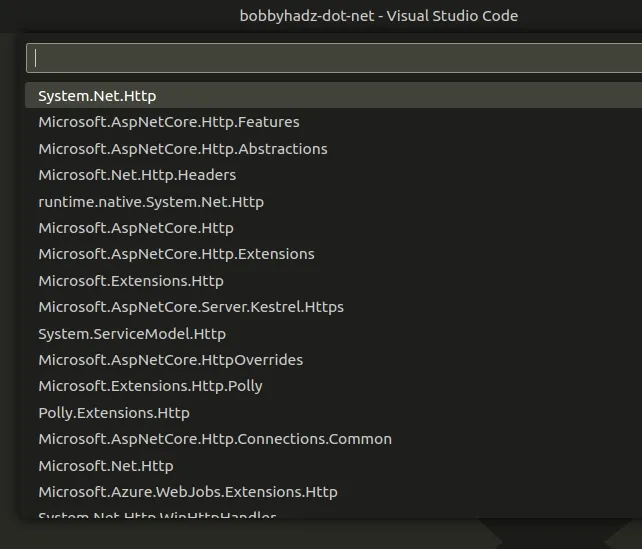
Start typing the name of the package and press
Enter.The command will pull packages with similar names from the repository.
Use the arrow keys to select the correct package and press
Enter.Select the version of the package to be installed and hit
Enter.
# Additional Resources
You can learn more about the related topics by checking out the following tutorials:
- 'nuget' is not recognized as an internal or external command
- How to exclude Folders from Search in Visual Studio Code
- VS Code: Folder contains emphasized items issue [Solved]
- Rename a File, Folder or Workspace in Visual Studio Code
- How to move a File to another Folder in VS Code
- VS Code: Remove Folder from Workspace open Multiple Folders
- What is the .vscode folder and should you Commit it to Git
- How to clear the Cache in Visual Studio Code
- How to Hide or Show the Minimap in Visual Studio Code
- How to reveal the current File in Explorer in VS Code
- Run NPM commands/scripts within Visual Studio Code
- Can't find Node.js binary 'node': path does not exist [Fix]

