Remove the Header, Footer & URL when Printing in JavaScript
Last updated: Mar 7, 2024
Reading time·4 min
# Table of Contents
- Remove the Header and Footer when Printing in JavaScript
- Hiding elements when printing by setting
displaytonone - Remove Header, Footer & URL when printing a page
# Remove the Header and Footer when Printing in JavaScript
You can use the @page rule to remove the header and footer when printing in
JavaScript.
<style> @media print { @page { margin: 0; } } </style>
The @page rule above hides the automatic header and footer, however, you will
likely want to set some margins or paddings so that the content won't push
against the edges of the page.
<style> @media print { @page { margin: 0; } body { margin: 1.6cm; } } </style>
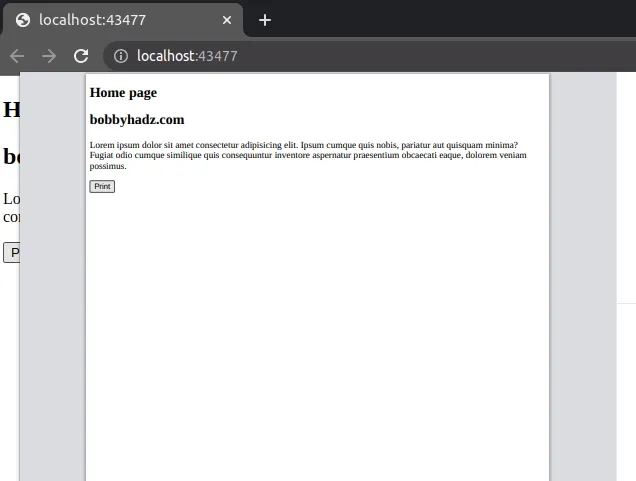
Here is a complete example of only removing the header and footer, without adding margins.
<!DOCTYPE html> <html lang="en"> <head> <meta charset="UTF-8" /> <style> @media print { @page { margin: 0; } } </style> </head> <body> <h2>Home page</h2> <h2>bobbyhadz.com</h2> <p> Lorem ipsum dolor sit amet consectetur adipisicing elit. Ipsum cumque quis nobis, pariatur aut quisquam minima? Fugiat odio cumque similique quis consequuntur inventore aspernatur praesentium obcaecati eaque, dolorem veniam possimus. </p> <button id="btn">Print</button> <script> const btn = document.getElementById('btn'); btn.addEventListener('click', () => { window.print(); }); </script> </body> </html>
You can either click on the button to open the print screen or:
- on Windows and Linux, press
Ctrl+P - on macOS, press
Cmd+P

And here is an example that adds 1.6cm margin to the body element.
<style> @media print { @page { margin: 0; } body { margin: 1.6cm; } } </style>
You can adjust the margin values depending on how you want the page to look.
You can also explicitly set the values of all margins.
<style> @media print { @page { margin-left: 0.5in; margin-right: 0.5in; margin-top: 0; margin-bottom: 0; } } </style>
The @page CSS rule is used to modify different aspects of a printed page
property.
It is used to target and modify:
- the page's dimensions
- the page's orientation
- the page's margins
# Hiding elements when printing by setting display to none
If you need to hide a certain div only when printing, set its display CSS
property to none.
<style> @media print { #non-printable { display: none !important; } } </style>
The code sample above assumes that you have a div with an id of
non-printable that you want to hide when printing the page.
<div id="non-printable"> <!-- your div that should be hidden when printing --> </div>
You can use this approach to hide as many elements as necessary when printing.
For example, the following code sample hides the elements with IDs of footer
and non-printable.
<style> @media print { #footer, #non-printable { display: none !important; } } </style>
If you explicitly want to show an element when printing, set its display CSS
property to block.
<style> @media print { #footer, #non-printable { display: none !important; } #printable { display: block; } } </style>
The elements with IDs footer and non-printable will be hidden when printing
the page and the printable element will be shown.
If your header and footer elements use the <header> and <footer> tags,
you can simply hide the elements by tag when printing.
<style> @media print { header,footer { display: none !important; } } </style>
You might not have to use the !important flag depending on your setup.
# Remove Header, Footer & URL when printing a page
You can also use the graphic user interface print settings directly in your browser to configure how the page should look when printing.
You can either click on Print button to open the print screen or:
- on Windows and Linux, press
Ctrl+P - on macOS, press
Cmd+P
Here is an example of how this looks in Chrome.
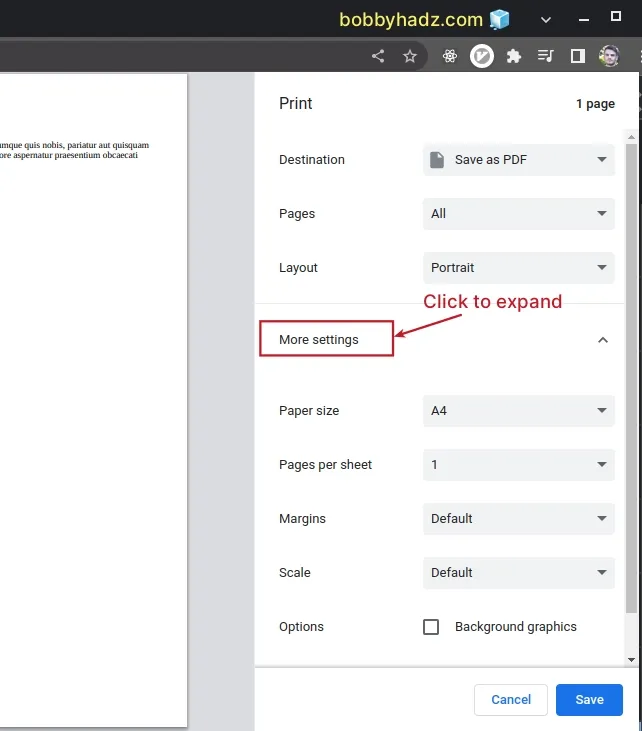
Once you open the print preview screen, click on More settings to expand the menu.
You can change the values of:
- Destination - where the file should be saved.
- Pages - which pages to print.
- Layout - whether to print in portrait or landscape mode.
- Paper size - the size of the paper.
- Pages per sheet - how many pages to print per sheet.
- Margins - Choose between
Default,None,MinimumandCustommargins. - Scale - whether to scale the contents of the page when printing.
You can select the different values of the Margins setting and see if you can
improve how the printed page looks.
On most pages, you will also be able to remove the headers, footers and URL directly in the "Print preview" settings.
Simply uncheck the Headers and footers checkbox under Options.
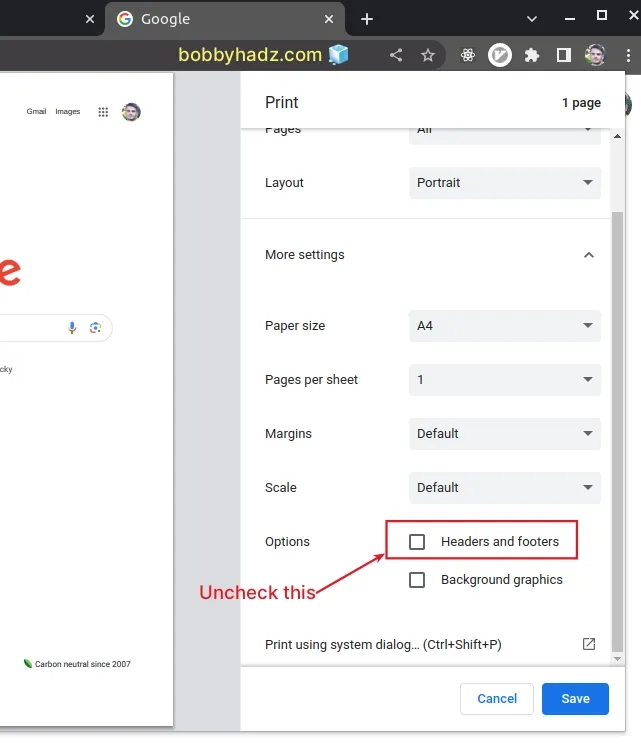
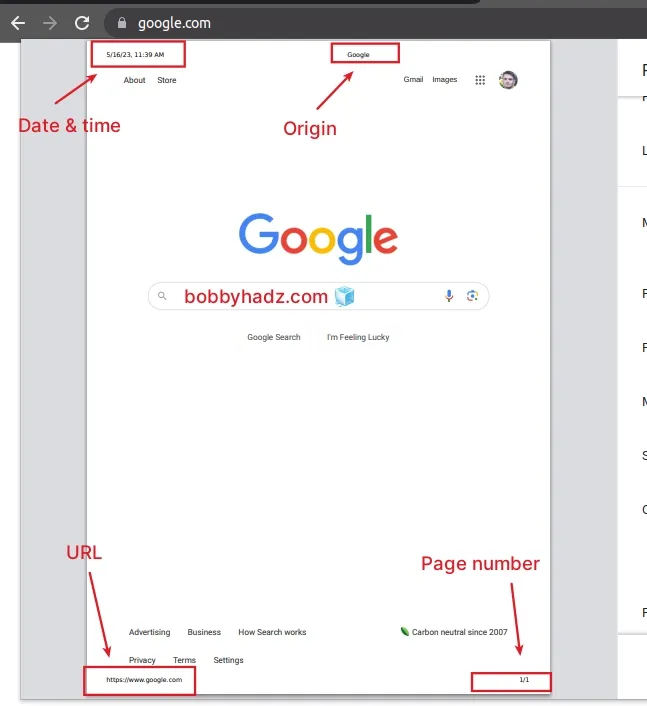
When you uncheck the Headers and footers checkbox, the date and time, the URL and the page number are hidden.
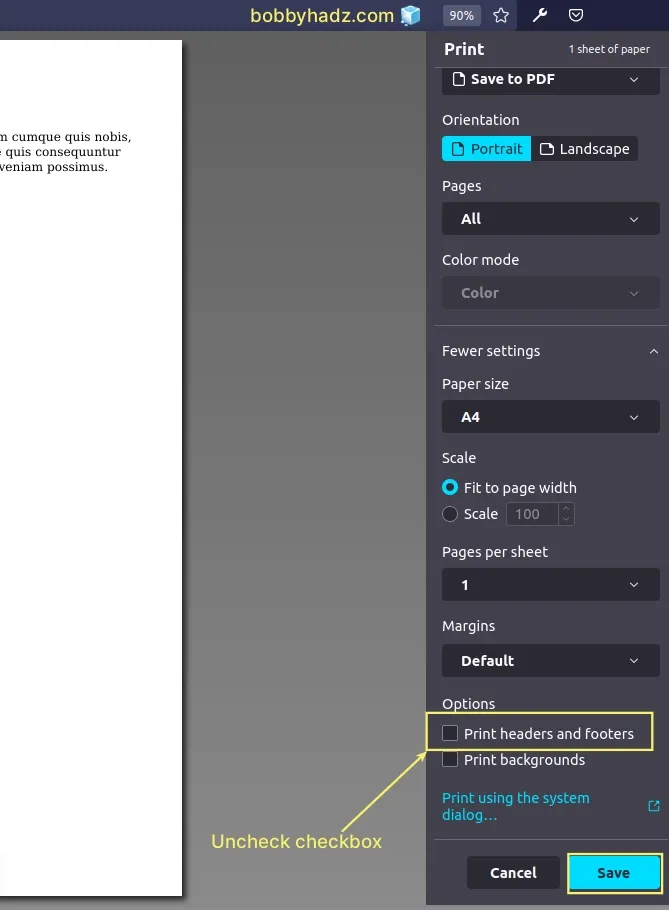
If you use Firefox, you can also uncheck the Print headers and footers checkbox directly in the Print Preview settings screen.
Here is a screenshot before removing the header, footer and URL.
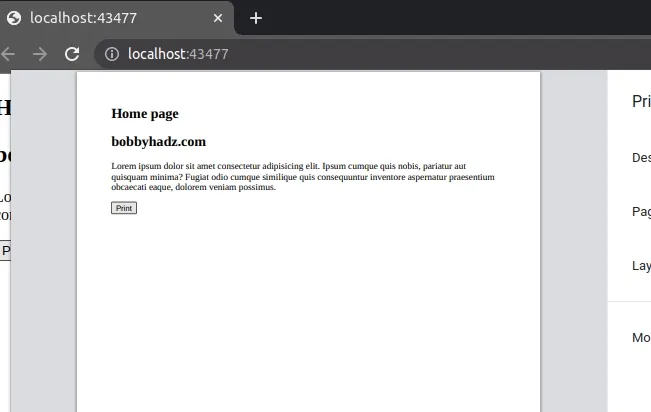
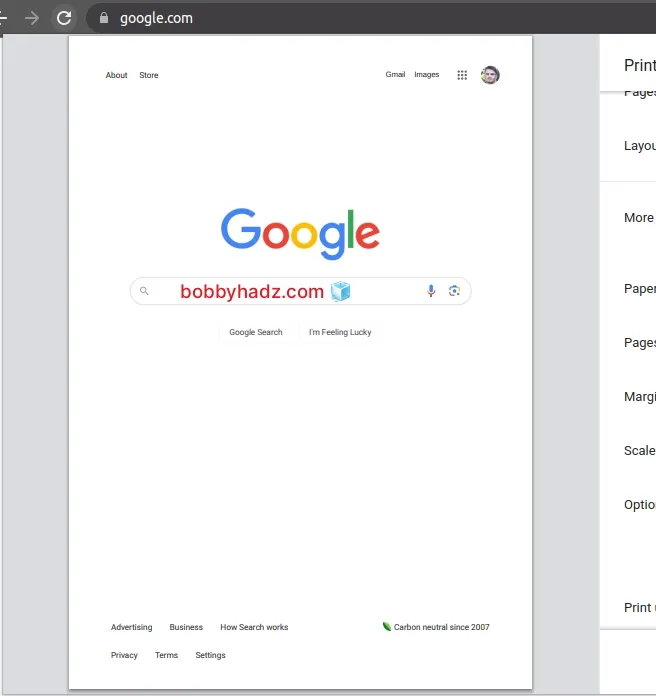
And here is a screenshot after removing them.
# Additional Resources
You can learn more about the related topics by checking out the following tutorials:
- How to adjust a Button's width to fit the Text in CSS
- Hide element when clicked outside using JavaScript
- Set min-margin, max-margin, min-padding & max-padding in CSS
- How to Apply a CSS Hover effect to multiple Elements
- How to set a Max Character length in CSS
- Changing Bold Text into Normal (Unbold Text) in HTML
- Force the text in a Div to stay in one Line in HTML & CSS
- CSS text-align: center; not working issue [Solved]
- focus() not working in JavaScript issue [Solved]

