Check image width and height before upload using JavaScript
Last updated: Apr 4, 2024
Reading time·4 min

# Table of Contents
- Check image width and height before upload using JavaScript
- Check the width and height of multiple images before upload using JavaScript
# Check image width and height before upload using JavaScript
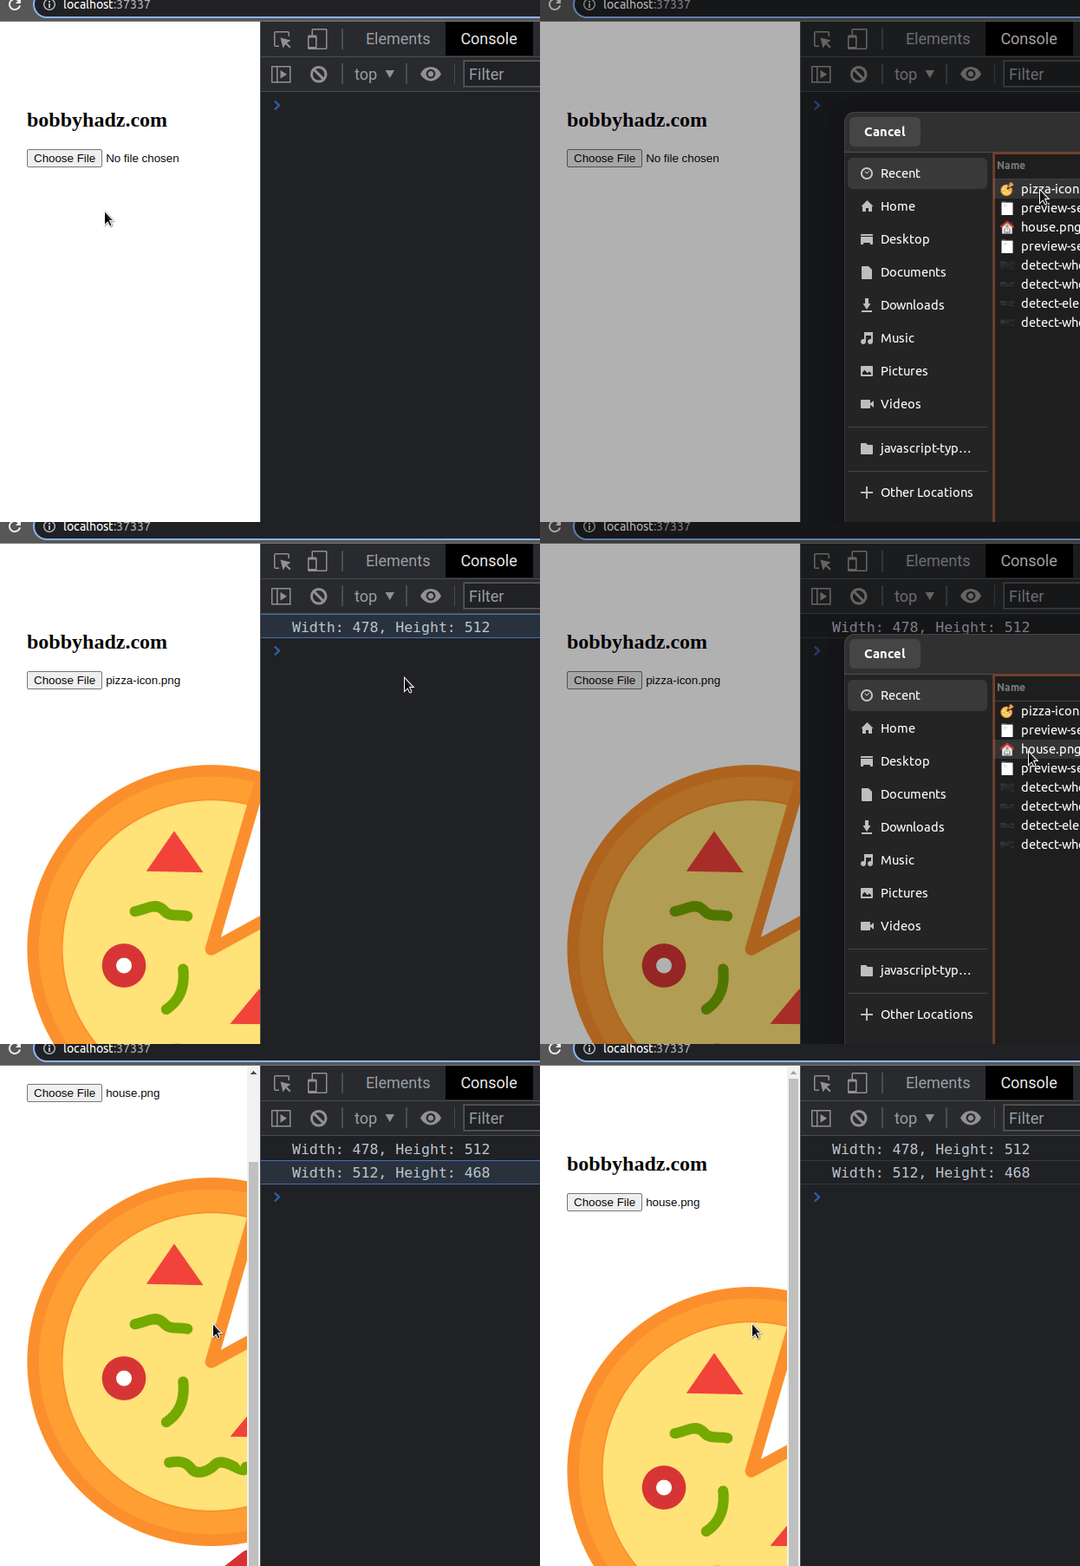
To check an image's width and height before upload using JavaScript:
- Add a
changeevent listener to the file input. - Create an image element and set its
srcattribute based on the selected image. - Access the
widthandheightattributes of the created image to check its width and height.
Here is the HTML for the example.
<!DOCTYPE html> <html lang="en"> <head> <meta charset="UTF-8" /> <style> body { margin: 100px; } </style> </head> <body> <h2>bobbyhadz.com</h2> <input id="file-input" type="file" accept="image/*" /> <script src="index.js"></script> </body> </html>
And here is the related JavaScript code.
const fileInput = document.getElementById('file-input'); fileInput.addEventListener('change', event => { if (fileInput.files.length > 0) { const img = document.createElement('img'); const selectedImage = fileInput.files[0]; const objectURL = URL.createObjectURL(selectedImage); img.onload = function handleLoad() { console.log(`Width: ${img.width}, Height: ${img.height}`); if (img.width < 100 || img.height < 100) { console.log( "The image's width or height is less than 100px", ); } URL.revokeObjectURL(objectURL); }; img.src = objectURL; document.body.appendChild(img); } fileInput.value = null; });

We used the document.getElementById()
method to select the file input and
added a change event listener
to it.
The next step is to
create an img element.
const img = document.createElement('img');
You can access the selected from the user image as fileInput.files[0].
const selectedImage = fileInput.files[0];
The URL.createObjectURL() method creates a string containing a URL that represents the supplied object.
The
load
event of the img element is triggered when the img successfully loads its
resource.
Once the resource is loaded, we can access the width and height properties
to get the width and height of the image.
const objectURL = URL.createObjectURL(selectedImage); img.onload = function handleLoad() { console.log(`Width: ${img.width}, Height: ${img.height}`); if (img.width < 100 || img.height < 100) { console.log( "The image's width or height is less than 100px", ); } URL.revokeObjectURL(objectURL); }; img.src = objectURL;
You can use an if statement if you need to check if the image's width or
height values meet a certain condition.
Once you're done, call the revokeObjectURL() method to release the object URL and free up resources.
I've also written articles on:
- How to Preview an image before uploading in JavaScript
- Limit the maximum files chosen or the file size in JS input
# Check the width and height of multiple images before upload using JavaScript
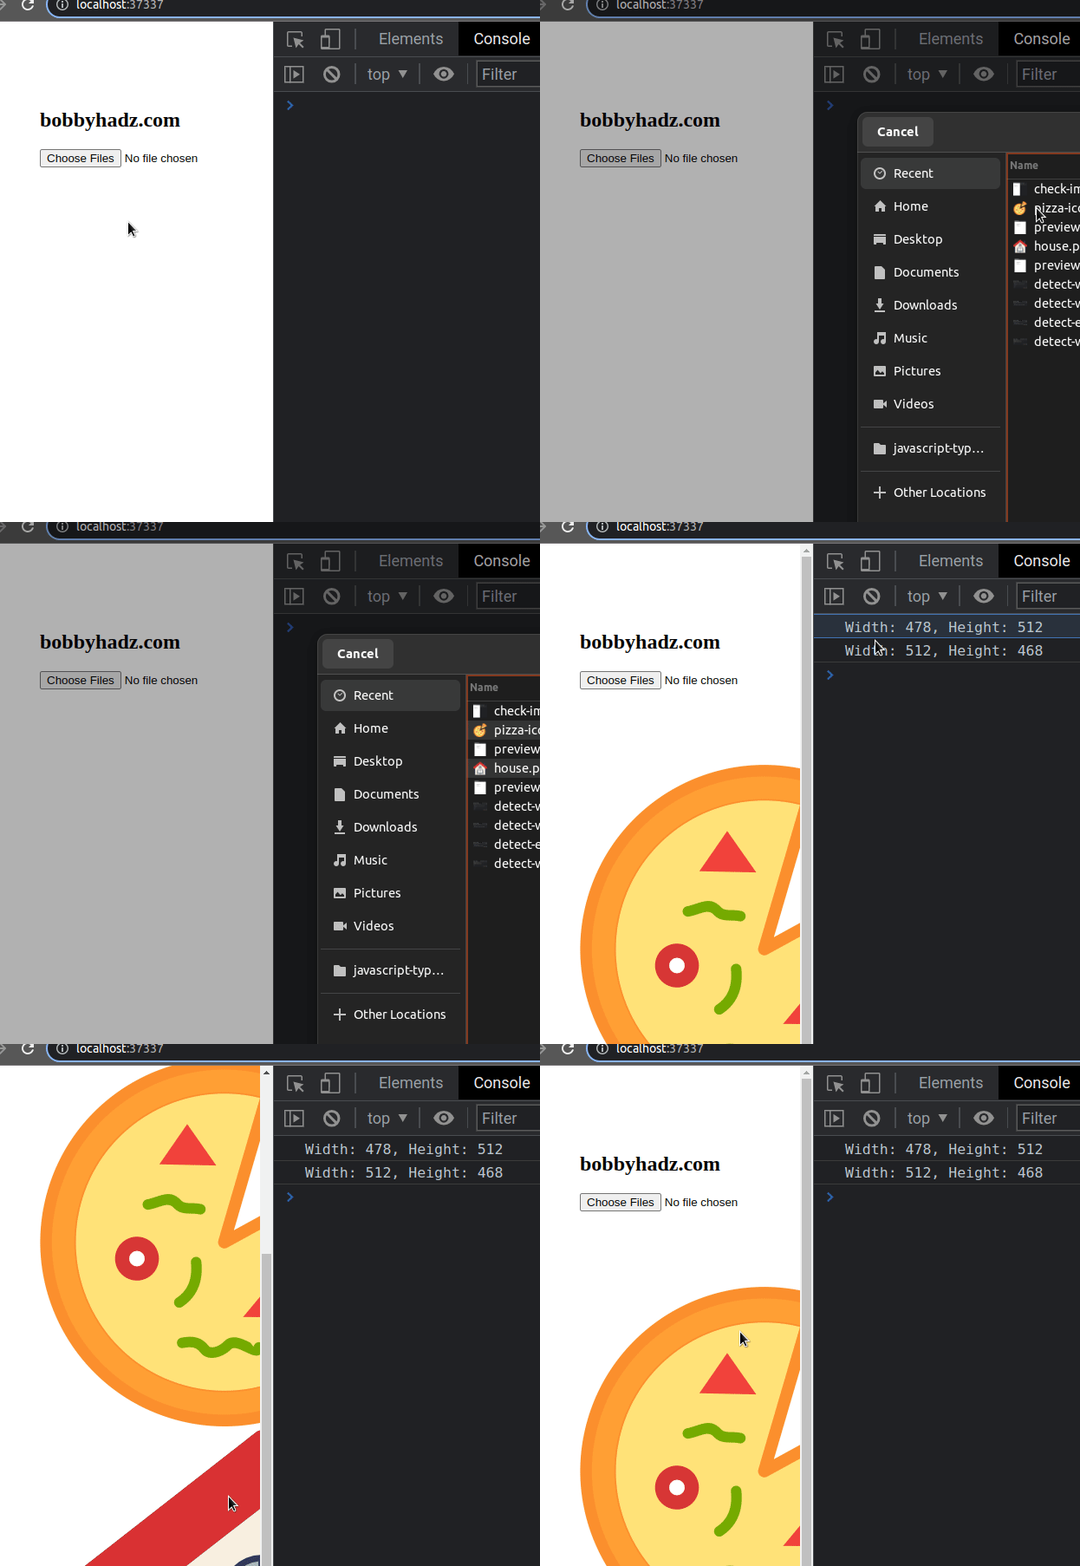
The same approach can be used to check the width and height of multiple images before uploading using JavaScript.
You have to:
- Iterate over the selected files.
- Create an
imgelement for each selected file. - Check the values of its
widthandheightproperties.
Here is the HTML for the example.
<!DOCTYPE html> <html lang="en"> <head> <meta charset="UTF-8" /> <style> body { margin: 100px; } </style> </head> <body> <h2>bobbyhadz.com</h2> <input id="file-input" type="file" accept="image/*" multiple /> <br /> <script src="index.js"></script> </body> </html>
And here is the related JavaScript code.
const fileInput = document.getElementById('file-input'); fileInput.addEventListener('change', event => { if (fileInput.files.length > 0) { const files = fileInput.files; for (const file of files) { const img = document.createElement('img'); const objectURL = URL.createObjectURL(file); img.onload = function handleLoad() { console.log( `Width: ${img.width}, Height: ${img.height}`, ); if (img.width < 100 || img.height < 100) { console.log( "The image's width or height is less than 100px", ); } URL.revokeObjectURL(objectURL); }; img.src = objectURL; document.body.appendChild(img); } } fileInput.value = null; });

We set the multiple attribute on the input type file so the user can
select multiple images by pressing and holding the Ctrl key.
<input id="file-input" type="file" accept="image/*" multiple />
In the change event handler function, we used a
for...of loop to iterate over
the collection of files.
The for...of statement is used to loop over iterable objects like arrays,
strings, Map, Set and NodeList objects and generators.
img element and set its src attribute to the created object URL.When the file's contents are read, the load event is triggered and we can
safely access the width and height properties of the selected image.
for (const file of files) { const img = document.createElement('img'); const objectURL = URL.createObjectURL(file); img.onload = function handleLoad() { console.log( `Width: ${img.width}, Height: ${img.height}`, ); if (img.width < 100 || img.height < 100) { console.log( "The image's width or height is less than 100px", ); } URL.revokeObjectURL(objectURL); }; img.src = objectURL; document.body.appendChild(img); }
You can use an if statement if you need to check if the image's width and
height satisfy your requirements.
After you're done, call the revokeObjectURL() method to avoid memory leaks.
# Additional Resources
You can learn more about the related topics by checking out the following tutorials:
- How to get the MIME type of a File in JavaScript & Node.js
- How to get the status code of an Axios HTTP error
- Get the Status Code of a Fetch HTTP Response in JavaScript
- How to convert an Object to FormData in JavaScript
- How to Make HTTP requests in TypeScript
- File input change event not working in JavaScript [Solved]

