How to Create an Image Element using JavaScript
Last updated: Mar 5, 2024
Reading time·3 min

# Create an Image Element using JavaScript
To create an image element:
- Use the
document.createElement()method to create theimgelement. - Use the
setAttribute()method to set thesrcattribute on the element. - Add the element to the page using the
appendChild()method.
Here is the HTML for the examples.
<!DOCTYPE html> <html lang="en"> <head> <title>bobbyhadz.com</title> <meta charset="UTF-8" /> </head> <body> <div id="box"></div> <script src="index.js"></script> </body> </html>
And here is the related JavaScript code.
const image = document.createElement('img'); // 👇️ Local image // image.setAttribute('src', 'my-img.png'); // 👇️ Remote image image.setAttribute( 'src', 'http://bobbyhadz.com/images/blog/javascript-show-div-on-select-option/banner.webp', ); image.setAttribute('alt', 'nature'); image.setAttribute('height', 350); // 👈️ height in px image.setAttribute('width', 550); // 👈️ width in px // 👇️ optionally style the image image.style.border = '5px solid yellow'; image.onerror = function handleError() { console.log('Image could not be loaded'); // 👇️ Can set image.src to a backup image here // image.src = 'backup-image.png' // 👇️ Or hide image // image.style.display = 'none'; }; image.onload = function handleImageLoaded() { console.log('image loaded successfully'); }; const box = document.getElementById('box'); box.appendChild(image);
We used the document.createElement() method to create the img element.
const image = document.createElement('img');
img in the example).The createElement method returns the newly created element.
We used the setAttribute() method to set
multiple attributes on the img element.
image.setAttribute( 'src', 'http://bobbyhadz.com/images/blog/javascript-show-div-on-select-option/banner.webp', ); image.setAttribute('alt', 'nature'); image.setAttribute('height', 350); // 👈️ height in px image.setAttribute('width', 550); // 👈️ width in px
The setAttribute method takes 2 parameters:
name- the name of the attribute whose value is to be set.value- the value to assign to the attribute.
We set the src attribute to a remote image in the example, however, this could
be an image on your local file system as well.
We set the image's alt, height and width attributes.
The alt attribute defines the alternative text description of the image. It is
mostly used for screen readers.
The width and height properties can be set to a number (without a unit) and
represent the image's width and height in pixels.
You can also set these properties on the style object of the element.
const image = document.createElement('img'); // 👇️ Remote image image.setAttribute( 'src', 'http://bobbyhadz.com/images/blog/javascript-show-div-on-select-option/banner.webp', ); image.setAttribute('alt', 'nature'); image.style.border = '5px solid yellow'; image.style.height = '350px'; image.style.width = '550px';
We added the
onload
event handler on the img element.
image.onload = function handleImageLoaded() { console.log('image loaded successfully'); };
The load event fires when the image has loaded successfully.
You can also add the onerror event on the element. The event fires when the image fails to load.
If the image fails to load, you can use the onerror event to show a default
image or hide the element.
image.onerror = function handleError() { console.log('Image could not be loaded'); // 👇️ Can set image.src to a backup image here // image.src = 'backup-image.png' // 👇️ Or hide image // image.style.display = 'none'; };
There are many other attributes you might need to set on the img element
depending on your use case. Here is a complete list from the
MDN img docs.
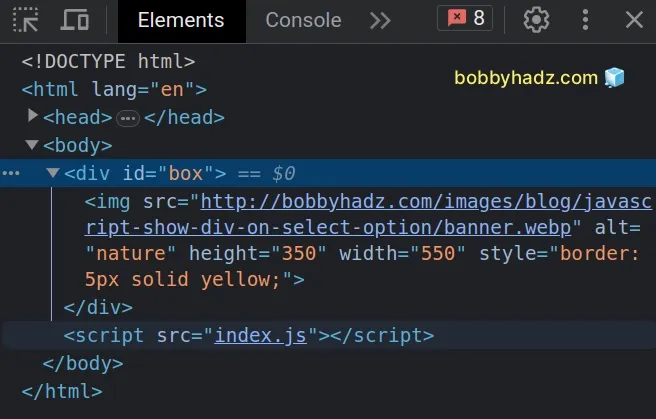
If I load the example from the article in my browser, I can see that the image is created and shown successfully.

# Additional Resources
You can learn more about the related topics by checking out the following tutorials:
- Create an Element with Attributes or Styles in JavaScript
- Create an Element with Classes or ID in JavaScript
- Create an element with onClick event listener using JS
- Create a Script element using JavaScript
- How to create a style tag using JavaScript
- How to Create a Video element using JavaScript
- Failed to execute 'appendChild' on 'Node': parameter 1 is not of type 'Node'
- How to auto-reload a Page every N seconds using JavaScript
- Disable drag and drop on HTML elements using JavaScript
- How to Preview an image before uploading in JavaScript
- Check image width and height before upload using JavaScript

