EC2 Instance Example in AWS CDK - Complete Guide
Last updated: Jan 26, 2024
Reading time·7 min
# Table of Contents
- Creating an EC2 Instance in AWS CDK
- Adding User Data to an EC2 Instance in AWS CDK
- Deploying the EC2 Instance Provisioned with AWS CDK
- EC2 User Data Example in AWS CDK - Complete Guide
# Creating an EC2 Instance in AWS CDK
In order to create an EC2 instance in AWS CDK, we have to instantiate and configure the Instance class.
Let's start by creating:
- a VPC, in which we will launch our EC2 instance
- a security group for the instance
- a role for the instance
import * as ec2 from 'aws-cdk-lib/aws-ec2'; import * as iam from 'aws-cdk-lib/aws-iam'; import * as cdk from 'aws-cdk-lib'; export class CdkStarterStack extends cdk.Stack { constructor(scope: cdk.App, id: string, props?: cdk.StackProps) { super(scope, id, props); // 👇 create VPC in which we'll launch the Instance const vpc = new ec2.Vpc(this, 'my-cdk-vpc', { ipAddresses: ec2.IpAddresses.cidr('10.0.0.0/16'), natGateways: 0, subnetConfiguration: [ {name: 'public', cidrMask: 24, subnetType: ec2.SubnetType.PUBLIC}, ], }); // 👇 create Security Group for the Instance const webserverSG = new ec2.SecurityGroup(this, 'webserver-sg', { vpc, allowAllOutbound: true, }); webserverSG.addIngressRule( ec2.Peer.anyIpv4(), ec2.Port.tcp(22), 'allow SSH access from anywhere', ); webserverSG.addIngressRule( ec2.Peer.anyIpv4(), ec2.Port.tcp(80), 'allow HTTP traffic from anywhere', ); webserverSG.addIngressRule( ec2.Peer.anyIpv4(), ec2.Port.tcp(443), 'allow HTTPS traffic from anywhere', ); // 👇 create a Role for the EC2 Instance const webserverRole = new iam.Role(this, 'webserver-role', { assumedBy: new iam.ServicePrincipal('ec2.amazonaws.com'), managedPolicies: [ iam.ManagedPolicy.fromAwsManagedPolicyName('AmazonS3ReadOnlyAccess'), ], }); } }
Let's go over what we did in the code sample.
We created a VPC with a
PUBLICsubnet group. Our EC2 instance will be a web server, so we want it to be accessible from the worldWe created a security group for our EC2 instance. The security group allows all outbound access.
For inbound access we have allowed:
- SSH access from anywhere
- HTTP traffic on port 80 from anywhere
- HTTPS traffic on port 443 from anywhere
We created an IAM role our EC2 instance will assume. As an example, we have attached a managed policy that grants S3 read access to the role.
Let's add the code that creates the EC2 Instance:
import * as ec2 from 'aws-cdk-lib/aws-ec2'; import * as iam from 'aws-cdk-lib/aws-iam'; import * as cdk from 'aws-cdk-lib'; export class CdkStarterStack extends cdk.Stack { constructor(scope: cdk.App, id: string, props?: cdk.StackProps) { super(scope, id, props); // ... rest // 👇️ Importing your SSH key const keyPair = ec2.KeyPair.fromKeyPairName( this, 'key-pair', 'ec2-key-pair', ); // 👇 create the EC2 Instance const ec2Instance = new ec2.Instance(this, 'ec2-instance', { vpc, vpcSubnets: { subnetType: ec2.SubnetType.PUBLIC, }, role: webserverRole, securityGroup: webserverSG, instanceType: ec2.InstanceType.of( ec2.InstanceClass.BURSTABLE2, ec2.InstanceSize.MICRO, ), machineImage: new ec2.AmazonLinuxImage({ generation: ec2.AmazonLinuxGeneration.AMAZON_LINUX_2, }), keyPair, }); } }
We created an EC2 instance, passing it the following props:
| Name | Description |
|---|---|
vpc | the VPC, the instance will be launched in |
vpcSubnets | in which subnet of the VPC the instance will be launched |
role | the IAM role, the EC2 instance will assume |
securityGroup | a security group to assign to the EC2 instance |
instanceType | the class and size configuration for the EC2 instance, in our case t2.micro |
machineImage | the Amazon Machine Image of the EC2 instance, in our case Amazon Linux 2 |
keyPair | the imported SSH key pair we are going to use to SSH into the instance |
ec2-key-pair for the name of the key. If a key with that name does not exist in your default AWS region, you will get an error when trying to deploy the EC2 instance.Let's create a key pair in your default
AWS region with the name ec2-key-pair.
Alternatively, you could replace the value of the key pair name to one that
already exists in your account.
To create a key pair, open the EC2 Management console and click on Key Pairs >
Create key pair.
Depending on your operating system you can choose between pem (Mac, Linux) and
ppk (Windows). I'm on Linux, so I've selected pem:

After the key pair has been created, navigate to the directory it was downloaded in and change its permissions:
chmod 400 ec2-key-pair.pem
Next, we are going to add a User Data script to the ec2 instance.
# Adding User Data to an EC2 Instance in AWS CDK
EC2 User data allows us to add commands to the startup script of an instance.
To add user data, we are going to use the addUserData method on our EC2 instance.
import * as ec2 from 'aws-cdk-lib/aws-ec2'; import * as iam from 'aws-cdk-lib/aws-iam'; import * as cdk from 'aws-cdk-lib'; import {readFileSync} from 'fs'; export class CdkStarterStack extends cdk.Stack { constructor(scope: cdk.App, id: string, props?: cdk.StackProps) { super(scope, id, props); // ... rest // 👇 load contents of script const userDataScript = readFileSync('./lib/user-data.sh', 'utf8'); // 👇 add the User Data script to the Instance ec2Instance.addUserData(userDataScript); } }
We used the readFileSync method from the fs module to load the contents of
a script. We then passed the result to the addUserData method of the EC2
instance.
Let's add the code for the user data script at lib/user-data.sh:
#!/bin/bash yum update -y sudo su amazon-linux-extras install -y nginx1 systemctl start nginx systemctl enable nginx chmod 2775 /usr/share/nginx/html find /usr/share/nginx/html -type d -exec chmod 2775 {} \; find /usr/share/nginx/html -type f -exec chmod 0664 {} \; echo "<h1>It worked</h1>" > /usr/share/nginx/html/index.html
The startup script installs and starts Nginx and writes a simple "It worked" heading tag to the root of our web server.
# Deploying the EC2 Instance Provisioned with AWS CDK
Let's run the deployment command and test if everything works as expected:
npx aws-cdk deploy
It takes about 5 minutes for the EC2 instance to be launched in my default AWS region.
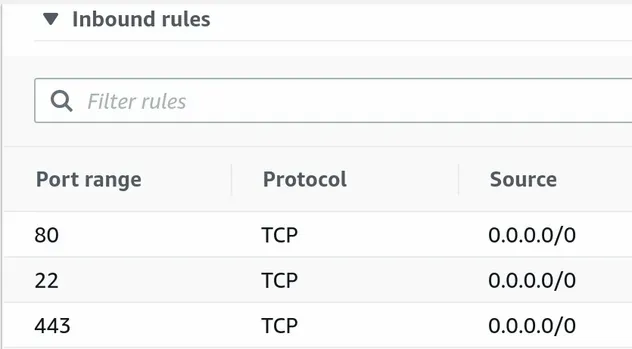
The inbound rules for the security group of the EC2 instance allow access on
ports 22, 80, 443:
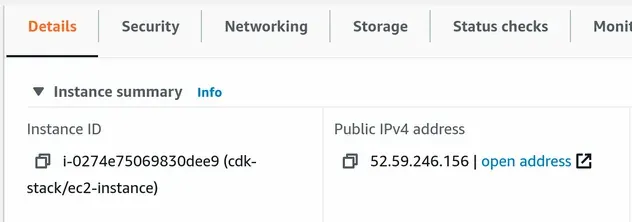
Let's try to access the Nginx server we installed and started. Copy the Public IPv4 address of your EC2 instance:
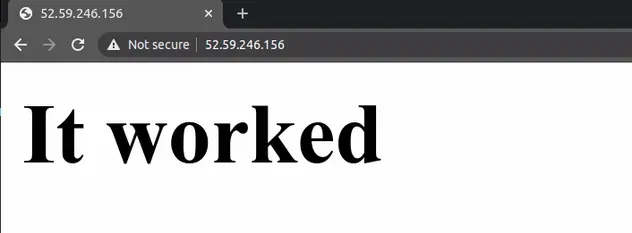
Now paste the public IPv4 address in your browser and you should see the response from our Nginx web server:
Now let's SSH into the instance and change the message our Nginx web server responds with.
Open your terminal in the directory where you placed your ec2-key-pair.pem
file and issue the following command:
ssh -i "ec2-key-pair.pem" ec2-user@YOUR_PUBLIC_IPv4
YOUR_PUBLIC_IPv4 placeholder with your EC2 instance's actual Public IPv4 address.Once you're in the instance, change the response of the web server with the following commands:
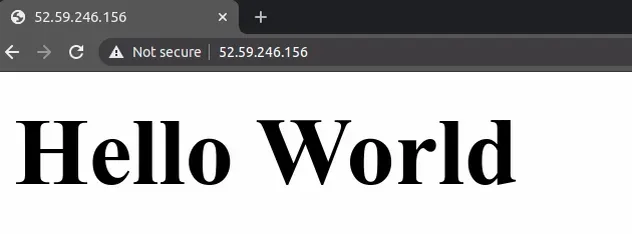
sudo su echo "<h1>Hello World</h1>" > /usr/share/nginx/html/index.html
If you now paste the public IPv4 address of the EC2 instance in your browser, you will see the updated response:
# Clean up
To delete the resources we have provisioned, issue the destroy command:
npx aws-cdk destroy
# EC2 User Data Example in AWS CDK - Complete Guide
User data allows us to add commands to the startup script of an EC2 instance.
In order to add user data to an EC2 instance, we have to load the script from the local file system and pass it to the addUserData method on the instance.
import {readFileSync} from 'fs'; // 👇 load user data script const userDataScript = readFileSync('./lib/user-data.sh', 'utf8'); // 👇 add user data to the EC2 instance ec2Instance.addUserData(userDataScript);
We're going to look at a complete example of creating an EC2 instance and adding user data to it. Our user data script installs and starts an Apache web server.
Let's look at the code for the complete example:
import * as ec2 from 'aws-cdk-lib/aws-ec2'; import * as cdk from 'aws-cdk-lib'; import {readFileSync} from 'fs'; export class CdkStarterStack extends cdk.Stack { constructor(scope: cdk.App, id: string, props?: cdk.StackProps) { super(scope, id, props); // 👇 import default VPC const vpc = ec2.Vpc.fromLookup(this, 'my-default-vpc', { isDefault: true, }); // 👇 create a security group for the EC2 instance const webserverSG = new ec2.SecurityGroup(this, 'webserver-sg', { vpc, }); webserverSG.addIngressRule( ec2.Peer.anyIpv4(), ec2.Port.tcp(80), 'allow HTTP traffic from anywhere', ); // 👇 create the EC2 instance const ec2Instance = new ec2.Instance(this, 'ec2-instance', { vpc, vpcSubnets: { subnetType: ec2.SubnetType.PUBLIC, }, securityGroup: webserverSG, instanceType: ec2.InstanceType.of( ec2.InstanceClass.BURSTABLE2, ec2.InstanceSize.MICRO, ), machineImage: new ec2.AmazonLinuxImage({ generation: ec2.AmazonLinuxGeneration.AMAZON_LINUX_2, }), }); // 👇 load user data script const userDataScript = readFileSync('./lib/user-data.sh', 'utf8'); // 👇 add user data to the EC2 instance ec2Instance.addUserData(userDataScript); } }
Let's go over the code snippet.
- We imported the default VPC, in which we'll launch the EC2 instance
- We created a security group with the following inbound rule:
| Type | Protocol | Port | Source |
|---|---|---|---|
| HTTP | TCP | 80 | 0.0.0.0/0 |
We allowed inbound HTTP traffic on port 80 from anywhere. Note that by
default all outbound traffic is allowed.
We created a
t2.microEC2 instance withAMAZON LINUX 2AMI. The instance is launched in a public subnet of our VPC because we'll use it as a web server.We loaded the user data script from the file system and passed it in a call to the
addUserDatamethod on the instance.
Let's add the user data script, which installs and starts an apache web server,
at lib/user-data.sh:
#!/bin/bash sudo su yum update -y yum install -y httpd systemctl start httpd systemctl enable httpd echo "<h1>Hello World from $(hostname -f)</h1>" > /var/www/html/index.html
The script installs and starts the apache webserver.
If our user data script works as intended, our web server should respond with a simple "Hello World" message, when we paste the instance's public IPv4 address in our web browser.
Next, we'll deploy and test our user data script.
# Deploying our EC2 instance with User Data in AWS CDK
Let's deploy the instance and test our user data script.
npx aws-cdk deploy
After about 5 minutes the EC2 instance is created.
Copy the Public IPv4 address of the instance:
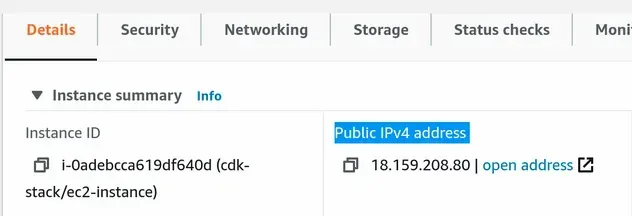
And paste it into your browser:
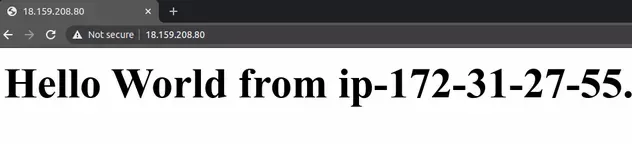
We can see that the user data script we added to our EC2 instance, has installed and booted our Apache web server successfully.
# Clean up
To delete the resources we provisioned, run the destroy command:
npx aws-cdk destroy
# Additional Resources
You can learn more about the related topics by checking out the following tutorials:
- RDS Example in AWS CDK - Complete Guide
- VPC Example in AWS CDK - Complete Guide
- Security Group Example in AWS CDK - Complete Guide
- Subnet Selection Example in AWS CDK
- AWS CDK Tutorial for Beginners - Step-by-Step Guide
- How to use Context in AWS CDK
- How to use Parameters in AWS CDK
- Application Load Balancer Example in AWS CDK
- apt-get command not Found AWS EC2 Error [Solved]
- Warning Unprotected Private Key File AWS EC2 Error
- AWS SSH Permission denied (PublicKey) Error [Solved]

