VPC Example in AWS CDK - Complete Guide
Last updated: Jan 26, 2024
Reading time·7 min
# Creating a VPC in AWS CDK
A VPC is a virtual private network that is isolated from other AWS customers.
We are going to cover how to create and configure a VPC in CDK, what the defaults are, and general things you should be aware of when provisioning VPCs in CDK.
$0.045 in the us-east-1 region.To create a VPC in AWS CDK, we have to instantiate and configure the Vpc class.
Let's look at an example of creating a VPC in CDK:
import * as ec2 from 'aws-cdk-lib/aws-ec2'; import * as cdk from 'aws-cdk-lib'; export class CdkStarterStack extends cdk.Stack { constructor(scope: cdk.App, id: string, props?: cdk.StackProps) { super(scope, id, props); const vpc = new ec2.Vpc(this, 'my-cdk-vpc', { ipAddresses: ec2.IpAddresses.cidr('10.0.0.0/16'), natGateways: 1, maxAzs: 3, subnetConfiguration: [ { name: 'private-subnet-1', subnetType: ec2.SubnetType.PRIVATE_WITH_EGRESS, cidrMask: 24, }, { name: 'public-subnet-1', subnetType: ec2.SubnetType.PUBLIC, cidrMask: 24, }, { name: 'isolated-subnet-1', subnetType: ec2.SubnetType.PRIVATE_ISOLATED, cidrMask: 28, }, ], }); } }
We used the Vpc class to create a VPC resource.
The configuration props we passed to the construct are:
ipAddresses- the CIDR block of the VPC. Must be between/16(65536 IP Addresses) and/28(16 IP addresses). The default value for a CIDR range is10.0.0.0/16.natGateways- how many NAT gateways should be created for the VPC. By default, one NAT Gateway is created for each availability zone. When testing you should lower the number ofnatGatewaysto 1 to avoid burning money.To use NAT instances instead of NAT gateways, we can set the
natGatewayProviderprop toec2.NatProvider.instance:
const vpc = new ec2.Vpc(this, 'my-cdk-vpc', { natGatewayProvider: ec2.NatProvider.instance({ instanceType: new ec2.InstanceType('t2.micro'), }) })
maxAzs- the maximum number of availability zones to use in the region. By default3availability zones are used for stacks, where we explicitly set theenvironment(account and region) and2availability zones are used forenvironment-agnosticstacks.There are regions that currently have only 2 availability zones, so the safe bet for CDK is to cap us at 2 AZs for
environment-agnosticstacks.subnetConfiguration- specifies the subnets that will be created in each availability zone. In our case, we have provisioned 3 subnet groups - 1 private, 1 public, 1 isolated.Because we have configured the VPC to use a maximum of 3 availability zones, each subnet group will create 1 subnet in each availability zone = 9 total subnets.
The default
subnetConfigurationis that the VPC CIDR block is divided between 1 public and 1 private subnet per Availability Zone, which means no isolated subnets are provisioned by default.
Let's look at the difference between the 3 types of subnets:
PRIVATE_WITH_EGRESSsubnet - resources provisioned inPRIVATEsubnets have access to the internet via a NAT Gateway, however, they can't be accessed from the internet.We created a private subnet group and our VPC is configured for a maximum of
3availability zones, therefore we are going to create 3 private subnets - 1 in each availability zone.Because we've set the
natGatewaysprop to1, we will only create 1 NAT gateway, so for 2 of the private subnets, we will use a NAT gateway from another availability zone.Private subnets are often used for our backend servers, where we need to download patches and updates from the internet, but we don't want the instances we provision to be directly accessible from the internet.
PUBLICsubnet - resources provisioned inPUBLICsubnets have access to the internet via an Internet Gateway and can be accessed from the internet as long as they have a public IP address.Public subnets are often used for a webserver, where we need the whole world to be able to access it on ports
80and443.PRIVATE_ISOLATEDsubnet - resources provisioned inPRIVATE_ISOLATEDsubnets don't have access to the internet and can't be accessed from the internet. They can only access and be accessed, from instances in the same VPC.Isolated subnets are often used for databases.
Let's deploy the resources and see what we provisioned:
npx aws-cdk deploy
If we take a look at the CloudFormation management console, it shows that we provisioned 39 resources with our ~20 lines of VPC definition.
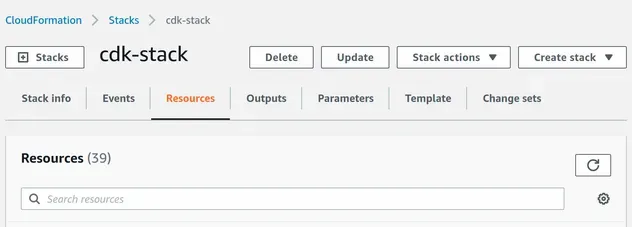
Let's look at the VPC components we provisioned.
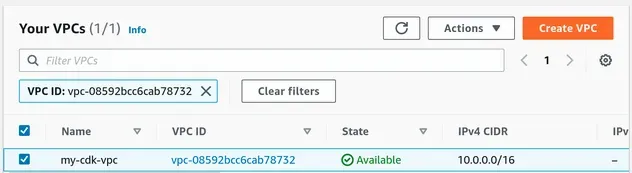
- The VPC:

From the screenshot we can see the naming convention for the VPC is that the stack name is also included. We are going to see how we can update the name by changing the tag of our VPC later in the article.
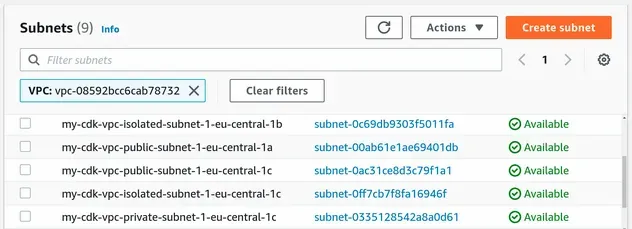
- The subnets:
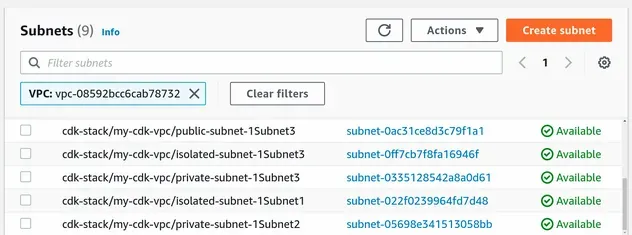
We used a maximum of 3 AZs for the VPC. For each AZ we created public, private and isolated subnet groups. This makes up a total of 9 subnets.
My default region is eu-central-1 and it has 3 AZs, your results will differ
if your default region only has 2 AZs.
The names of the subnets are quite confusing and verbose, we are going to update them by changing the tag associated with each subnet later in the article.
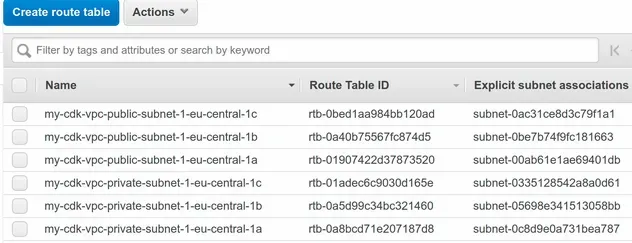
- The Route tables:
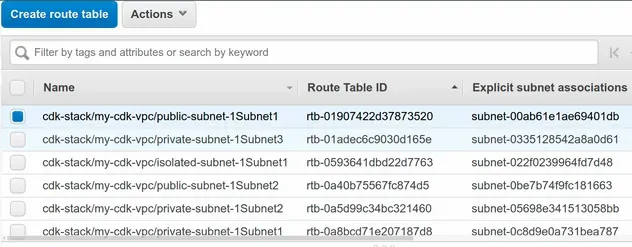
We created a total of 10 route tables - 1 route table for each of the 9 subnets, and 1 default route table.
The default routes for a route table associated with a PUBLIC subnet are
configured to route traffic to the internet through an Internet Gateway:
| Destination | Target | Status | Propagated |
|---|---|---|---|
10.0.0.0/16 | local | active | No |
0.0.0.0/0 | IGW-ID | active | No |
The default routes for a route table associated with a PRIVATE subnet are
configured to route traffic to the internet through a NAT Gateway:
| Destination | Target | Status | Propagated |
|---|---|---|---|
10.0.0.0/16 | local | active | No |
0.0.0.0/0 | NATGW-ID | active | No |
The default routes for a route table associated with an ISOLATED subnet are to
only route traffic to resources inside the VPC:
| Destination | Target | Status | Propagated |
|---|---|---|---|
10.0.0.0/16 | local | active | No |
- The Internet gateway:
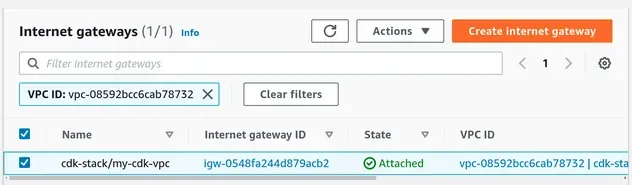
The internet gateway we provisioned, for our public subnets, has been attached to the VPC.
- The NAT Gateway:

A NAT Gateway with an elastic IP has been provisioned to route traffic to the internet from our private subnets.
- The Network Access Control Lists (NACLs):
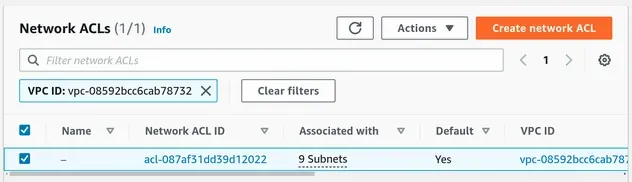
A default NACL has been associated with all 9 of our subnets. As expected, by default the inbound and outbound rules allow all traffic.
- The Security Groups:
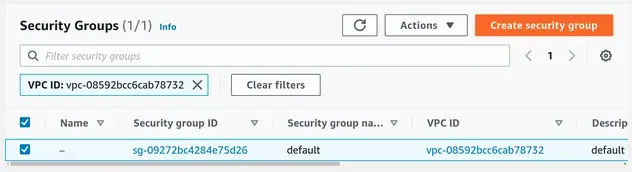
The Inbound rules for the default
security group allow all traffic, that
comes from resources within the same security group, on all ports:
| Type | Protocol | Port range | Source |
|---|---|---|---|
| All traffic | All | All | SG-ID |
The Outbound rules for the default security group allow all traffic to all
destinations, on all ports:
| Type | Protocol | Port range | Destination |
|---|---|---|---|
| All traffic | All | All | 0.0.0.0/0 |
Next, let's look at how we can change the names of the VPC components we provisioned.
# Changing Names of VPC Components in AWS CDK
In order to change the names of VPC components in AWS CDK, we have to change
the Name tag associated with the resources.
The easiest way to change the tags associated with all constructs within a given scope is to use CDK Aspects.
Let's look at an example of how we would use aspects to change the tags of our VPC and subnets:
import * as ec2 from 'aws-cdk-lib/aws-ec2'; import * as cdk from 'aws-cdk-lib'; export class CdkStarterStack extends cdk.Stack { constructor(scope: cdk.App, id: string, props?: cdk.StackProps) { super(scope, id, props); // ... rest // 👇 update the Name tag for the VPC cdk.Aspects.of(vpc).add(new cdk.Tag('Name', 'my-cdk-vpc')); // 👇 update the Name tag for public subnets for (const subnet of vpc.publicSubnets) { cdk.Aspects.of(subnet).add( new cdk.Tag( 'Name', `${vpc.node.id}-${subnet.node.id.replace(/Subnet[0-9]$/, '')}-${ subnet.availabilityZone }`, ), ); } // 👇 update the Name tag for private subnets for (const subnet of vpc.privateSubnets) { cdk.Aspects.of(subnet).add( new cdk.Tag( 'Name', `${vpc.node.id}-${subnet.node.id.replace(/Subnet[0-9]$/, '')}-${ subnet.availabilityZone }`, ), ); } // 👇 update the Name tag for private subnets for (const subnet of vpc.isolatedSubnets) { cdk.Aspects.of(subnet).add( new cdk.Tag( 'Name', `${vpc.node.id}-${subnet.node.id.replace(/Subnet[0-9]$/, '')}-${ subnet.availabilityZone }`, ), ); } } }
We used CDK Aspects to update the Name tag of our VPC components.
To remove some of the duplication, you could extract the logic in a function.
Here is an example.
function tagSubnets(subnets: ec2.ISubnet[], tagName: string, tagValue: string) { for (const subnet of subnets) { cdk.Aspects.of(subnet).add(new cdk.Tag(tagName, tagValue)); } } tagSubnets(vpc.privateSubnets, 'Name', `your-private-subnet-name`); tagSubnets(vpc.publicSubnets, 'Name', `your-public-subnet-name`);
The expected name of the VPC after the change is my-cdk-vpc, and the expected
name for a public subnet is my-cdk-vpc-public-subnet-1-us-east-1a, etc.
Let's deploy the changes:
npx aws-cdk deploy
After the Name tag has been updated, the VPC name is easier to read:
The same counts for our subnets, which now include the availability zone in the subnet name:
Since each subnet is associated with a route table, the subnet name tags have been applied to the route tables as well:
# Clean up
To delete the resources we have provisioned, issue the destroy command:
npx aws-cdk destroy
# Additional Resources
You can learn more about the related topics by checking out the following tutorials:
- RDS Example in AWS CDK - Complete Guide
- How to import an Existing VPC in AWS CDK
- EC2 Instance Example in AWS CDK - Complete Guide
- Security Group Example in AWS CDK - Complete Guide
- Subnet Selection Example in AWS CDK
- Create Lambda Functions in a VPC in AWS CDK
- What is a Token in AWS CDK
- What is an identifier (id) in AWS CDK
- How to use Context in AWS CDK
- How to use Parameters in AWS CDK
- botocore.exceptions.NoRegionError: You must specify a region

