How to Print a List in Columns in Python
Last updated: Apr 9, 2024
Reading time·6 min

# Table of Contents
- Print a List in Columns in Python
- Print a List of Lists in columns in Python
- Print a List in Tabular format using tabulate
- Print a List in Tabular format using prettytable
# Print a list in columns in Python
To print a list in columns:
- Use the
zip()function to get a zip object of tuples. - Use a formatted string literal to format the items in each tuple in a row.
- Use the
print()function to print the result.
my_list = ['a', 'b', 'c', 'd', 'e', 'f', 'g', 'h', 'i'] columns = 3 # a b c # d e f # g h i for first, second, third in zip( my_list[::columns], my_list[1::columns], my_list[2::columns] ): print(f'{first: <10}{second: <10}{third}')
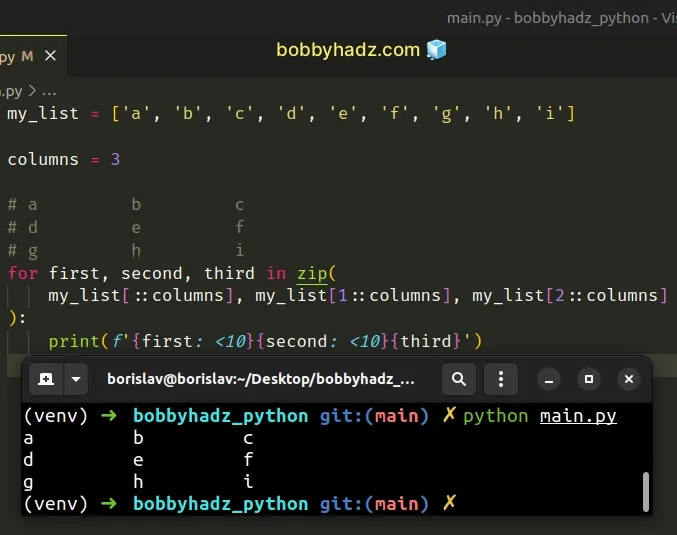
The zip function iterates over several iterables in parallel and produces tuples with an item from each iterable.
The zip function returns an iterator of tuples.
my_list = ['a', 'b', 'c', 'd', 'e', 'f', 'g', 'h', 'i'] columns = 3 # 👇️ [('a', 'b', 'c'), ('d', 'e', 'f'), ('g', 'h', 'i')] print( list( zip( my_list[::columns], my_list[1::columns], my_list[2::columns]) ) )
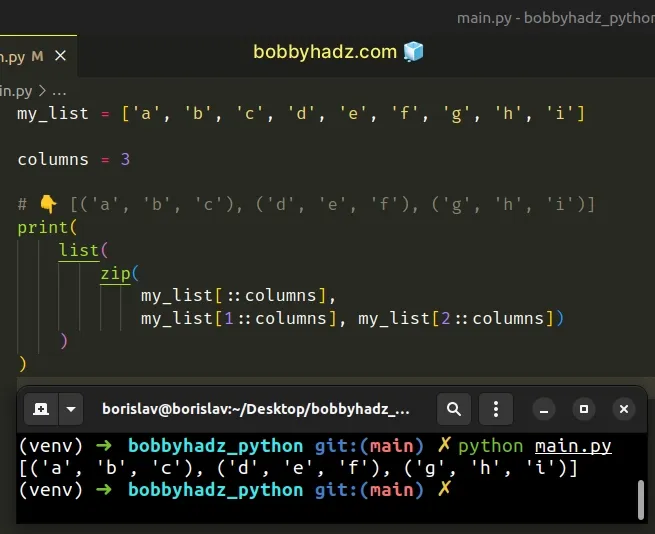
We used list slicing in the call to
the zip() function.
my_list = ['a', 'b', 'c', 'd', 'e', 'f', 'g', 'h', 'i'] print(my_list[::3]) # 👉️ ['a', 'd', 'g'] print(my_list[1::3]) # 👉️ ['b', 'e', 'h'] print(my_list[2::3]) # 👉️ ['b', 'e', 'h']
The syntax for list slicing is my_list[start:stop:step].
step value to get a list containing every 3 elements because we want to print 3 columns.The first list slice contains every 3 elements of the original list starting at
index 0.
The second list slice contains every 3 elements of the original list starting at
index 1.
The last step is to use a formatted string literal to format the list items in columns.
my_list = ['a', 'b', 'c', 'd', 'e', 'f', 'g', 'h', 'i'] columns = 3 # a b c # d e f # g h i for first, second, third in zip( my_list[::columns], my_list[1::columns], my_list[2::columns] ): print(f'{first: <10}{second: <10}{third}')
Formatted string literals also enable us to use the format-specific mini-language in expression blocks.
my_str = 'hi' # 👇️ left-aligned result = f'{my_str: <6}' print(repr(result)) # 👉️ 'hi ' # 👇️ right-aligned result = f'{my_str: >6}' print(repr(result)) # 👉️ ' hi'
The space between the colon and the less-than sign is the fill character.
The less-than or greater-than sign is the alignment.
# Printing the list in 2 columns
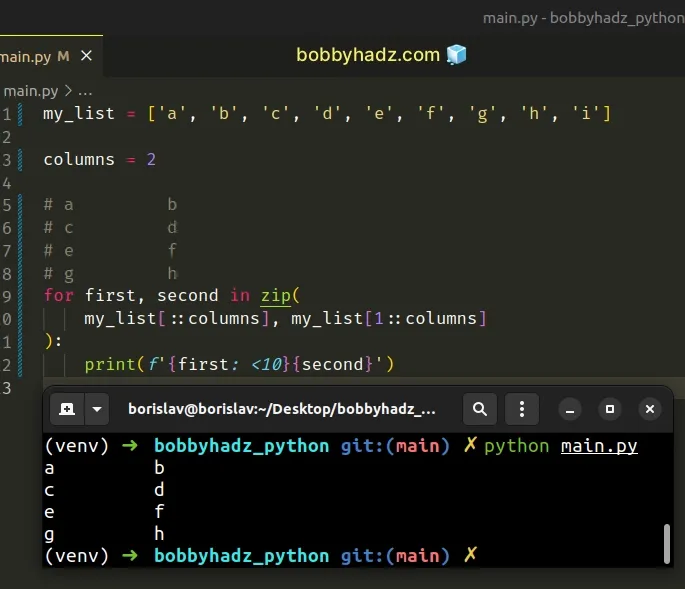
You can print the list in two columns with some very minor changes.
my_list = ['a', 'b', 'c', 'd', 'e', 'f', 'g', 'h', 'i'] columns = 2 # a b # c d # e f # g h for first, second in zip( my_list[::columns], my_list[1::columns] ): print(f'{first: <10}{second}')
# Printing the headers of the list as well
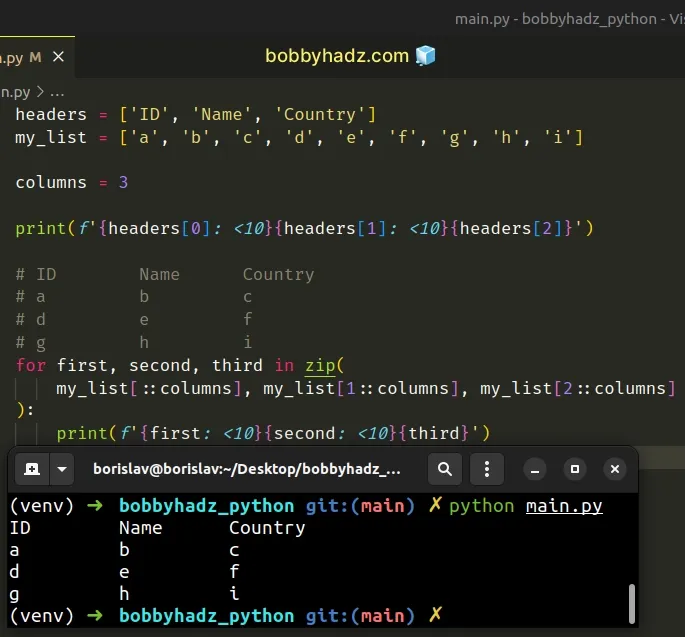
You can also print the headers before you print any of the columns.
headers = ['ID', 'Name', 'Country'] my_list = ['a', 'b', 'c', 'd', 'e', 'f', 'g', 'h', 'i'] columns = 3 print(f'{headers[0]: <10}{headers[1]: <10}{headers[2]}') # ID Name Country # a b c # d e f # g h i for first, second, third in zip( my_list[::columns], my_list[1::columns], my_list[2::columns] ): print(f'{first: <10}{second: <10}{third}')
# Print a List of Lists in columns in Python
To print a list in tabular format:
- Use a formatted string literal to print the headers.
- Iterate over the list and format each row.
- Use the
print()function to print the result.
headers = [ 'ID', 'Name', 'Country' ] employees = [ [1, 'alice', 'Austria'], [2, 'bobbyhadz', 'Bulgaria'], [3, 'carl', 'Canada'], ] print(f'{headers[0]: <10}{headers[1]: <15}{headers[2]}') # ID Name Country # 1 alice Austria # 2 bobbyhadz Bulgaria # 3 carl Canada for row in employees: print(f'{row[0]: <10}{row[1]: <15}{row[2]}')
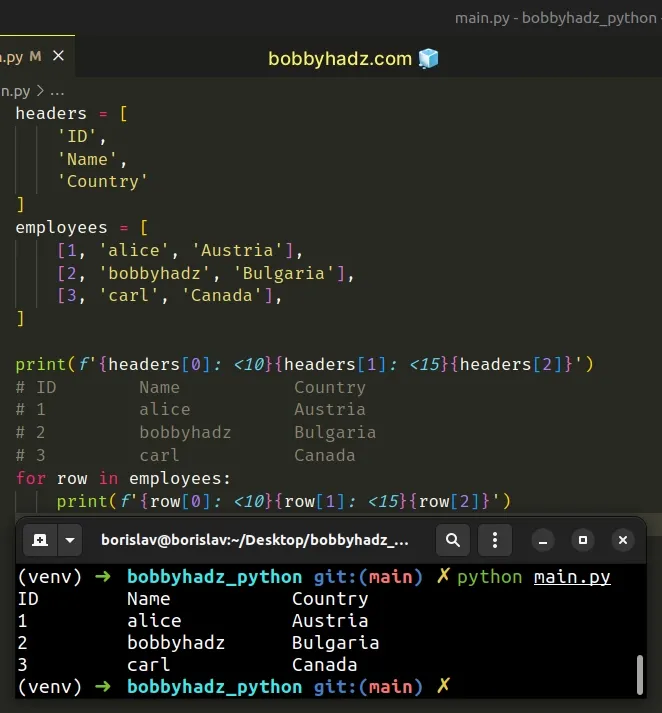
We used a formatted string literal to format the headers and rows.
Formatted string literals also enable us to use the format-specific mini-language in expression blocks.
my_str = 'hi' # 👇️ left-aligned result = f'{my_str: <6}' print(repr(result)) # 👉️ 'hi ' # 👇️ right-aligned result = f'{my_str: >6}' print(repr(result)) # 👉️ ' hi'
The space between the colon and the less-than sign is the fill character.
The less-than or greater-than sign is the alignment.
We first format and print the headers and then iterate over the list and print each row.
# Print a list in Tabular format using tabulate
- Run the
pip install tabulatecommand to install thetabulatemodule. - Pass the list as an argument to the
tabulate()method.
First, open your terminal in your project's root directory and install the tabulate module.
pip install tabulate # 👇️ or with pip3 pip3 install tabulate
Now we can import and use the tabulate method.
from tabulate import tabulate headers = [ 'ID', 'Name', 'Country' ] employees = [ [1, 'alice', 'Austria'], [2, 'bobbyhadz', 'Bulgaria'], [3, 'carl', 'Canada'], ] # ID Name Country # ---- --------- --------- # 1 alice Austria # 2 bobbyhadz Bulgaria # 3 carl Canada print(tabulate(employees, headers=headers))
As the documentation states, the following tabular data types are supported:
- list of lists or another iterable of iterables
- list or another iterable of dictionaries (keys as columns)
- dictionary of iterables (keys as columns)
- two-dimensional Numpy arrays
- NumPy record arrays (names as columns)
- pandas.DataFrame
The tabulate() method also takes a tablefmt argument that can be used to
format the table.
from tabulate import tabulate headers = [ 'ID', 'Name', 'Country' ] employees = [ [1, 'alice', 'Austria'], [2, 'bobbyhadz', 'Bulgaria'], [3, 'carl', 'Canada'], ] # | ID | Name | Country | # |------|-----------|-----------| # | 1 | alice | Austria | # | 2 | bobbyhadz | Bulgaria | # | 3 | carl | Canada | print(tabulate(employees, headers=headers, tablefmt='github'))
If you need to test some of the other options, scroll down to the "Table format" section in the documentation.
You can also set the headers argument to "firstrow" if your headers are
stored in the first row of the list.
# Print a list in Tabular format using prettytable
Alternatively, you can use the prettytable module.
- Run the
pip install prettytablecommand to install theprettytablemodule. - Use the
PrettyTableclass from the module to print the list in tabular format.
First, open your terminal and install the prettytable module.
python -m pip install -U prettytable # 👇️ or python3 python3 -m pip install -U prettytable
Now we can import and use the PrettyTable class.
from prettytable import PrettyTable headers = [ 'ID', 'Name', 'Country' ] employees = [ [1, 'alice', 'Austria'], [2, 'bobbyhadz', 'Bulgaria'], [3, 'carl', 'Canada'], ] pt = PrettyTable(headers) pt.add_rows(employees) # +----+-----------+----------+ # | ID | Name | Country | # +----+-----------+----------+ # | 1 | alice | Austria | # | 2 | bobbyhadz | Bulgaria | # | 3 | carl | Canada | # +----+-----------+----------+ print(pt)
The prettytable module can also be used for sorting.
You can also change the formatting of the table.
from prettytable import PrettyTable, MSWORD_FRIENDLY headers = [ 'ID', 'Name', 'Country' ] employees = [ [1, 'alice', 'Austria'], [2, 'bobbyhadz', 'Bulgaria'], [3, 'carl', 'Canada'], ] pt = PrettyTable(headers) pt.set_style(MSWORD_FRIENDLY) pt.add_rows(employees) # | ID | Name | Country | # | 1 | alice | Austria | # | 2 | bobbyhadz | Bulgaria | # | 3 | carl | Canada | print(pt)
You can view some of the other formatting options in the "Setting a table style" section of the documentation.
I've also written an article on how to print a dictionary in table format.
# Additional Resources
You can learn more about the related topics by checking out the following tutorials:
- How to print Boolean values in Python
- How to Print on the Same Line in Python
- How to Print a Horizontal Line in Python
- How to print Integer values in Python
- Print a List without the Commas and Brackets in Python
- Print New Line after a Variable in Python
- How to Print the output of a Function in Python
- How to Print specific items in a List in Python
- Print specific key-value pairs of a dictionary in Python
- How to repeat a String N times in Python
- How to escape commas in a CSV File [with Examples]
- How to close the Window in Tkinter [5 easy Ways]
- How to print Bold text in Python [5 simple Ways]
- Using nested Loops to print a Rectangle in Python
- How to print a Timestamp for Logging in Python

