Create a Zip archive of a Directory in Python [5 Ways]
Last updated: Apr 11, 2024
Reading time·5 min

# Table of Contents
- How to create a Zip archive of a Directory in Python
- Using the
zipfilemodule to zip a directory in Python - Creating a Zip archive of a Directory in Python using the command line
- Creating a Zip archive of a Python application
# How to create a Zip archive of a Directory in Python
Use the shutil.make_archive() method to create a zip archive of a directory
in Python.
The method creates an archive file (such as zip or tar) and returns its
name.
import shutil path_to_dir = './my-directory' output_filename = 'my-zip' shutil.make_archive(output_filename, 'zip', path_to_dir) print('Zip archive of directory created.')
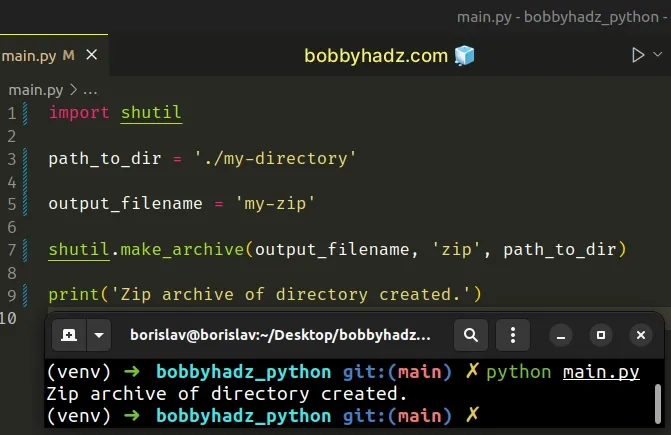
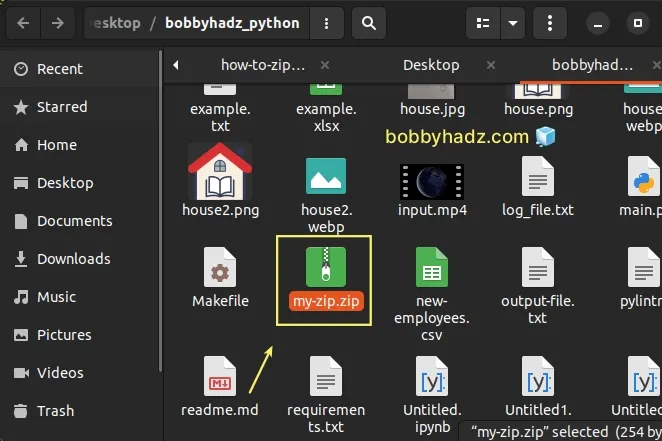
Running the code sample with python main.py produces a file named my-zip.zip
located in the same directory as your Python script.
The
shutil.make_archive()
method creates an archive file (such as zip or tar) and returns its name.
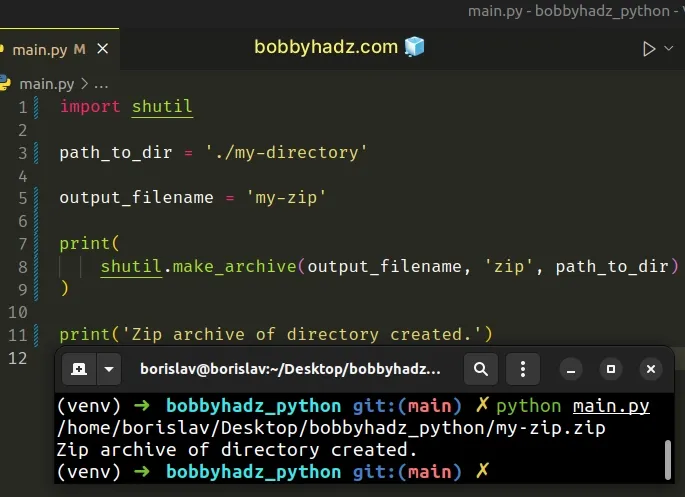
If you print the output of calling the shutil.make_archive() method, you will
see the path to the newly created zip file.
import shutil path_to_dir = './my-directory' output_filename = 'my-zip' # 👇️ /home/borislav/Desktop/bobbyhadz_python/my-zip.zip print( shutil.make_archive(output_filename, 'zip', path_to_dir) ) print('Zip archive of directory created.')
The shutil.make_archive method should be your preferred approach when you need
to zip a directory recursively.
The first argument we passed to the method is the base_name.
The base_name is the name of the zip file to be created, including the path,
excluding a format-specific extension.
Notice that we didn't specify the extension in the first argument.
The second argument the method takes is the format.
The format argument can be one of:
zip(if thezlibmodule is available)targztar(if thezlibmodule is available)bztar(if thebz2module is available)xztar(if thelzmamodule is available)
The third argument we passed to the method is the root directory of the archive.
All paths in the archive will be relative to the specified root directory.
# Using the zipfile module to zip a directory in Python
You can also use the zipfile module to zip a directory in Python.
The module provides classes and methods that enable you to create, read, write, append and list a ZIP file.
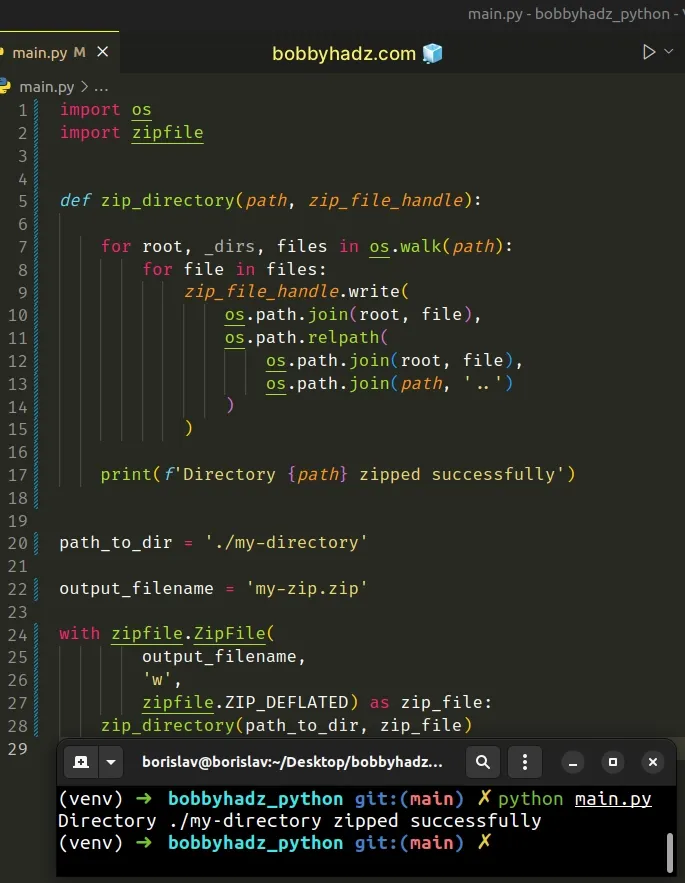
import os import zipfile def zip_directory(path, zip_file_handle): for root, _dirs, files in os.walk(path): for file in files: zip_file_handle.write( os.path.join(root, file), os.path.relpath( os.path.join(root, file), os.path.join(path, '..') ) ) print(f'Directory {path} zipped successfully') path_to_dir = './my-directory' output_filename = 'my-zip.zip' with zipfile.ZipFile( output_filename, 'w', zipfile.ZIP_DEFLATED) as zip_file: zip_directory(path_to_dir, zip_file)
We used the
zipfile.ZipFile
class to open a ZIP file in w (write) mode.
path_to_dir = './my-directory' output_filename = 'my-zip.zip' with zipfile.ZipFile( output_filename, 'w', zipfile.ZIP_DEFLATED) as zip_file: zip_directory(path_to_dir, zip_file)
We passed the following argument to the class:
- The name of the output
.zipfile. - The mode - can be
r(read),w(write),a(append) orx(exclusive create). - The compression - The
zipfile.ZIP_DEFLATEDcompression is a numeric constant for the usual ZIP compression method. Make sure the zlib module is available to be able to use the constant.
The zip_directory function takes the path to the directory and the zip file
handle and creates a zip of the contents of the directory.
The os.walk() method generates the file names in a directory tree by walking the tree top-down.
The tuple contains:
- The directory path.
- The directory names.
- The filenames.
import os import zipfile def zip_directory(path, zip_file_handle): for root, _dirs, files in os.walk(path): for file in files: zip_file_handle.write( os.path.join(root, file), os.path.relpath( os.path.join(root, file), os.path.join(path, '..') ) ) print(f'Directory {path} zipped successfully')
On each iteration, we use the ZipFile.write() method to write the current file
to the archive.
We passed the following 2 arguments to the ZipFile.write() method:
- The filename - the name of the file we want to write to the archive.
- The archive name - by default, it is the same as the filename, but without a drive letter and with the leading path separators removed.
You can simplify the code sample a bit by using the pathlib.Path class.
import zipfile from pathlib import Path def zip_directory(directory, filename): directory = Path(directory) with zipfile.ZipFile( filename, "w", zipfile.ZIP_DEFLATED ) as zip_file: for entry in directory.rglob("*"): zip_file.write(entry, entry.relative_to(directory)) print('Zip archive created successfully') path_to_dir = './my-directory' output_filename = 'my-zip.zip' zip_directory(path_to_dir, output_filename)
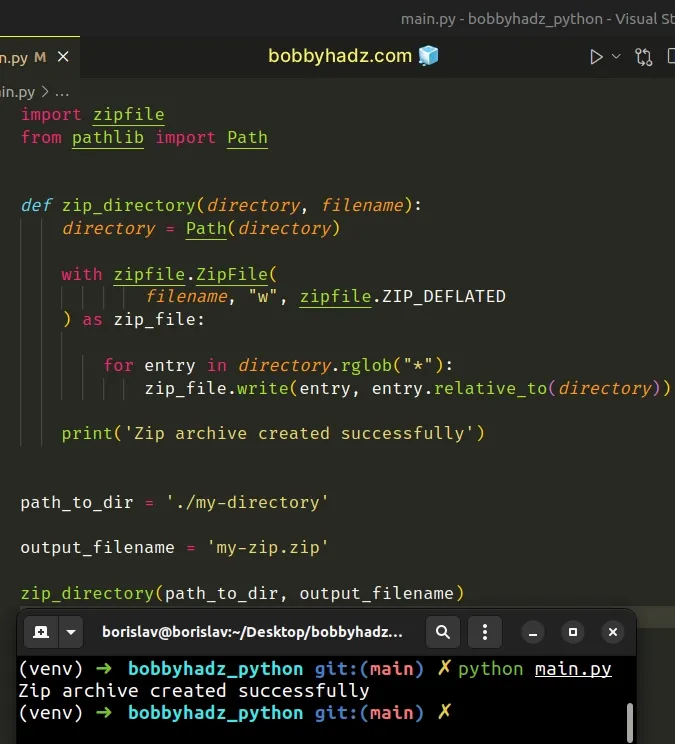
The pathlib.Path class takes one or more path segments as parameters and creates a PosixPath or a WindowsPath, depending on the operating system.
We no longer have to write code that handles each operating system, so the code sample is a bit more concise.
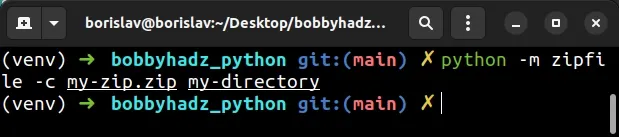
# Creating a Zip archive of a Directory in Python using the command line
You can also use the python -m zipfile command to create a zip archive of a
directory.
python -m zipfile -c my-zip.zip my-directory # or with python3 (macOS and Linux) python3 -m zipfile -c my-zip.zip my-directory # or with py alias (Windows) py -m zipfile -c my-zip.zip my-directory
my-zip.zip placeholder with the name of your output zip file and the my-directory placeholder with the path to the directory you want to zip.Depending on your operating system, you might have to use the python3 or py
(Windows) command instead.
The commands from the example should be issued in your terminal (e.g. CMD, bash, zsh).
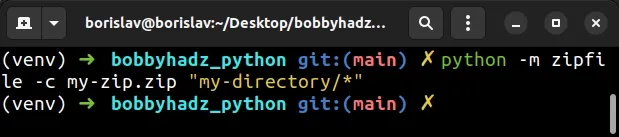
If you don't want to zip the parent directory, use the /* suffix.
python -m zipfile -c my-zip.zip "my-directory/*" # or with python3 (macOS and Linux) python3 -m zipfile -c my-zip.zip "my-directory/*" # or with py alias (Windows) py -m zipfile -c my-zip.zip "my-directory/*"
# Creating a Zip archive of a Python application
If you need to create a zip archive of a Python application, use the built-in zipapp module.
python -m zipapp my_application python my_application.pyz # or with python3 python3 -m zipapp my_application python3 my_application.pyz # or with py alias (Windows) py -m zipapp my_application py my_application.pyz
The zipapp module is used for managing executable Python zip archives.
Make sure to replace the my_application placeholder with the actual name of
your Python application.
You can also specify the function to be invoked when you run the .pyz file.
python -m zipapp myapp -m "myapp:main" python myapp.pyz
When you run the myapp.pyz file, the main function from the archive is
invoked.
I've also written an article on how to unzip a .gz file using Python.
# Additional Resources
You can learn more about the related topics by checking out the following tutorials:
- IsADirectoryError: [Errno 21] Is a directory in Python
- How to Print a Zipped list in Python
- Count number of unique Words in a String or File in Python
- Create a file name using Variables in Python
- How to get the File path of a Class in Python
- Taking a file path from user input in Python
- How to check if a File is Empty in Python
- NameError: name '__file__ is not defined in Python [Fixed]
- Write a String to a File on a New Line every time in Python
- How to merge multiple JSON files in Python [3 Ways]
- How to merge text files in Python [5 simple Ways]
- How to update a JSON file in Python [3 Ways]
- Python: Get the Type, File and Line Number of Exception
- Python: Check if a File path is symlink (symbolic link)

