Change/Remove "No file Chosen" text of input type "file"
Last updated: Apr 5, 2024
Reading time·4 min
# Table of Contents
- Change/Remove "No file Chosen" text of input type "file"
- Removing the "no file chosen" text by setting
overflowtohidden - Change/Remove "No file Chosen" text of input type "file" with JavaScript
# Change/Remove "No file Chosen" text of input type "file"
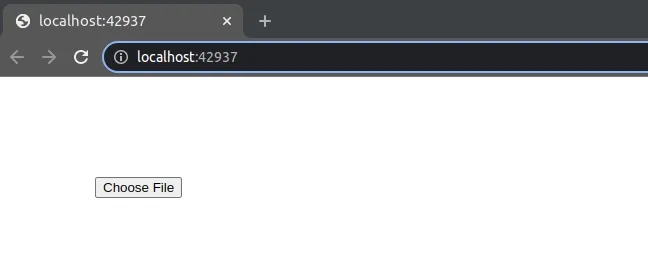
The easiest way to change or remove the "No file chosen" text from an input type "file" is to:
- Hide the file input element.
- Associate a label with the element and sets its
forattribute to the input'sid. - When the user clicks on the label, the file input will open.
<!DOCTYPE html> <html lang="en"> <head> <meta charset="UTF-8" /> <style> body { margin: 100px; } #file-input { display: none; } #file-input-label { font-size: 1.3em; padding: 10px 15px; border: 1px solid black; border-radius: 4%; } </style> </head> <body> <input type="file" id="file-input" name="file-input" /> <label id="file-input-label" for="file-input" >Select a File</label > </body> </html>
We set the display CSS property of the
file input to hidden to hide the element.
#file-input { display: none; }
The file input has a label that is associated with it, so clicking on the
label opens the file selection box.
<input type="file" id="file-input" name="file-input" /> <label id="file-input-label" for="file-input" > Select a File </label>
Note that the id of the input element has to match the label's for value.
Otherwise, clicking the label won't open the file selection box.
You can set the text of the label element to something that suits your use case.
You can also style the label element as you see fit.
#file-input-label { font-size: 1.3em; padding: 10px 15px; border: 1px solid black; border-radius: 4%; }
If you use React.js, make sure to set the htmlFor attribute on the label
instead of for.
<input type="file" id="file-input" name="file-input" /> <label id="file-input-label" htmlFor="file-input"> Select a File </label>
The for attribute is named htmlFor in React.js.
Removing the "no file chosen" text by setting overflow to hidden
A hacky solution to remove the "no file chosen" text is to set the overflow
CSS property on the file input to hidden and limit its width.
<!DOCTYPE html> <html lang="en"> <head> <meta charset="UTF-8" /> <style> body { margin: 100px; } #file-input { width: 90px; overflow: hidden; } </style> </head> <body> <input type="file" id="file-input" name="file-input" /> </body> </html>
We set the width of the file input to 90px.
You might have to adjust the value.
When the element's overflow property is set to hidden, the content that
overflows is clipped and not shown.
You can also set the color of the file input to transparent to remove the "No
file chosen" text.
<!DOCTYPE html> <html lang="en"> <head> <meta charset="UTF-8" /> <style> body { margin: 100px; } #file-input { color: transparent; } </style> </head> <body> <input type="file" id="file-input" name="file-input" /> </body> </html>
However, this has the disadvantage that the name of the select file is also not shown.
You can also set the text color of the file input to transparent the ::after
pseudo-selector to add a label-like note for the user.
<!DOCTYPE html> <html lang="en"> <head> <meta charset="UTF-8" /> <style> body { margin: 100px; } #file-input { color: transparent; } input[type='file']::after { content: 'Pick an image file'; color: black; margin-right: 30px; } </style> </head> <body> <input type="file" id="file-input" name="file-input" /> <script src="index.js"></script> </body> </html>
You might have to play around with the value of the margin to adjust the
::after text.
Alternatively, you can remove the ::after style altogether.
If you want to display the text on the left side of the file input, use the
before:: pseudo-selector.
<!DOCTYPE html> <html lang="en"> <head> <meta charset="UTF-8" /> <style> body { margin: 100px; } #file-input { color: transparent; } input[type='file']::before { content: 'Pick an image file'; color: black; margin-right: 10px; } </style> </head> <body> <input type="file" id="file-input" name="file-input" /> <script src="index.js"></script> </body> </html>
# Change/Remove "No file Chosen" text of input type "file" with JavaScript
An alternative approach is to use a few lines of JavaScript to change or remove the "No file chosen" text of an input type "file".
Here is the HTML for the example.
<!DOCTYPE html> <html lang="en"> <head> <meta charset="UTF-8" /> <style> body { margin: 100px; } #file-input { width: 90px; color: transparent; } </style> </head> <body> <input type="file" id="file-input" name="file-input" /> <label id="file-input-label" for="file-input" >Select a file</label > <script src="index.js"></script> </body> </html>
And here is the related JavaScript code.
const fileInput = document.getElementById('file-input'); const fileInputLabel = document.getElementById( 'file-input-label', ); fileInput.addEventListener('change', () => { if (fileInput.value === '') { fileInputLabel.innerHTML = 'Select a file'; } else { const realPathArray = fileInput.value.split('\\'); fileInputLabel.innerHTML = realPathArray[realPathArray.length - 1]; } });
We first set the width of the file input to 90px and set its color to
transparent to hide the "No file chosen" text.
#file-input { width: 90px; color: transparent; }
We used the document.getElementById
method to select the file input element and its label by their id attributes.
The next step is to add a change event listener to the file input element.
fileInput.addEventListener('change', () => { if (fileInput.value === '') { fileInputLabel.innerHTML = 'Select a file'; } else { const realPathArray = fileInput.value.split('\\'); fileInputLabel.innerHTML = realPathArray[realPathArray.length - 1]; } });
If the user doesn't select a file, we display the "Select a file" text, otherwise, the file's name is displayed.
# Additional Resources
You can learn more about the related topics by checking out the following tutorials:
- Limit the maximum files chosen or the file size in JS input
- How to get the MIME type of a File in JavaScript & Node.js
- How to get the status code of an Axios HTTP error
- Get the Status Code of a Fetch HTTP Response in JavaScript
- How to convert an Object to FormData in JavaScript
- How to Make HTTP requests in TypeScript
- File input change event not working in JavaScript [Solved]
- Check image width and height before upload using JavaScript

