Nested Stack Example in AWS CDK - Complete Guide
Last updated: Jan 26, 2024
Reading time·10 min
# Table of Contents
Note: if you want to create multiple stacks and environments in AWS CDK, click on the second subheading.
# Creating Nested Stacks in AWS CDK
Nested stacks are stacks we create as part of other stacks. There are 2 main reasons to use nested stacks in AWS CDK:
Separate and reuse resources that are reused in multiple places. For example, if we use the same VPC configuration for all of our applications, it makes sense to extract the logic into a separate, dedicated stack and plug it into all of our applications.
This makes our nested stack the single source of truth. Should we change our VPC configuration, we don't have to go through every single stack and update it. We only have to update the nested stack and re-deploy the parent stacks.
CDK gets compiled down to CloudFormation, before a deployment, which has a resource limit of 500. Using nested stacks allows us to get around this limitation because a nested stack counts as only 1 resource, which can contain up to 500 resources, including other nested stacks.
Let's look at an example, where we define a VPC in a nested stack and reuse it in multiple places.
Let's start by defining the nested stack:
import * as ec2 from 'aws-cdk-lib/aws-ec2'; import * as cdk from 'aws-cdk-lib'; import {Construct} from 'constructs'; import * as path from 'path'; // 👇 extends NestedStack class VpcNestedStack extends cdk.NestedStack { public readonly vpc: ec2.Vpc; constructor(scope: Construct, id: string, props?: cdk.NestedStackProps) { super(scope, id, props); this.vpc = new ec2.Vpc(this, 'nested-stack-vpc', { ipAddresses: ec2.IpAddresses.cidr('10.0.0.0/16'), natGateways: 0, maxAzs: 3, subnetConfiguration: [ { name: 'public-subnet-1', subnetType: ec2.SubnetType.PUBLIC, cidrMask: 24, }, // 👇 added isolated subnets { name: 'isolated-subnet-1', subnetType: ec2.SubnetType.PRIVATE_ISOLATED, cidrMask: 24, }, ], }); } }
We defined a VPC resource and attached it to a property on the class, in order to expose it when instantiating the nested stack.
Note that the nested stack extends NestedStack instead of Stack.
Let's define our EC2Stack, which launches an
EC2 instance in the VPC from the nested
stack.
import * as ec2 from 'aws-cdk-lib/aws-ec2'; import * as cdk from 'aws-cdk-lib'; import * as path from 'path'; export class EC2Stack extends cdk.Stack { constructor(scope: cdk.App, id: string, props?: cdk.StackProps) { super(scope, id, props); // 👇 grab the VPC from the nested stack const {vpc} = new VpcNestedStack(this, 'nested-stack'); const webserverSG = new ec2.SecurityGroup(this, 'webserver-sg', { vpc, }); webserverSG.addIngressRule( ec2.Peer.anyIpv4(), ec2.Port.tcp(80), 'allow HTTP traffic from anywhere', ); const ec2Instance = new ec2.Instance(this, 'ec2-instance', { // 👇 use the VPC from the nested stack vpc, vpcSubnets: { subnetType: ec2.SubnetType.PUBLIC, }, securityGroup: webserverSG, instanceType: ec2.InstanceType.of( ec2.InstanceClass.BURSTABLE2, ec2.InstanceSize.MICRO, ), machineImage: new ec2.AmazonLinuxImage({ generation: ec2.AmazonLinuxGeneration.AMAZON_LINUX_2, }), }); ec2Instance.addUserData( 'sudo su', 'yum install -y httpd', 'systemctl start httpd', 'systemctl enable httpd', 'echo "<h1>It works :)</h1>" > /var/www/html/index.html', ); } }
Let's go over what we did in the code sample.
We instantiated the nested stack and grabbed the VPC resource
We created a
t2.microEC2 instance, which serves as a webserver and exposed port80on the security group. The instance is launched in a public subnet of the VPC from the nested stack.We then added a user data script that installs and starts an Apache Web server.
Let's run the deploy command:
npx aws-cdk deploy
After the deployment has succeeded we have provisioned the following stacks:
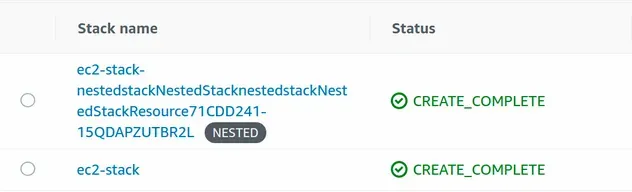
If we look at the ec2-stack, we see that it only provisions 6 resources. One
of them, being the nested VPC stack:
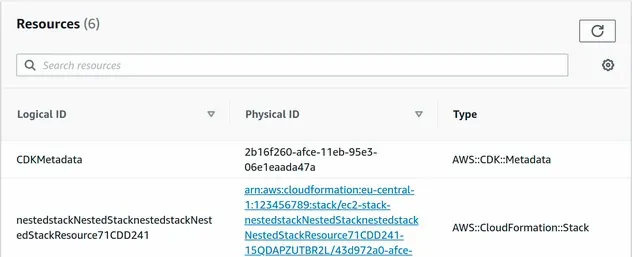
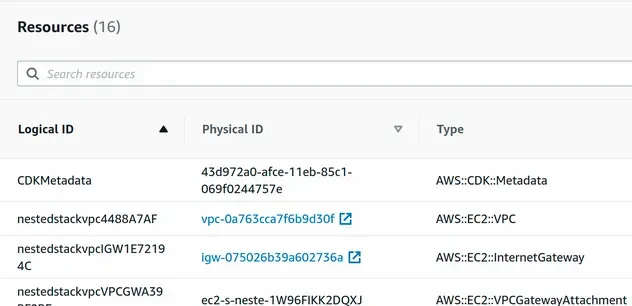
The resource of type AWS::CloudFormation::Stack is our nested stack, which
provisions 16 resources:
Nested stacks in CDK get their own CloudFormation templates, however, they can't be individually deployed. When using nested stacks in CDK, we interact with the root stack.
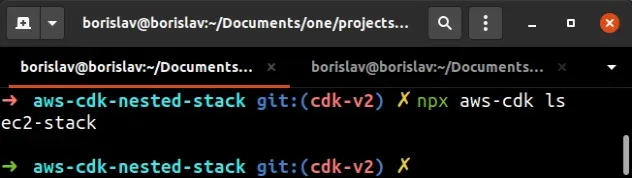
If I run the npx aws-cdk ls command, we would only see 1 stack listed - the
ec2-stack:
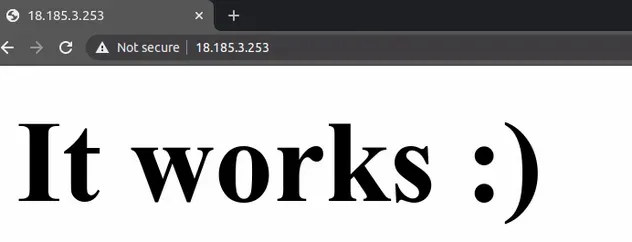
If we copy and paste the public IPv4 address from the EC2 instance in the browser, we can see that launching the instance in the nested stack VPC has succeeded:
If we update the nested stack and re-deploy the parent stack, the changes take effect:
import * as ec2 from 'aws-cdk-lib/aws-ec2'; import * as cdk from 'aws-cdk-lib'; import * as path from 'path'; import {Construct} from 'constructs'; class VpcNestedStack extends cdk.NestedStack { public readonly vpc: ec2.Vpc; constructor(scope: Construct, id: string, props?: cdk.NestedStackProps) { super(scope, id, props); this.vpc = new ec2.Vpc(this, 'nested-stack-vpc', { ipAddresses: ec2.IpAddresses.cidr('10.0.0.0/16'), natGateways: 0, maxAzs: 3, subnetConfiguration: [ { name: 'public-subnet-1', subnetType: ec2.SubnetType.PUBLIC, cidrMask: 24, }, // 👇 added isolated subnet group { name: 'isolated-subnet-1', subnetType: ec2.SubnetType.PRIVATE_ISOLATED, cidrMask: 24, }, ], }); } }
We added an isolated subnet group, which will provision 1 isolated subnet for each of the 3 availability zones of our VPC.
Let's deploy the parent stack:
npx aws-cdk deploy
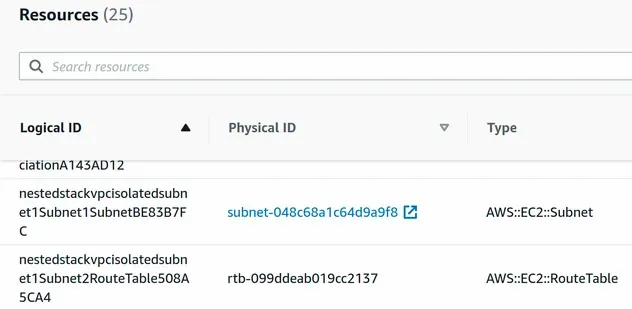
After the deployment has succeeded, we can see that our nested VPC stack now provisions a total of 25 resources. The route tables, subnets and route table association resources have been added:
We can instantiate the same nested stack in a parent stack multiple times. For example, let's instantiate the VPC nested stack a second time and provision a lambda function in the VPC.
import * as ec2 from 'aws-cdk-lib/aws-ec2'; import * as lambda from 'aws-cdk-lib/aws-lambda'; import * as cdk from 'aws-cdk-lib'; import * as path from 'path'; export class EC2Stack extends cdk.Stack { constructor(scope: cdk.App, id: string, props?: cdk.StackProps) { super(scope, id, props); // ...rest // 👇 instantiate the nested stack again const {vpc: vpcLambda} = new VpcNestedStack(this, 'nested-stack-lambda'); const lambdaFunction = new lambda.Function(this, 'lambda-function', { runtime: lambda.Runtime.NODEJS_18_X, // 👇 use the VPC from the second nested stack vpc: vpcLambda, vpcSubnets: { subnetType: ec2.SubnetType.PUBLIC, }, allowPublicSubnet: true, handler: 'index.main', code: lambda.Code.fromAsset(path.join(__dirname, '/../src/my-lambda')), environment: { VPC_CIDR: vpcLambda.vpcCidrBlock, VPC_ID: vpcLambda.vpcId, }, }); } }
We instantiated the VPC nested stack for a second time and provisioned a lambda function. We are basically creating a second VPC with the same configuration, in our parent stack.
Let's add the code for the lambda function at src/my-lambda/index.js:
async function main(event) { try { console.log('VPC CIDR 👉', process.env.VPC_CIDR); console.log('VPC ID 👉', process.env.VPC_ID); return { body: JSON.stringify({ cidr: process.env.VPC_CIDR, id: process.env.VPC_ID, }), statusCode: 200, }; } catch (error) { return {body: JSON.stringify({error})}; } } module.exports = {main};
The lambda simply returns the CIDR and ID of the VPC from the nested stack.
Let's deploy the new resources:
npx aws-cdk deploy
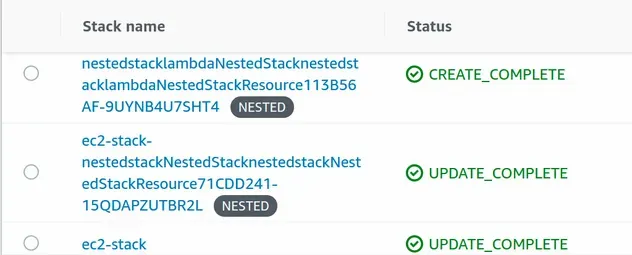
After we've deployed the changes, we can see that we have provisioned 2 nested stacks:
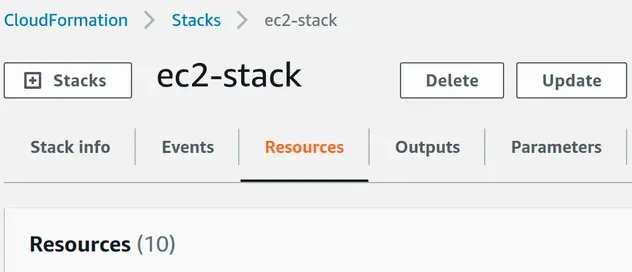
Our parent stack, however, only provisions a total of 10 resources:
If we were to update our nested stack and re-deploy the parent the changes would apply to both of our nested stacks.
By taking a look at the configuration from the lambda function, we can see that it is associated with the VPC from the nested stack:

Outputs and Parameters for the interactions between nested and parent stacks, which hides a lot of the complexity of using nested stacks.# Clean up
To delete the provisioned resources, issue the destroy command:
npx aws-cdk destroy
# Creating Multiple stacks and environments in a CDK App
A CDK App can consist of one or more Stacks. A stack in CDK is a 1x1 mapping to a CloudFormation stack, in other words, it's a unit of application deployment.
When we provision infrastructure for real-world applications, we often have to
manage more than 1 stack. For example, a dev, prod and a staging stack.
Many reasons force us to manage more than 1 stack in our CDK applications, for example:
- We wouldn't want to write to our production database in development
- The provisioned capacity of resources differs between environments. For instance, we provision a smaller EC2 instance for development and a larger, more expensive one for production
- Other parameters will differ, for example, API keys for external services, etc.
We are going to provision a small CDK app that consists of 2 stacks - dev and
prod.
For our dev stack we are going to provision a
Dynamodb table with provisioned read and write
capacity of 1 unit.
For our prod stack we are going to provision a Dynamodb table with capacity
set to on Demand.
Let's start with the definition of our Stack:
import * as dynamodb from 'aws-cdk-lib/aws-dynamodb'; import * as cdk from 'aws-cdk-lib'; // 👇 extend the StackProps interface interface MyCdkStackProps extends cdk.StackProps { deploymentEnvironment: 'dev' | 'prod'; } export class MyCdkStack extends cdk.Stack { constructor(scope: cdk.App, id: string, props: MyCdkStackProps) { super(scope, id, props); // 👇 get the environment from props const {deploymentEnvironment} = props; const isProduction = deploymentEnvironment === 'prod'; // 👇 conditionally set capacity based on environment new dynamodb.Table(this, 'my-table', { partitionKey: {name: 'todoId', type: dynamodb.AttributeType.NUMBER}, billingMode: isProduction ? dynamodb.BillingMode.PAY_PER_REQUEST : dynamodb.BillingMode.PROVISIONED, writeCapacity: isProduction ? undefined : 1, readCapacity: isProduction ? undefined : 1, removalPolicy: cdk.RemovalPolicy.DESTROY, }); } }
In the code sample:
We define an interface for the props that the stack takes when instantiated. The interface has a
deploymentEnvironmentproperty that can have the values ofdevorprod.We set the
propsparameter in the constructor method of the class to be theMyCdkStackPropsinterface we just createdWe then took the
deploymentEnvironmentvalue from the props object and used it to conditionally set the write and read capacity on the DynamoDB table
Next, we'll instantiate the dev and prod stacks:
import * as cdk from 'aws-cdk-lib'; import {MyCdkStack} from '../lib/cdk-starter-stack'; const app = new cdk.App(); // 👇 instantiate dev stack new MyCdkStack(app, 'my-stack-dev', { stackName: 'my-stack-dev', env: { region: process.env.CDK_DEFAULT_REGION, account: process.env.CDK_DEFAULT_ACCOUNT, }, deploymentEnvironment: 'dev', }); // 👇 instantiate prod stack new MyCdkStack(app, 'my-stack-prod', { stackName: 'my-stack-prod', env: { region: process.env.CDK_DEFAULT_REGION, account: process.env.CDK_DEFAULT_ACCOUNT, }, deploymentEnvironment: 'prod', });
In the code sample:
- We initialize a new CDK app, which we'll use for the scope parameter in our CDK Stacks
- We instantiate the
devstack, passing in thedeploymentEnvironmentprop set todev. - We instantiate the
prodstack, passing in thedeploymentEnvironmentprop set toprod
Notice that we also set the env property of the stack.
In this case, we use the values of the environment variables:
CDK_DEFAULT_REGIONCDK_DEFAULT_ACCOUNT
These environment variables are made available to us in the CDK environment and correspond to the region and account id of our default AWS profile.
In general, when instantiating CDK stacks, it's recommended to pass in fixed
values for the env property because if you work on a team with multiple
engineers, they could have different account and region properties
configured in their default AWS CLI profile.
# Deploying multiple stacks in CDK
First, we have to synthesize our stacks. The cdk synth commands runs our CDK
code and generates the corresponding CloudFormation template in the cdk.out
directory of our project.
Let's run the synth command and look at the results:
npx aws-cdk synth \ my-stack-dev \ my-stack-prod
We explicitly specify the names of the stacks we want to synthesize. We set the
names, by passing in the stackName prop when we instantiated the Stacks.
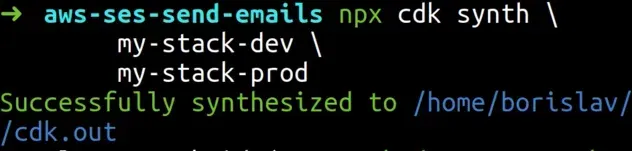
The output from the synth command tells us that the templates have been placed
in the cdk.out directory, let's take a look:
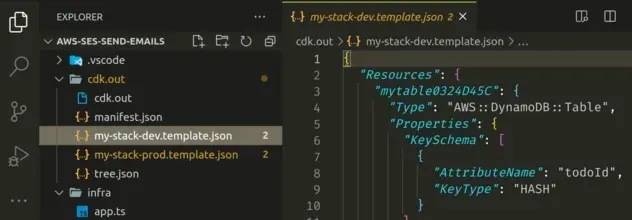
We can see that the CloudFormation templates for both of our stacks have been generated and are ready for deployment.
Next, we'll run the cdk deploy command to deploy the generated CloudFormation
stacks in our AWS account:
npx aws-cdk deploy \ my-stack-dev \ my-stack-prod
After issuing the command, the CDK CLI will create a changeset for both of our CloudFormation templates and then deploy them.
Let's take a look at the result in our CloudFormation console.
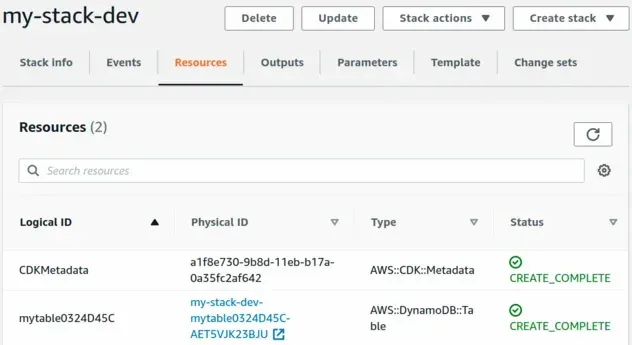
This is our dev stack:
And this is our prod stack:
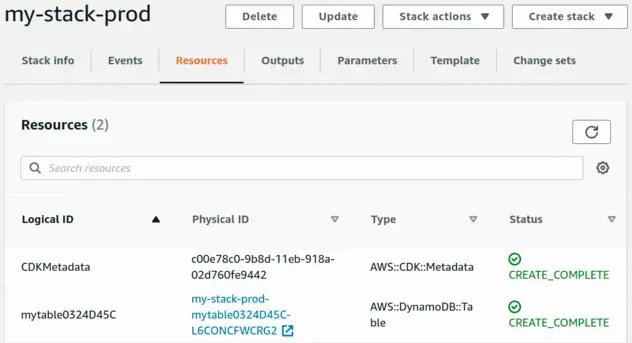
Notice that the Physical IDs of the Dynamodb tables are different.
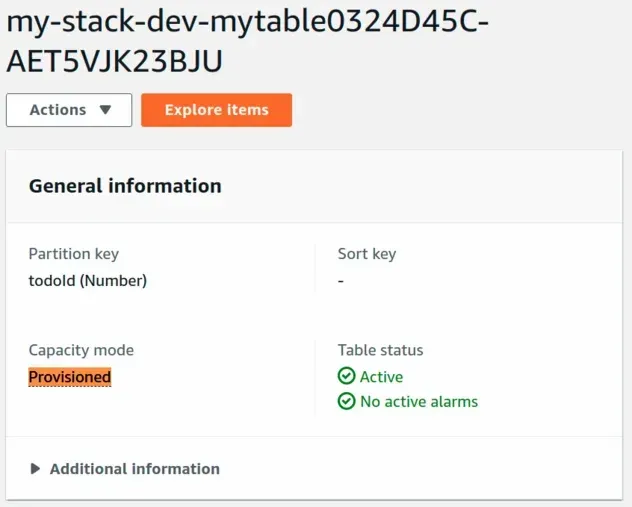
If we look at the provisioned Dynamodb tables, we can see that we were able to conditionally set the Capacity mode based on the environment.
The dev table's Capacity is set to Provisioned:
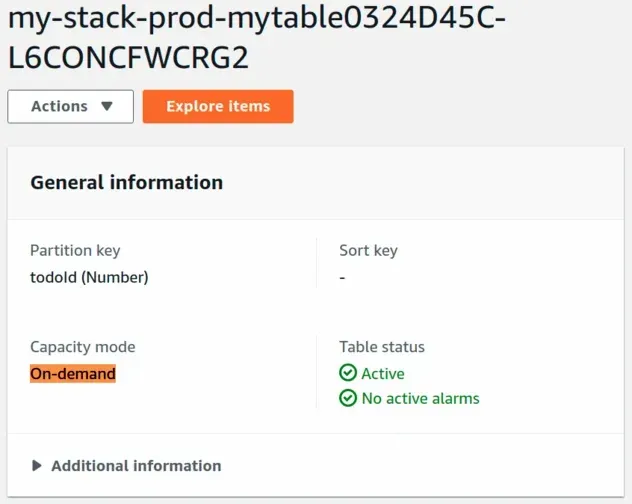
And the prod table's Capacity mode is set to On-demand:
# Deploying all Stacks in AWS CDK
In order to deploy all stacks with the cdk deploy command, we have to use the
* (asterisk) character.
npx aws-cdk deploy "*"
The cdk deploy command takes wildcards, where * matches any number of
characters and ? matches a single character.
For example, to deploy all stacks that start with the name my-stack issue the
following command:
npx aws-cdk deploy "my-stack*"
The command above would deploy my-stack-dev, my-stack-prod, etc.
When using wildcards we have to always wrap the wild card characters in quotes, otherwise, our shell may try to auto-complete the wild card to names of files in the current directory.
# Clean up
To delete the stacks we've provisioned, we can run the
cdk destroy command:
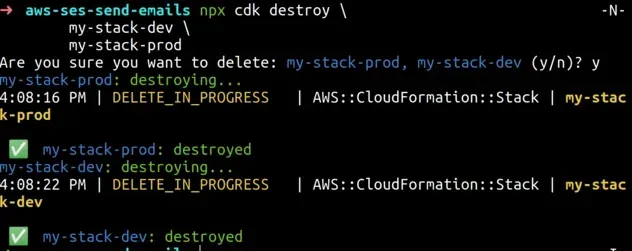
npx aws-cdk destroy \ my-stack-dev \ my-stack-prod
The CDK CLI will then issue a delete command for both of our CloudFormation stacks:
# Summary
CDK Applications can consist of one or more CDK stacks.
With CDK, provisioning multiple stacks is as simple as instantiating our Stack construct multiple times and passing it different props.
We are then able to conditionally configure/provision our AWS resources based on the environment of the Stack.
# Additional Resources
You can learn more about the related topics by checking out the following tutorials:

