Add an on Click event to Table Rows in JavaScript
Last updated: Mar 7, 2024
Reading time·4 min

# Add an on Click event to Table Rows in JavaScript
To add an onClick event to table rows in JavaScript:
- Select the
trelements in the table. - Use the
Array.forEach()method to iterate over them. - Use the
addEventListener()method to add aclickevent listener to each table row.
Here is the HTML for the example.
<!DOCTYPE html> <html lang="en"> <head> <meta charset="UTF-8" /> </head> <body> <h2>bobbyhadz.com</h2> <table id="example-table"> <tr> <td>Key 1</td> <td>Value 1</td> </tr> <tr> <td>Key 2</td> <td>Value 2</td> </tr> <tr> <td>Key 3</td> <td>Value 3</td> </tr> </table> <script src="index.js"></script> </body> </html>
And here is the related JavaScript code.
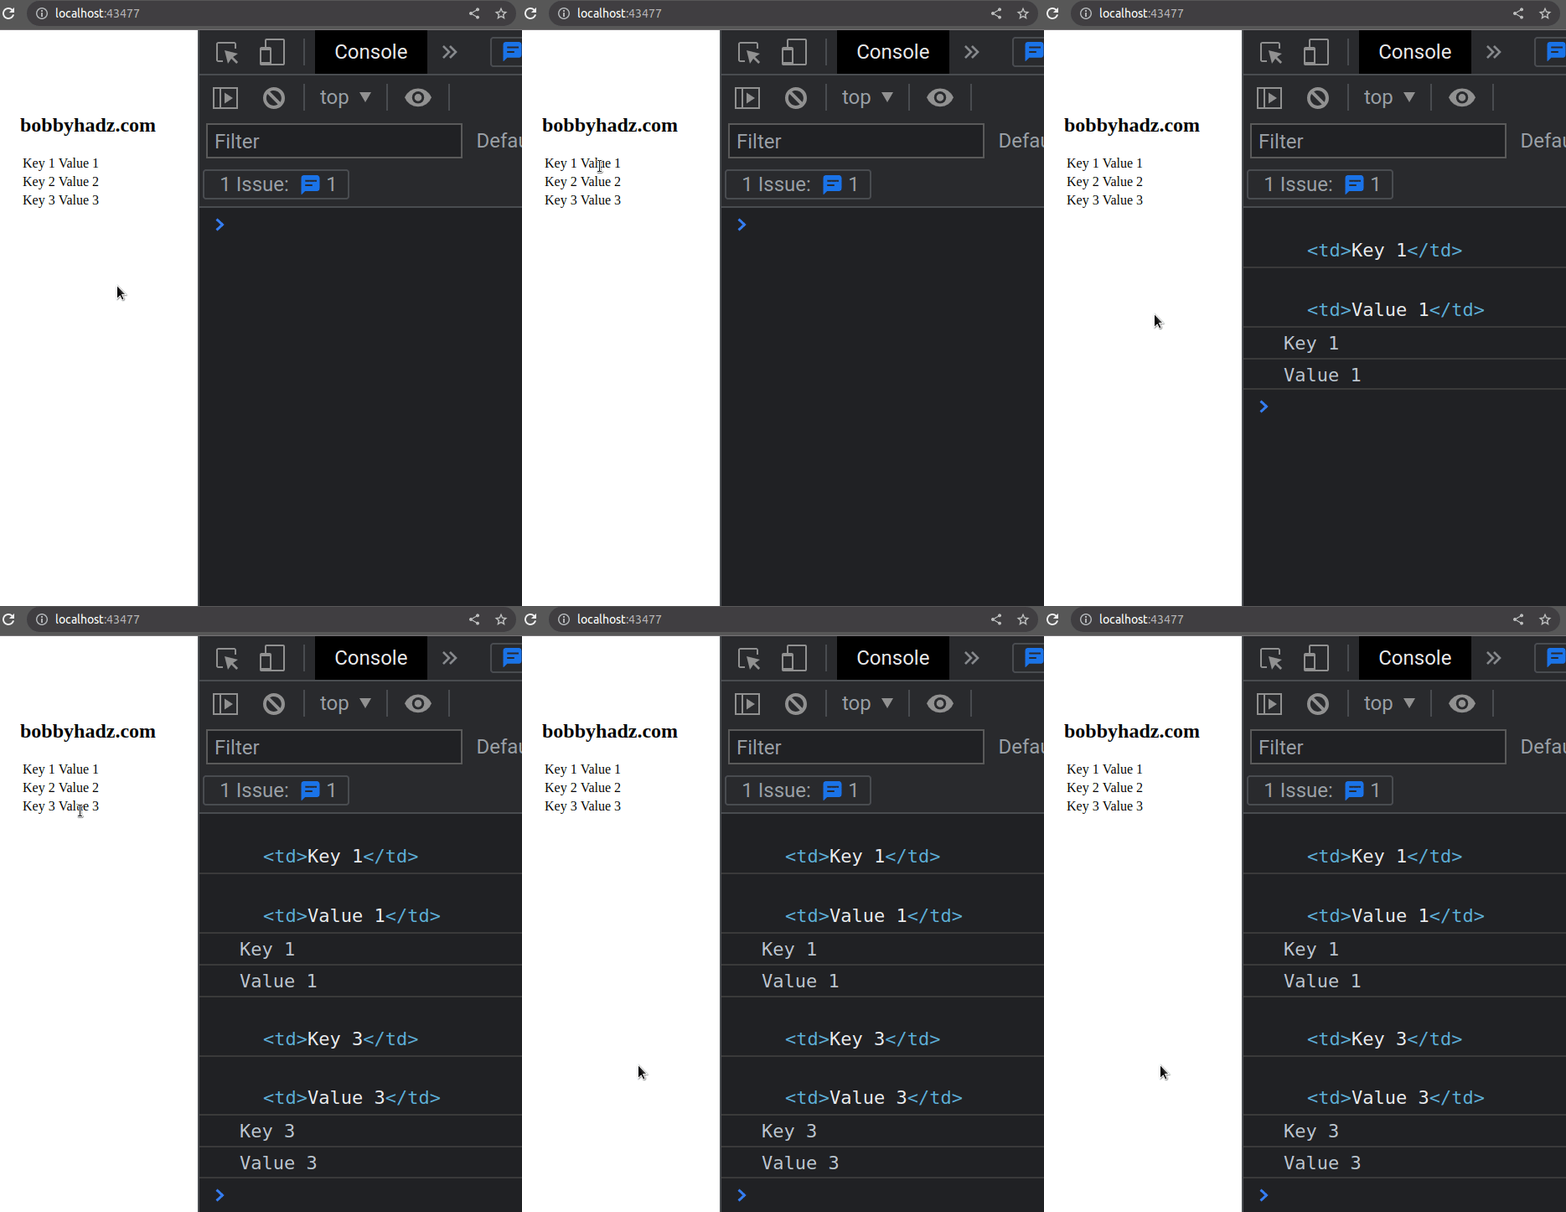
const table = document.getElementById('example-table'); const rows = table.getElementsByTagName('tr'); Array.from(rows).forEach((row, index) => { row.addEventListener('click', () => { const cells = row.getElementsByTagName('td'); console.log(cells[0]); console.log(cells[1]); const content1 = cells[0].innerHTML; console.log(content1); const content2 = cells[1].innerHTML; console.log(content2); }); });

We create a quite simple table that has 3 rows.
<table id="example-table"> <tr> <td>Key 1</td> <td>Value 1</td> </tr> <tr> <td>Key 2</td> <td>Value 2</td> </tr> <tr> <td>Key 3</td> <td>Value 3</td> </tr> </table>
We used the document.getElementById() method to select the table element by its ID.
const table = document.getElementById('example-table');
The next step is to use the
getElementsByTagName()
method to get all tr elements.
const rows = table.getElementsByTagName('tr');
We could have achieved the same result by using the document.querySelectorAll() method.
const rows = document.querySelectorAll('#example-table tr'); console.log(rows); // 👉️ NodeList(3) [tr, tr, tr]
The querySelectorAll method takes a selector and returns a NodeList
containing all of the elements that match the given selector.
We used the Array.from() method to convert the collection of HTML elements to an array to be able to use the Array.forEach() method.
Array.from(rows).forEach((row, index) => { row.addEventListener('click', () => { const cells = row.getElementsByTagName('td'); console.log(cells[0]); console.log(cells[1]); const content1 = cells[0].innerHTML; console.log(content1); const content2 = cells[1].innerHTML; console.log(content2); }); });
The function we passed to the Array.forEach() method gets called with each
array element and the index of the current iteration.
We didn't have to use the index in the example, but it's there in case you need it.
const table = document.getElementById('example-table'); const rows = table.getElementsByTagName('tr'); Array.from(rows).forEach((row, index) => { // 👇️ the index of the current row console.log(index); // 👉️ 0, 1, 2 row.addEventListener('click', () => { const cells = row.getElementsByTagName('td'); console.log(cells[0]); console.log(cells[1]); const content1 = cells[0].innerHTML; console.log(content1); const content2 = cells[1].innerHTML; console.log(content2); }); });
On each iteration, we use the getElementsByTagName() method to get all td
elements that are within the current row.
You can use square brackets notation to access each column.
JavaScript indices are zero-based, so the first column (td element) has an
index of 0 and the last has an index of array.length - 1.
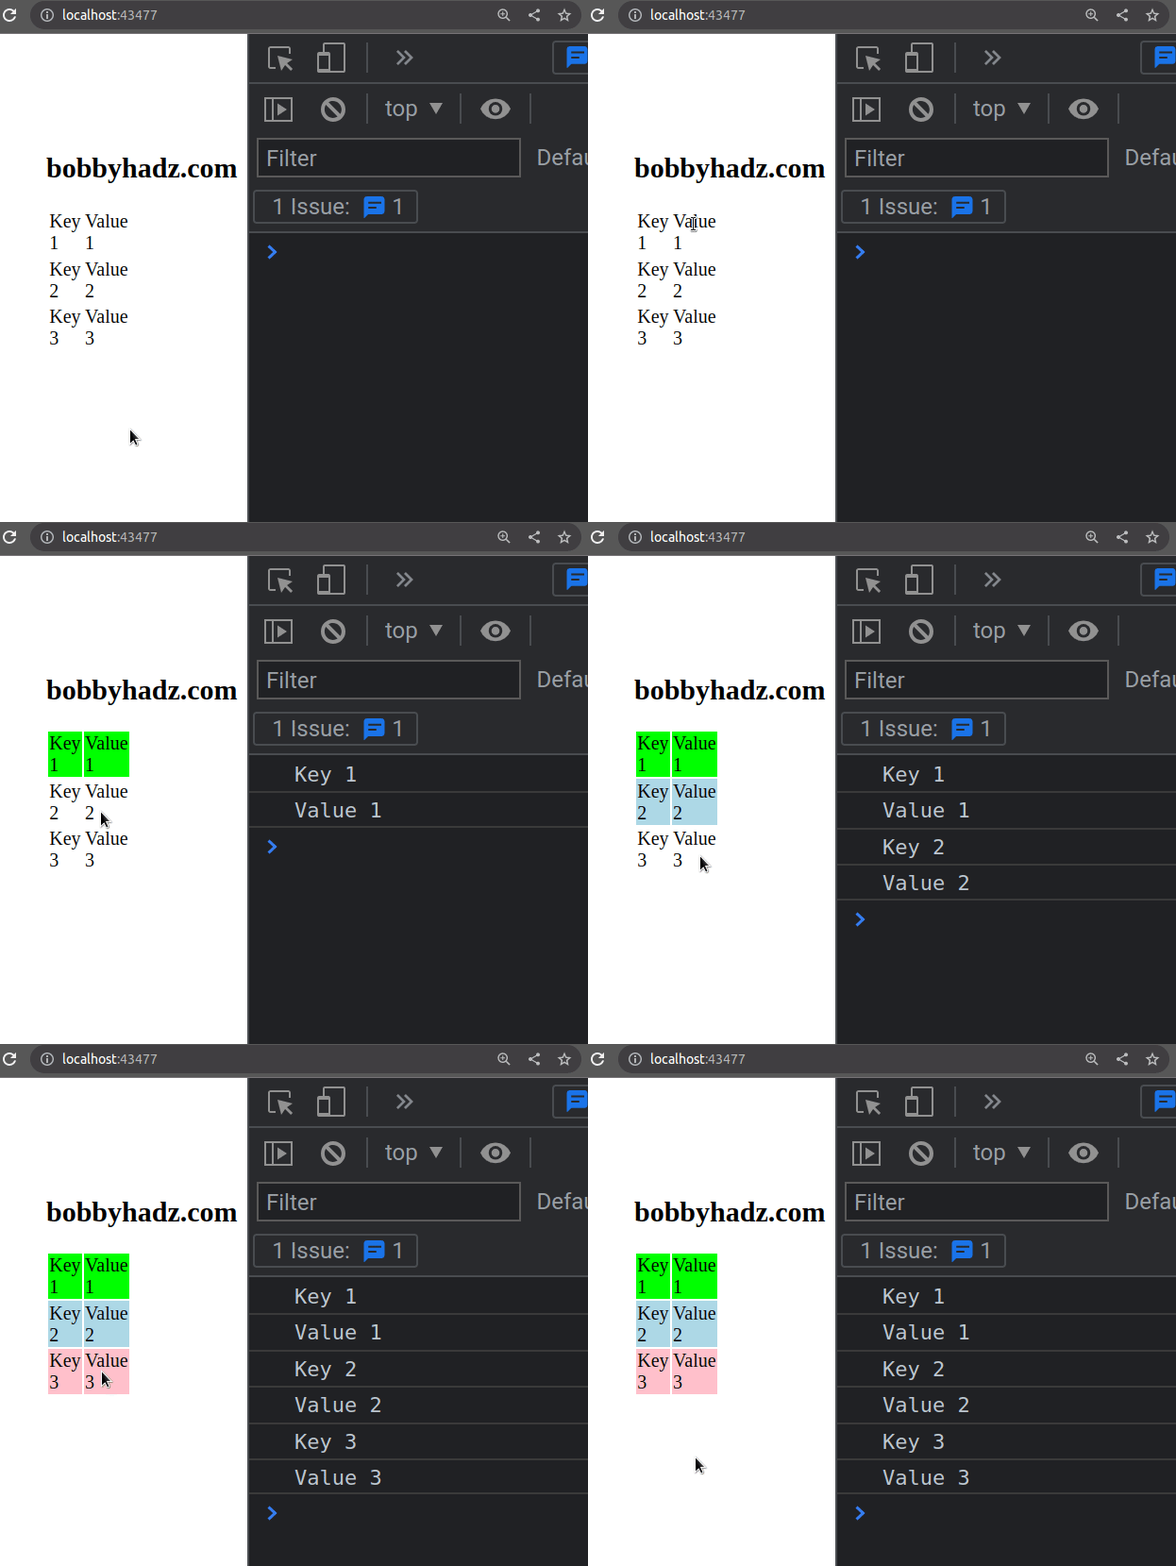
Here is an example that uses the index of the rows to set a different style on each table row on click.
const rows = document.querySelectorAll('#example-table tr'); console.log(rows); // 👉️ NodeList(3) [tr, tr, tr] Array.from(rows).forEach((row, index) => { // 👇️ the index of the current row console.log(index); // 👉️ 0, 1, 2 row.addEventListener('click', () => { const cells = row.getElementsByTagName('td'); if (index === 0) { row.style.backgroundColor = 'lime'; } else if (index === 1) { row.style.backgroundColor = 'lightblue'; } else if (index === 2) { row.style.backgroundColor = 'pink'; } const content1 = cells[0].innerHTML; console.log(content1); const content2 = cells[1].innerHTML; console.log(content2); }); });

We used the index of each table row when setting a style in a click event
handler.
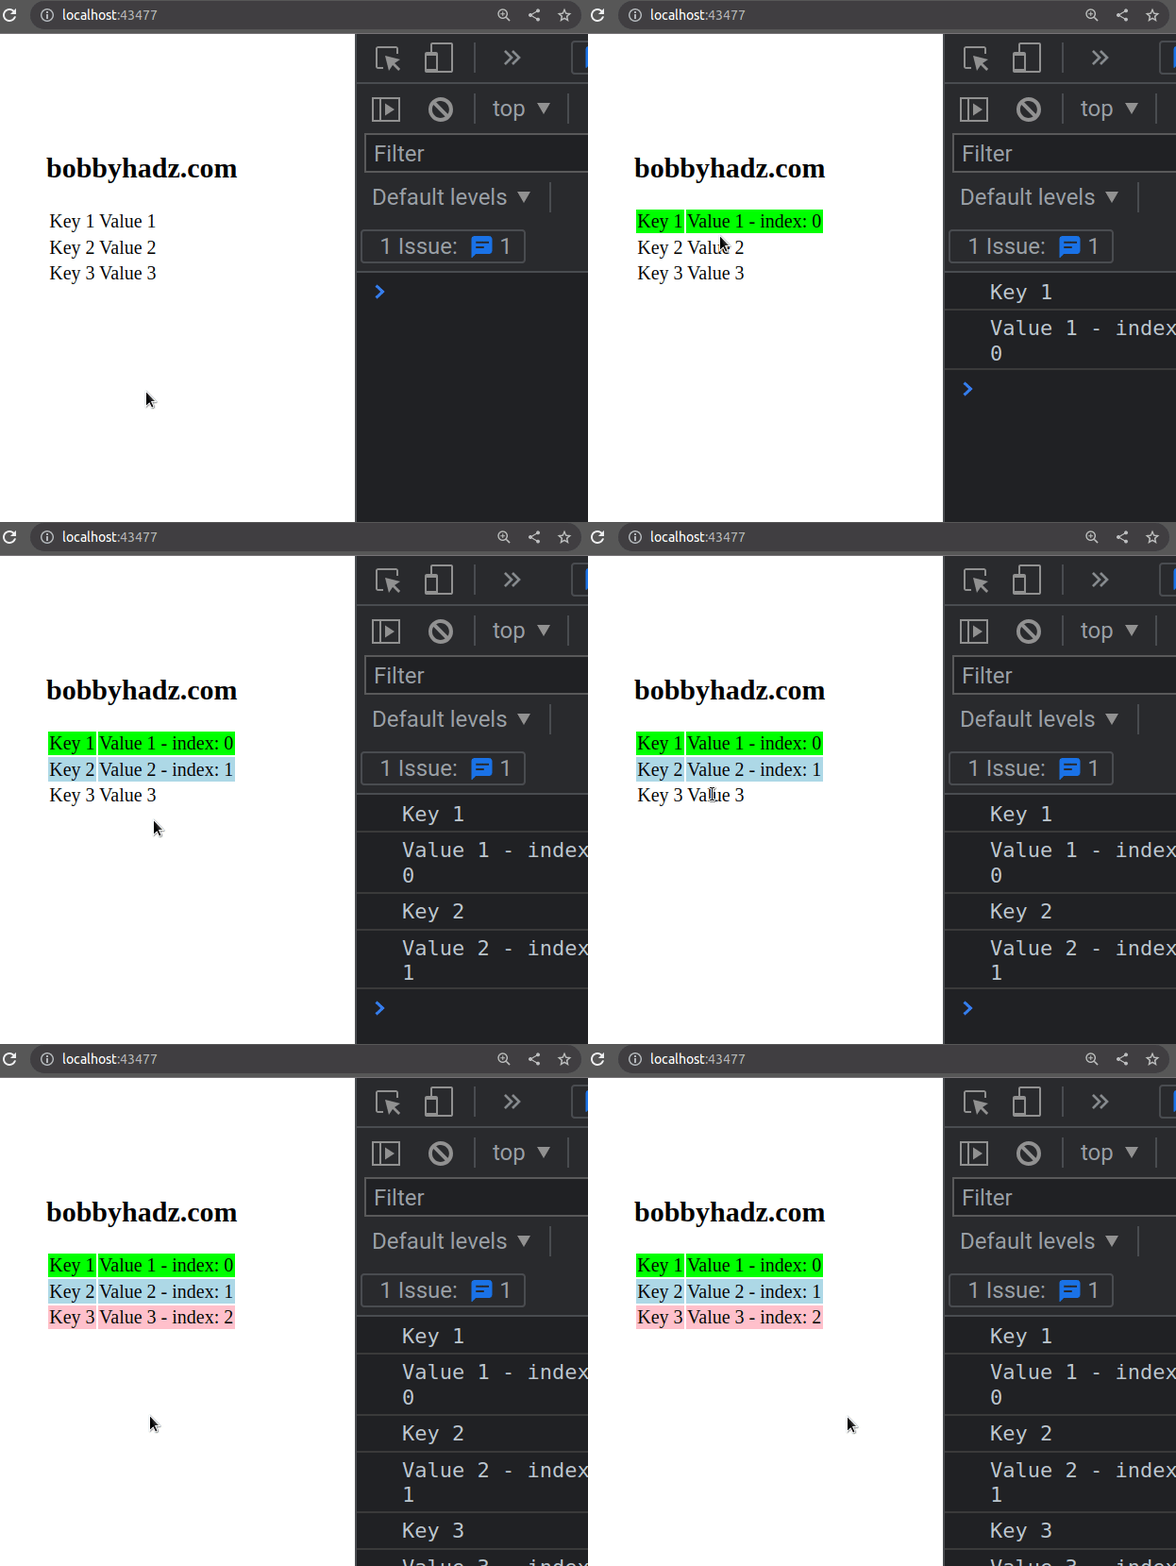
You could also use this approach to change the contents of each row.
const table = document.getElementById('example-table'); const rows = table.getElementsByTagName('tr'); Array.from(rows).forEach((row, index) => { // 👇️ the index of the current row console.log(index); // 👉️ 0, 1, 2 row.addEventListener('click', () => { const cells = row.getElementsByTagName('td'); if (index === 0) { row.style.backgroundColor = 'lime'; cells[1].innerHTML = cells[1].innerHTML + ` - index: ${index}`; } else if (index === 1) { row.style.backgroundColor = 'lightblue'; cells[1].innerHTML = cells[1].innerHTML + ` - index: ${index}`; } else if (index === 2) { row.style.backgroundColor = 'pink'; cells[1].innerHTML = cells[1].innerHTML + ` - index: ${index}`; } const content1 = cells[0].innerHTML; console.log(content1); const content2 = cells[1].innerHTML; console.log(content2); }); });

If you don't need access to the index of the current row, you can also use a for...of loop when iterating over the collection of rows.
const table = document.getElementById('example-table'); const rows = table.getElementsByTagName('tr'); console.log(rows); // 👉️ NodeList(3) [tr, tr, tr] for (const row of rows) { row.addEventListener('click', () => { const cells = row.getElementsByTagName('td'); console.log(cells[0]); console.log(cells[1]); const content1 = cells[0].innerHTML; console.log(content1); const content2 = cells[1].innerHTML; console.log(content2); }); }

The for...of statement is used to loop over iterable objects like arrays,
strings, Map, Set and NodeList objects and generators.
# Additional Resources
You can learn more about the related topics by checking out the following tutorials:
- How to Create a Table without a Header in Markdown
- Add a class to the Clicked Element using JavaScript
- Check if Element was Clicked using JavaScript
- Hide element when clicked outside using JavaScript
- Change the background color of an Input Field using JS
- Change a Style of all Elements with a specific Class in JS
- How to wrap the content of a table cell using CSS
- How to export an HTML table to Excel using JavaScript

