How to export an HTML table to Excel using JavaScript
Last updated: Apr 4, 2024
Reading time·3 min

# How to export an HTML table to Excel using JavaScript
The easiest way to export an HTML table to Excel in JavaScript is to use the popular SheetJS library.
The SheetJS module can be used to read the HTML table and extract its data
into an Excel file.
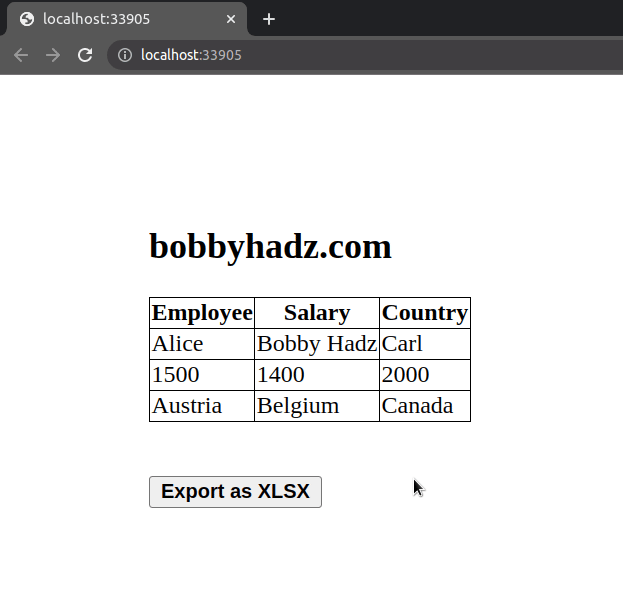
Here is the HTML for the example.
<!DOCTYPE html> <html lang="en"> <head> <meta charset="UTF-8" /> <style> body { margin: 100px; } table { border-collapse: collapse; } table td, table th { border: 1px solid black; } </style> <script src="https://cdn.sheetjs.com/xlsx-0.19.3/package/dist/xlsx.full.min.js"></script> </head> <body> <h2>bobbyhadz.com</h2> <table id="my-table"> <thead> <tr> <th>Employee</th> <th>Salary</th> <th>Country</th> </tr> </thead> <tbody> <tr> <td>Alice</td> <td>Bobby Hadz</td> <td>Carl</td> </tr> <tr> <td>1500</td> <td>1400</td> <td>2000</td> </tr> <tr> <td>Austria</td> <td>Belgium</td> <td>Canada</td> </tr> </tbody> </table> <br /> <br /> <button id="btn-export"><b>Export as XLSX</b></button> <script src="index.js"></script> </body> </html>
And here is the related JavaScript code.
const exportButton = document.getElementById('btn-export'); const table = document.getElementById('my-table'); exportButton.addEventListener('click', () => { /* Create worksheet from HTML DOM TABLE */ const wb = XLSX.utils.table_to_book(table, {sheet: 'sheet-1'}); /* Export to file (start a download) */ XLSX.writeFile(wb, 'MyTable.xlsx'); });
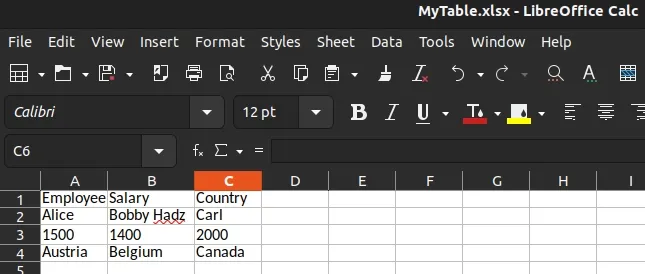
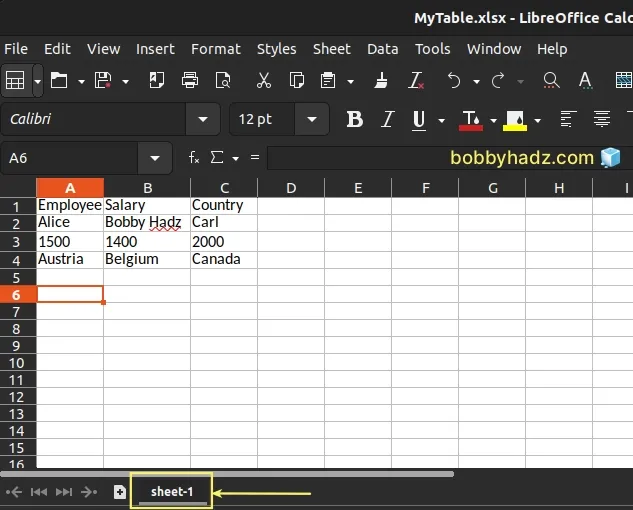
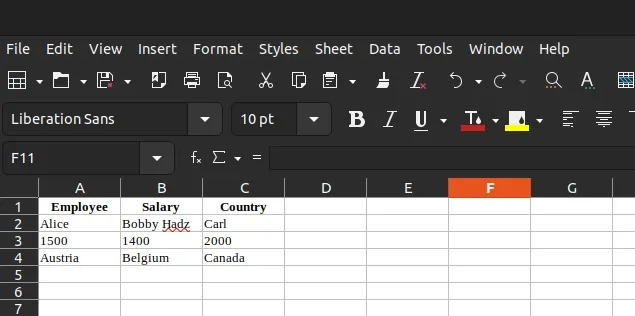
The Excel file looks as follows.
We used the popular SheetJS library in the example.
Make sure to load the library with the following script tag.
<script src="https://cdn.sheetjs.com/xlsx-0.19.3/package/dist/xlsx.full.min.js"></script>
The first step is to select the button and the table elements using document.getElementById().
const exportButton = document.getElementById('btn-export'); const table = document.getElementById('my-table');
We then added a click event listener to the button element.
exportButton.addEventListener('click', () => { /* Create worksheet from HTML DOM TABLE */ const wb = XLSX.utils.table_to_book(table, {sheet: 'sheet-1'}); /* Export to file (start a download) */ XLSX.writeFile(wb, 'MyTable.xlsx'); });
Every time the button is clicked, we create the worksheet from the HTML table.
// Create worksheet from HTML DOM table const wb = XLSX.utils.table_to_book(table, {sheet: 'sheet-1'});
The table_to_book() method takes the table element as the first parameter and
an options object as the second.
The sheet property can be used to set the name of the Excel sheet.
The last step is to use the writeFile() method to export the bytes to a file.
/* Export to file (start a download) */ XLSX.writeFile(wb, 'MyTable.xlsx');
The second parameter w passed to the writeFile method is the name of the file
(MyTable.xlsx in the example).
If you need to check out more examples of using the SheetJS package, check out the package's docs.
# How to export an HTML table to Excel using JavaScript without a library
You can also export an HTML table to Excel without using a third-party library.
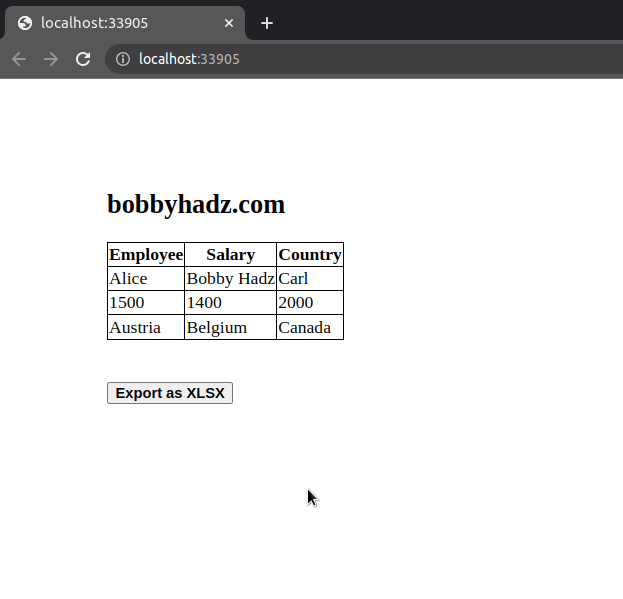
Here is the HTML for the example.
<!DOCTYPE html> <html lang="en"> <head> <meta charset="UTF-8" /> <style> body { margin: 100px; } table { border-collapse: collapse; } table td, table th { border: 1px solid black; } </style> </head> <body> <h2>bobbyhadz.com</h2> <table id="my-table"> <thead> <tr> <th>Employee</th> <th>Salary</th> <th>Country</th> </tr> </thead> <tbody> <tr> <td>Alice</td> <td>Bobby Hadz</td> <td>Carl</td> </tr> <tr> <td>1500</td> <td>1400</td> <td>2000</td> </tr> <tr> <td>Austria</td> <td>Belgium</td> <td>Canada</td> </tr> </tbody> </table> <br /> <br /> <button id="btn-export"><b>Export as XLSX</b></button> <script src="index.js"></script> </body> </html>
And here is the related JavaScript code.
const exportButton = document.getElementById('btn-export'); exportButton.addEventListener('click', () => { const table = document.getElementById('my-table'); exportTable(table, 'my-file.xls'); }); function exportTable(table, filename = 'excel-file.xls') { const tableHTML = table.outerHTML.replace(/\s/g, '%20'); const downloadLink = document.createElement('a'); document.body.appendChild(downloadLink); const dataType = 'application/vnd.ms-excel'; if (navigator.msSaveOrOpenBlob) { const blob = new Blob(['\ufeff', tableHTML], { type: dataType, }); navigator.msSaveOrOpenBlob(blob, filename); } else { downloadLink.href = `data:${dataType}, ${tableHTML}`; downloadLink.download = filename; downloadLink.click(); } } exportTable('my-table', 'example.xlsx');
And here is the Excel file.
We added a click event listener to the button element, so every time it is clicked, the handler function is invoked.
const exportButton = document.getElementById('btn-export'); exportButton.addEventListener('click', () => { const table = document.getElementById('my-table'); exportTable(table, 'my-file.xls'); });
The event handler function calls the exportTable() function.
The export table function creates a download link using the document.createElement() method.
const downloadLink = document.createElement('a'); document.body.appendChild(downloadLink);
If the browser is Internet Explorer, we use the navigator.msSaveOrOpenBlob
method.
if (navigator.msSaveOrOpenBlob) { const blob = new Blob(['\ufeff', tableHTML], { type: dataType, }); navigator.msSaveOrOpenBlob(blob, filename); }
Otherwise, we simply set the href and download attributes on the download
link and simulate a click.
else { downloadLink.href = `data:${dataType}, ${tableHTML}`; downloadLink.download = filename; downloadLink.click(); }
The download attribute causes the browser to treat the linked URL as a download.
We set the attribute to the name of the Excel file that should be downloaded to the user's file system.
I've also written articles on:

