Exporting Settings and Extensions in Visual Studio Code
Last updated: Apr 6, 2024
Reading time·6 min

# Table of Contents
- Exporting Settings and Extensions in Visual Studio Code
- Manually syncing your settings
- Configuring which settings are stored
- Exporting your VS Code settings and extensions
- Importing a Profile in VS Code
- Viewing your profile's contents
- Where profiles are stored
- Manually copying specific settings to another computer
# The 2 main ways to export settings and extensions in VS Code
There are 2 main ways to export settings and extensions in VS Code.
You can:
- Use the built-in Settings sync functionality (recommended).
- Manually copy the settings and extensions and paste them into the corresponding folders on your other computer.
Using the built-in Settings sync functionality is quite intuitive, so this is the recommended approach.
Click on your preferred approach to navigate to the subheading:
- Exporting Settings and Extensions in Visual Studio Code
- Manually copying specific settings to another computer
# Exporting Settings and Extensions in Visual Studio Code
The best way to export settings and extensions in Visual Studio Code is to use the built-in Settings Sync functionality.
To turn on settings sync:
- Click on the gear icon at the bottom left part of the Activity Bar.
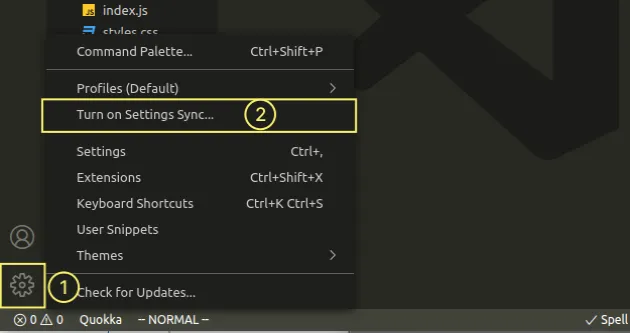
Click on the Turn on Settings Sync... option.
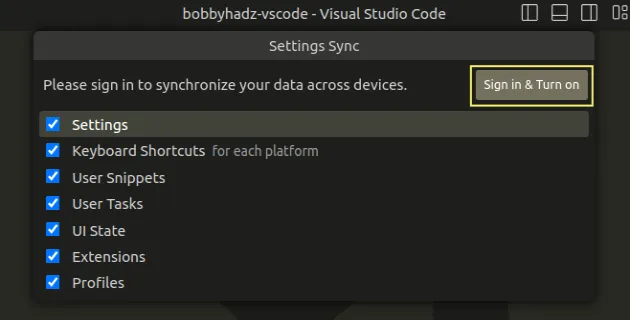
You will be prompted to select which settings you want to sync.
Click on the Sign in & Turn on button at the top right.
- Sign in with GitHub or Microsoft.
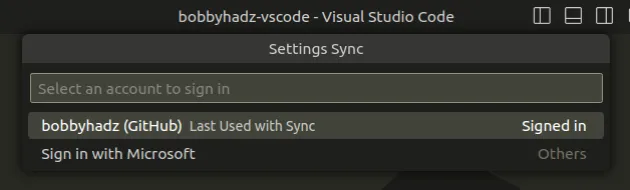
- A browser tab will open so that you can sign in with your Microsoft or GitHub account.
If you pick Microsoft, you can either use your Outlook account, an Azure account or link a GitHub account to an existing Microsoft account.
- Once you're signed in, Settings Sync is activated and syncs your settings in the background.
If you follow the same steps on a different machine:
- Enable Settings sync.
- Log in with the same account.
Your VS Code settings will automatically get imported on the other machine.
# Manually syncing your settings
Settings get automatically synced over time, e.g. every 30 minutes or every hour. However, you can also manually sync your settings if you've made important changes.
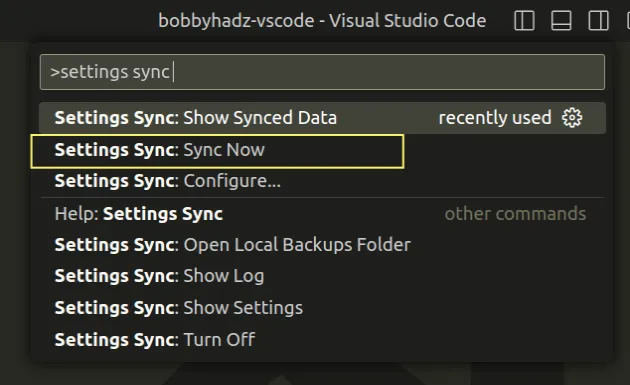
If you want to manually sync your settings:
- Press:
Ctrl+Shift+Pon Windows and Linux.Command+Shift+Pon macOS.
F1 to open the Command Palette.- Type settings sync now and click on Settings Sync: Sync Now.
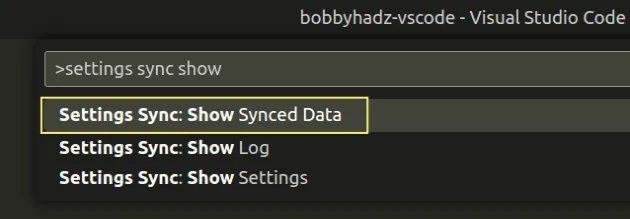
To view your synced settings:
- Press:
Ctrl+Shift+Pon Windows and Linux.Command+Shift+Pon macOS.
- Type settings sync show and click on Settings Sync: Show Synced data.
- Click on the Settings Sync icon in the left Activity Bar.
![]()
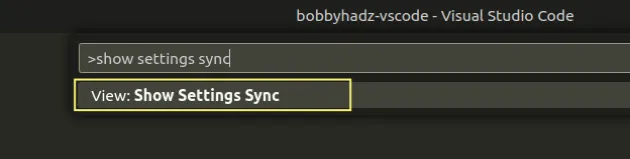
You can also open the menu by:
- Pressing:
Ctrl+Shift+Pon Windows and Linux.Command+Shift+Pon macOS.
- Typing show settings sync and clicking on View: Show Settings Sync.
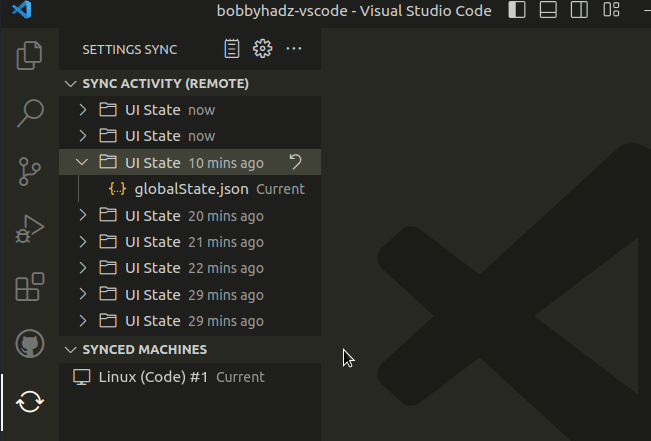
The Sync activity is shown in the Explorer window.
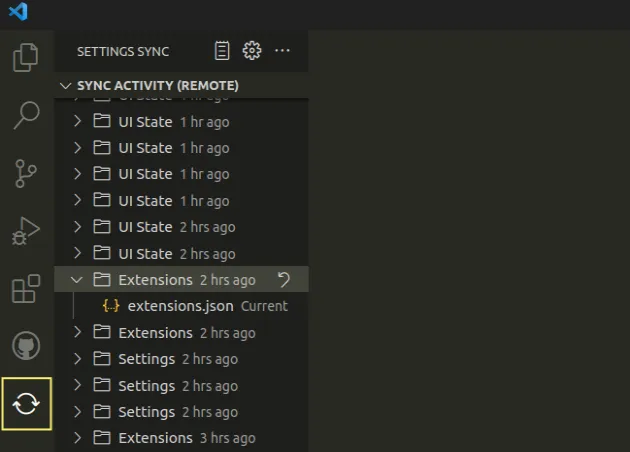
The sync activity tab has directories where your settings, keyboard shortcuts, snippets, UI state, extensions and profiles are stored.
Each directory contains a JSON file with the corresponding settings.
If you want to restore your settings from a specific directory, click on the arrow next to the directory.
# Configuring which settings are stored
If you need to configure which settings are stored:
- Press:
Ctrl+Shift+Pon Windows and Linux.Command+Shift+Pon macOS.
F1 to open the Command Palette.- Type settings sync configure and click on Settings Sync: Configure.
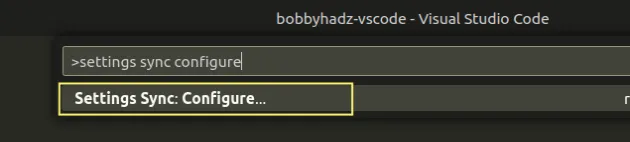
- You can select which settings you want to store. For example, you can only sync your extensions and UI state by ticking only selected boxes.
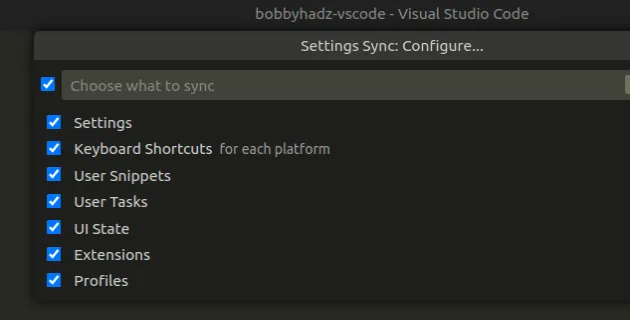
Once you're done click on the OK button.
# Exporting your VS Code settings and extensions
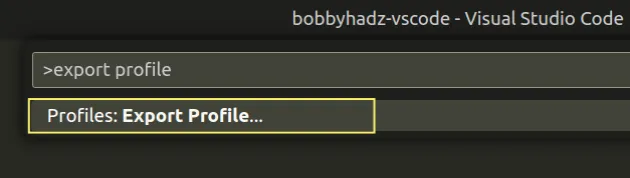
If you need to export your VS Code settings and extensions into a file:
- Press:
Ctrl+Shift+Pon Windows and Linux.Command+Shift+Pon macOS.
F1 to open the Command Palette.- Type export profile and click on Profiles: Export Profile....
- Tick the options you want to export in the sidebar and click on the Export button.
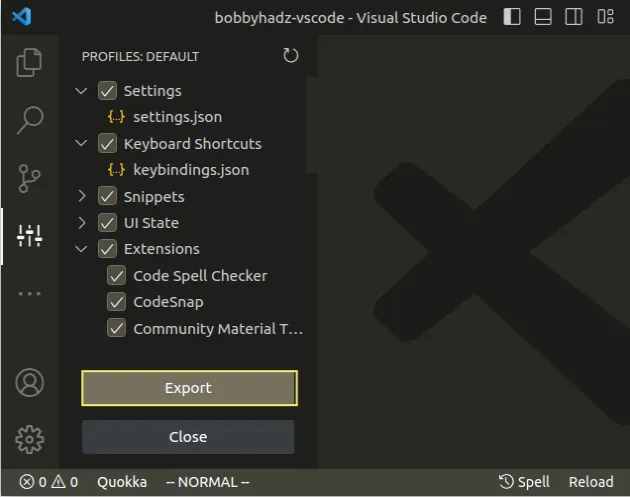
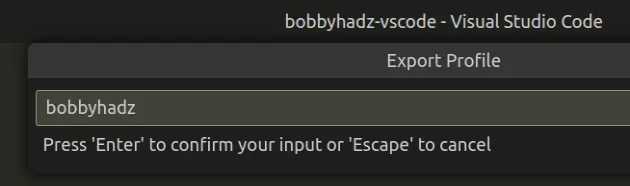
You will then get prompted to name your profile.
Type a name for your profile and press Enter.
- You can export your profile into a GitHub gist or a local file.
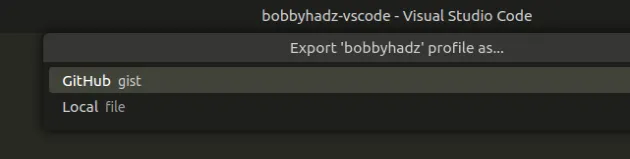
- I'll use a local file for the tutorial.
Once you export your profile into a local file (or a GitHub gist), you can use the local file (or the GitHub gist) to restore your settings on a different computer.
# Importing a Profile in VS Code
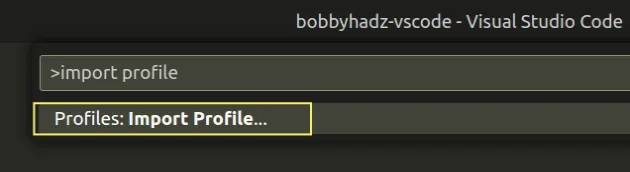
If you need to import a profile on a different computer:
- Press:
Ctrl+Shift+Pon Windows and Linux.Command+Shift+Pon macOS.
F1 to open the Command Palette.- Type import profile and click on Profiles: Import Profile....
- You will be prompted for a URL or a local file.
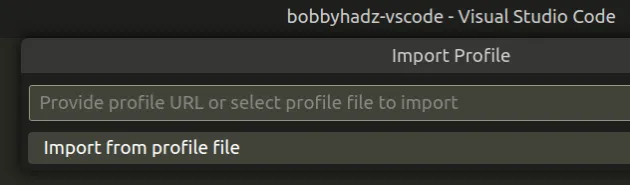
If you exported your profile as a GitHub gist, paste the URL and press Enter.
Otherwise, navigate to the directory that contains your local file and select it.
Once you select the profile file or enter the GitHub gist URL, you will be able to select the settings you want to import.
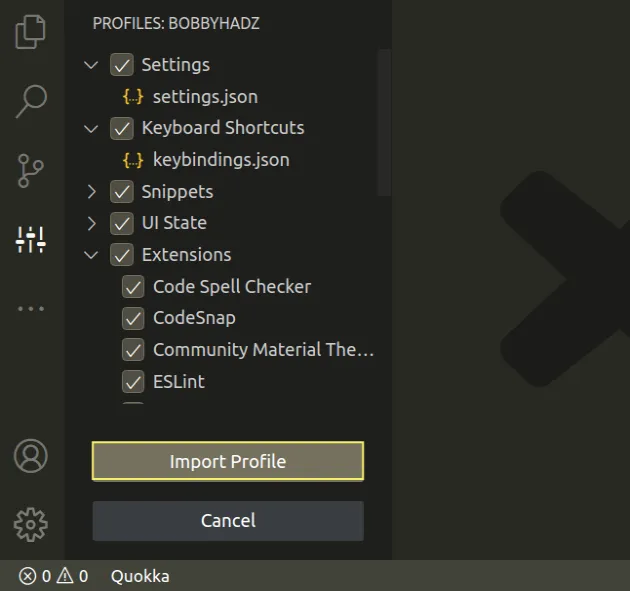
If you don't want to import some of the settings, uncheck the checkboxes before clicking on the Import Profile button.
Once you click on the Import Profile button, the profile will be imported successfully and your VS Code instance will be in sync.
# Viewing your profile's contents
If you need to view your profile's contents:
- Press:
Ctrl+Shift+Pon Windows and Linux.Command+Shift+Pon macOS.
F1 to open the Command Palette.- Type profiles show and click on Profiles: Show Contents....

# Where profiles are stored
The location where profiles are stored depends on your operating system.
On Windows, profiles are stored under:
%APPDATA%\Code\User\profiles
The path resolves to C:\Users\<username>\AppData\Roaming\Code\User\profiles.
Make sure to replace the <username> placeholder with your actual username.
On macOS, profiles are stored under:
$HOME/Library/Application\ Support/Code/User/profiles
On Linux, profiles are stored under:
$HOME/.config/Code/User/profiles
# Manually copying specific settings to another computer
If you decide to manually copy specific settings, here are the paths, depending on your operating system:
On Windows, the path is:
%APPDATA%\Code\User
The path resolves to C:\Users\<username>\AppData\Roaming\Code\User.
Make sure to replace the <username> placeholder with your actual username.
On macOS, the path is:
~/Library/Application\ Support/Code/User/
On Linux, the path is:
~/.config/Code/User
The folder contains the settings.json and
keybindings.json files which you can copy and paste into the same folder on
your other machine.
The extensions are located under:
On Windows, the path is:
%USERPROFILE%\.vscode\extensions
The path resolves to C:\Users\<username>\.vscode\extensions.
Make sure to replace the <username> placeholder with your actual username.
On macOS and Linux, the path is:
~/.vscode/extensions
You can copy the extensions and paste them into the same folder on your other machine.
I've also written an article on how to reset VS Code to the default settings.
# Additional Resources
You can learn more about the related topics by checking out the following tutorials:

