How to render Whitespace Characters in Visual Studio Code
Last updated: Apr 6, 2024
Reading time·4 min

# Table of Contents
- How to render Whitespace Characters in Visual Studio Code
- Using the top menu to render Whitespace characters
- Render whitespace characters and update their color
- Rendering whitespace characters using your global settings.json
- Setting a keyboard shortcut to toggle rendering whitespace
# How to render Whitespace Characters in Visual Studio Code
To render whitespace characters in VS Code:
- Press:
Ctrl+Shift+Pon Windows and LinuxCommand+Shift+Pon macOS
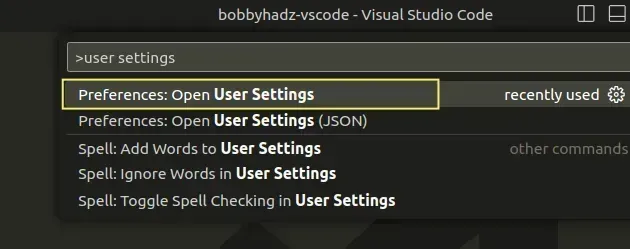
F1 to open the Command Palette.- Type user settings and select Preferences: Open User Settings.
You can also open the settings screen by pressing Ctrl + , on Windows and
Linux or Cmd + , on macOS.
- Type render whitespace and set the Editor: Render Whitespace setting to all.
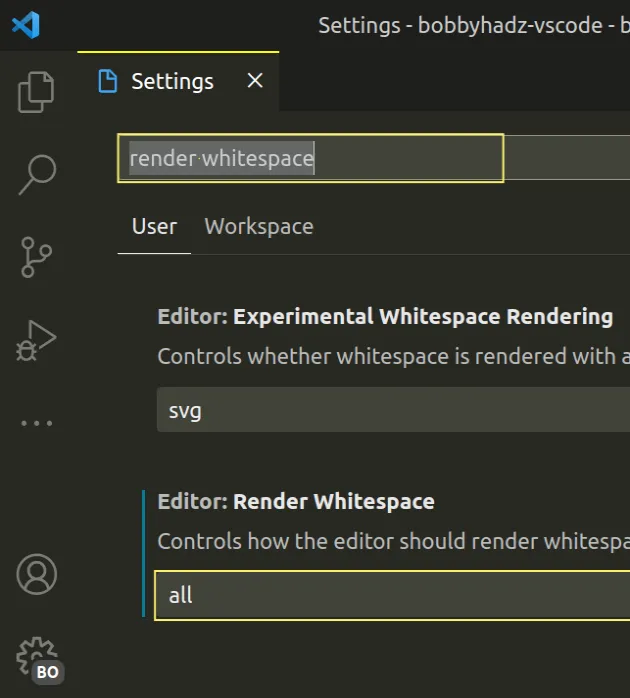
When the Editor: Render Whitespace setting is set to all, all whitespace characters are displayed.
You can also set the setting to:
selection- to only display the whitespace characters in the highlighted text.trailing- to only display the trailing whitespace characters.boundary- displays whitespace characters at the beginning and end of lines (not between words).
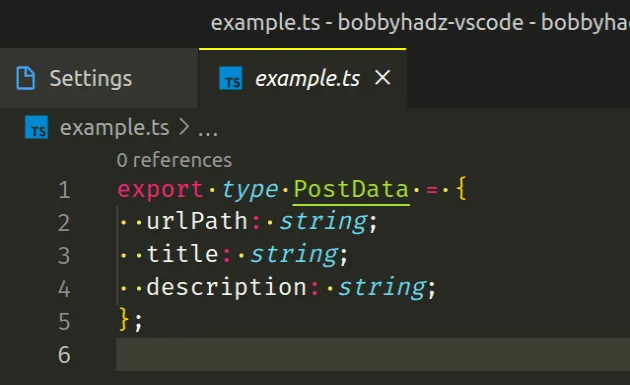
Once the setting is set to all, all whitespace characters are shown.
# Using the top menu to render Whitespace characters
You can also show the whitespace characters using the top menu:
- Click on View in the top menu.
- Click on Appearance and then click Render Whitespace.
Alt to show the top menu on Windows and Linux.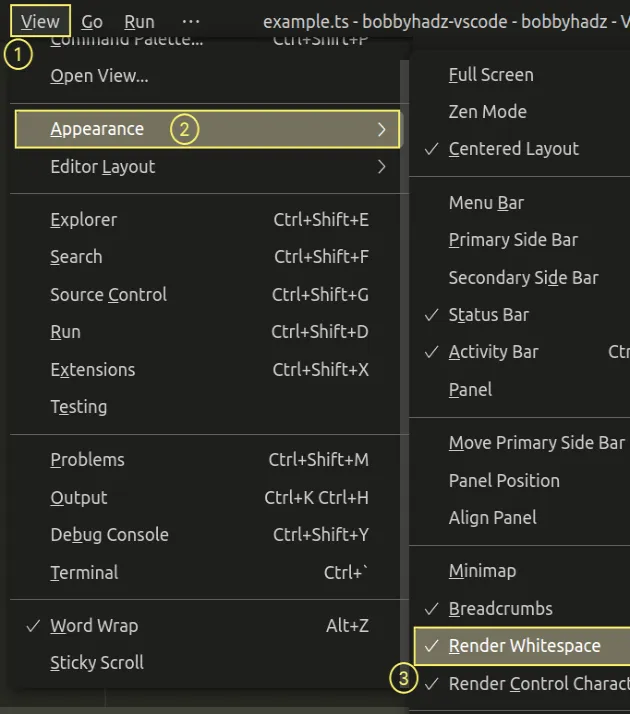
If you don't see the top menu on Windows or Linux, press the Alt key to toggle
it.
# Render whitespace characters and update their color
You can also render whitespace characters using a settings.json file:
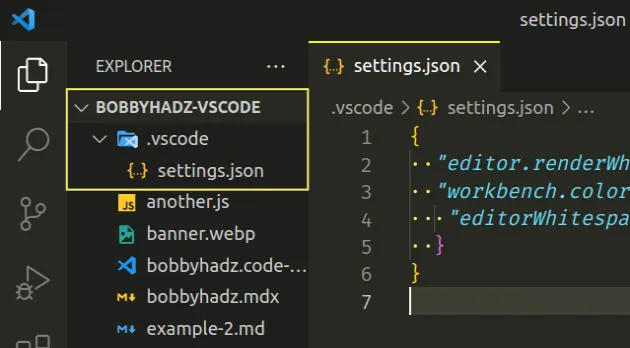
- In the root directory of your project, create a .vscode folder.
- Create a
settings.jsonfile in the.vscodefolder.
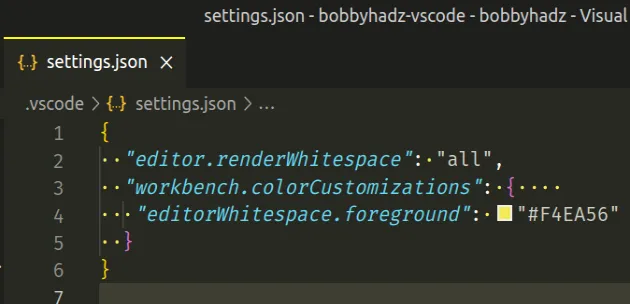
Add the following code to the settings.json file.
{ "editor.renderWhitespace": "all", "workbench.colorCustomizations": { "editorWhitespace.foreground": "#F4EA56" } }
Make sure the .vscode/settings.json file is located in the root directory of
your project.
The following setting is used to render all whitespace characters.
{ "editor.renderWhitespace": "all", }
And, the following setting is used to set the color of the whitespace characters.
{ "workbench.colorCustomizations": { "editorWhitespace.foreground": "#F4EA56" } }
The setting is optional and can be set using the #RGB, #RGBA, #RRGGBB or #RRGGBBAA formats.
# Rendering whitespace characters using your global settings.json
You can also show whitespace characters by updating your global settings.json file:
- Press
Ctrl+Shift+P(orCommand+Shift+Pon macOS).
F1 to open the Command Palette.Type
user settings json.Click on Preferences: Open User Settings (JSON)

- Add the following properties to the object in the
settings.jsonfile.
"editor.renderWhitespace": "all", "workbench.colorCustomizations": { "editorWhitespace.foreground": "#F4EA56" }
Make sure the properties are wrapped in an object if your settings.json file
is empty.
{ "editor.renderWhitespace": "all", "workbench.colorCustomizations": { "editorWhitespace.foreground": "#F4EA56" } }
The workbench.colorCustomizations property is optional and sets the color of
the whitespace characters.
If you already have the property set in your settings.json file, you have to
simply add the "editorWhitespace.foreground": "#F4EA56" line to the object.
Make sure you don't declare the workbench.colorCustomizations object multiple
times in your settings.json file.
# Setting a keyboard shortcut to toggle rendering whitespace
You can also use a keyboard shortcut to toggle rendering the whitespace characters in your project.
- Press:
Ctrl+Shift+Pon Windows and Linux.Command+Shift+Pon macOS.
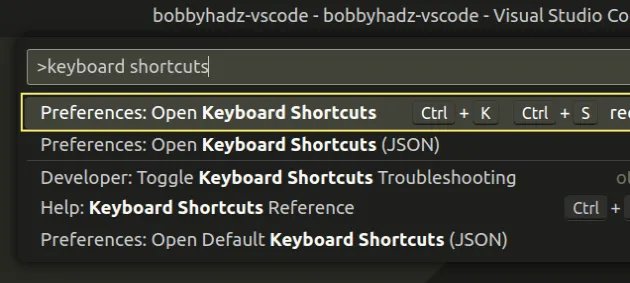
F1 to open the Command Palette.- Type Keyboard Shortcuts and select Preferences: Open Keyboard Shortcuts.
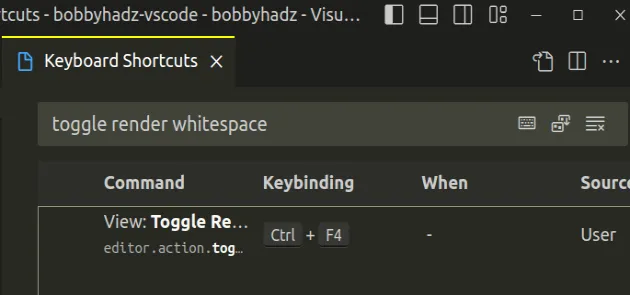
- Search for toggle render whitespace.
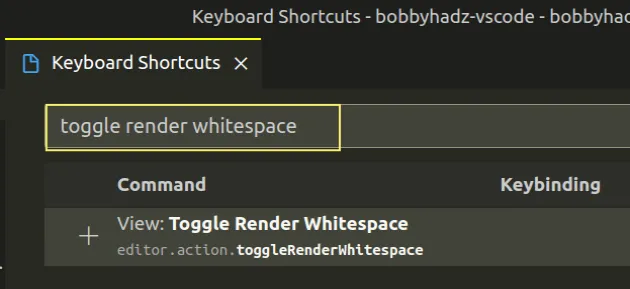
- Click on the plus icon next to View: Toggle Render Whitespace or simply double-click on the row to add a keyboard shortcut.
You will be prompted to press the desired key combination.
Once done, press Enter to set the keyboard shortcut.
Now you can use the keybinding to show or hide the whitespace characters.
I've also written an article on how to remove the trailing spaces automatically in VS Code.
# Additional Resources
You can learn more about the related topics by checking out the following tutorials:

