Jupyter Notebook "Not Trusted" issue [Solved]
Last updated: Apr 12, 2024
Reading time·3 min

# Table of Contents
- Jupyter Notebook "Not Trusted" issue
- Using a command to trust the given notebook
- Resolving the issue with the Jupyter Notebook GUI
- Using the "Trust Notebook" command to resolve the issue
- Creating a notebook in a Docker container with a mounted volume
# Jupyter Notebook "Not Trusted" issue [Solved]
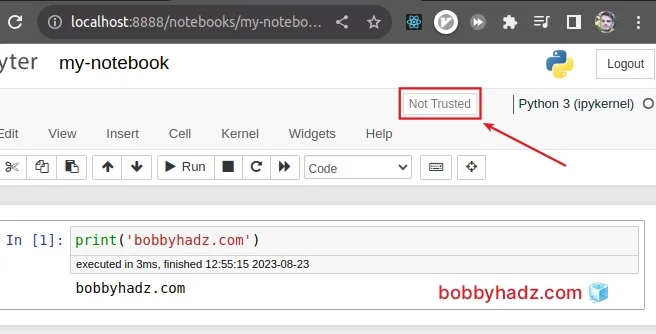
The Jupyter Notebook "Not Trusted" issue is caused because of a security feature that disables the execution of code from untrusted notebooks, without the user's consent.
You can resolve the issue by issuing a command to trust the notebook or by using the graphic user interface to achieve the same.
# Using a command to trust the given notebook
One way to resolve the issue is to use a command.
Open your terminal in the same directory as your notebook and issue the
jupyter trust command.
jupyter trust my-notebook-name.ipynb
Make sure to replace the my-notebook-name.ipynb placeholder with your actual
notebook name.
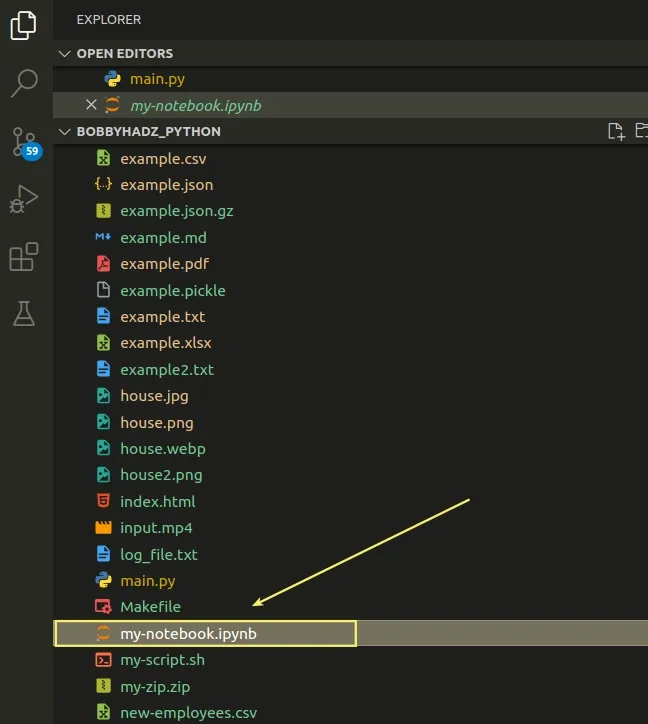
You can find the notebook name by:
- Looking for the
.ipynbfile in your project's directory.
- Or by looking at the label below the URL as shown in this screenshot.
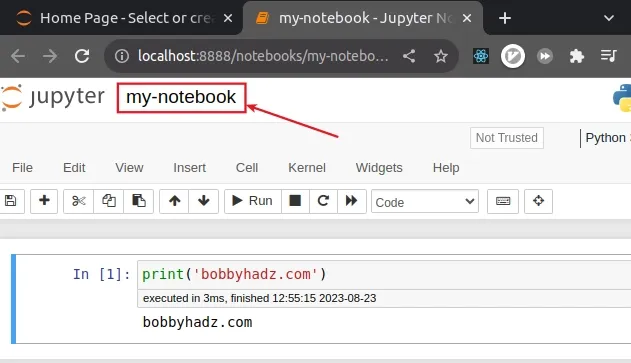
For example, my notebook is named my-notebook.ipynb, so I will issue the
following command.
jupyter trust my-notebook.ipynb

Then you can reopen the notebook by using the jupyter notebook command.
jupyter notebook my-notebook-name.ipynb
Make sure to replace the my-notebook-name.ipynb placeholder with your actual
notebook name.
The jupyter trust command tells Jupyter to trust your notebook.
# Resolving the issue with the Jupyter Notebook GUI
You can also resolve the issue by using the Jupyter Notebook GUI:
- Open your notebook with the
jupyter-notebookorjupyter notebookcommand.
jupyter notebook
- In the top menu, click on File.
- Select Trust Notebook.
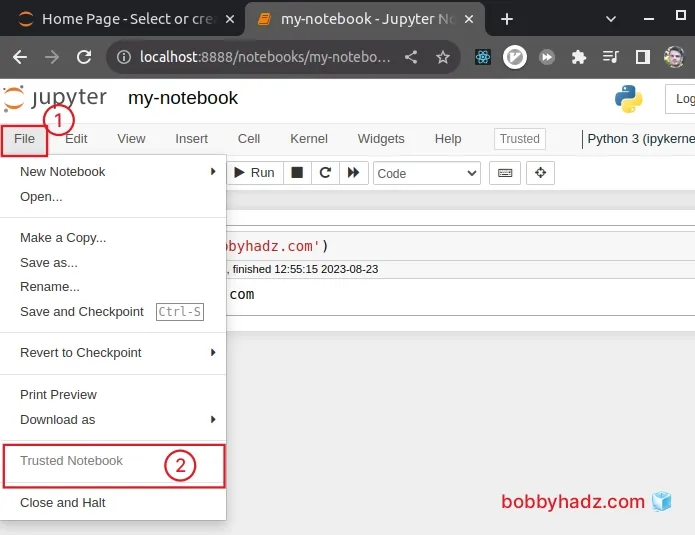
If you see the "Trusted Notebook" option when you click on File, then your Notebook is already trusted.
You can also resolve the issue by clicking on the "Note Trusted" label.

After you click on it, you will be prompted for confirmation.
Click on "Trust".
# Using the "Trust Notebook" command to resolve the issue
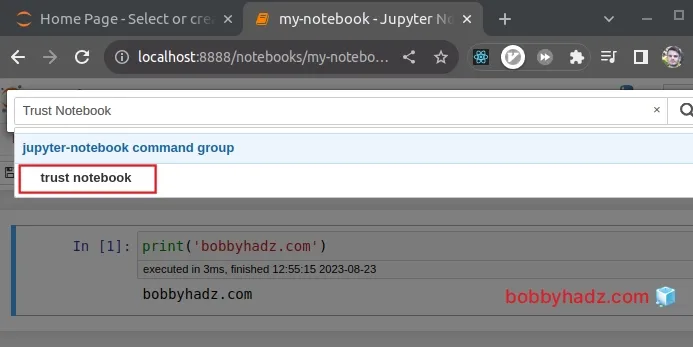
You can also use the "Trust Notebook" command to resolve the issue.
If you use Jupyter Lab, click on View in the top menu and then select
Activate Command Palette or press Ctrl + Shift + C.
You might also be able to open the Command Palette by pressing Ctrl +
Shift + P.
Then type "Trust Notebook" in the command palette and issue the command.
# Creating a notebook in a Docker container with a mounted volume
You might also get the error if you create a Notebook in a Docker container with a mounted volume.
The notebook file is owned by the root user, so if you open it in Jupyter on the host machine, it won't be trusted.
In this case, you have to change the ownership of the notebook .ipynb file to
the host user.
# Additional Resources
You can learn more about the related topics by checking out the following tutorials:
- How to add a new line in a Jupyter Notebook markdown cell
- Error executing Jupyter command 'notebook': [Errno 2] No such file or directory
- The purpose of the exclamation mark (!) in Jupyter Notebook
- How to show (or hide) the Line Numbers in Jupyter Notebook
- How to Clear Cell Output in Jupyter Notebook
- How to read a .mat (Matplotlib) file in Python
- Jupyter Notebook not saving: '_xsrf' argument missing from post
- How to Collapse cells in Jupyter Notebook & Jupyter Lab
- Import a Jupyter ipynb file from another ipynb file

