How to enable Font Ligatures in Visual Studio Code
Last updated: Apr 6, 2024
Reading time·4 min

# Table of Contents
- How to enable Font Ligatures in Visual Studio Code
- Installing a font with ligatures
- Enabling Font Ligatures in Visual Studio Code
- Enabling font ligatures in a local .vscode/settings.json file
# How to enable Font Ligatures in Visual Studio Code
Ligatures are special characters in a font that combine two or more characters into one.
Here is a screenshot with some examples.
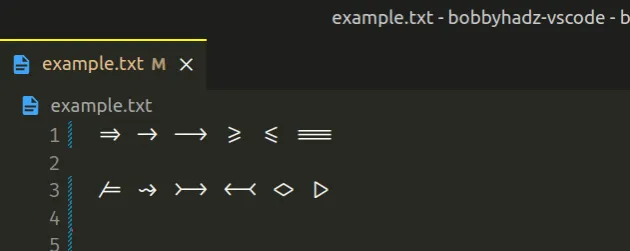
The file from the screenshot has the following contents.
=> -> --> >= <= === /= ~> >-> <-< <> |>
The font in the example is called Fira Code.
If you have already installed a font with ligatures, click on the following subheading:
# Installing a font with ligatures
Make sure you have a font with ligatures installed.
The most commonly used font with programming ligatures is Fira Code.
Other free monospaced fonts with ligatures include:
# Installing Fira Code on Windows
Here are the instructions on how to install Fira Code.
Alternatively, you can follow the OS-specific instructions in the official repository.
On Windows:
- Install Fira Code using chocolatey:
choco install firacode
- Install Fira Code using scoop.
Make sure to start CMD as an administrator and issue the following command.
scoop bucket add nerd-fonts scoop install firacode
# Installing Fira Code on macOS
On macOS:
- The easiest way is to use
brewandcask.
brew tap homebrew/cask-fonts brew install --cask font-fira-code
Alternatively, you can:
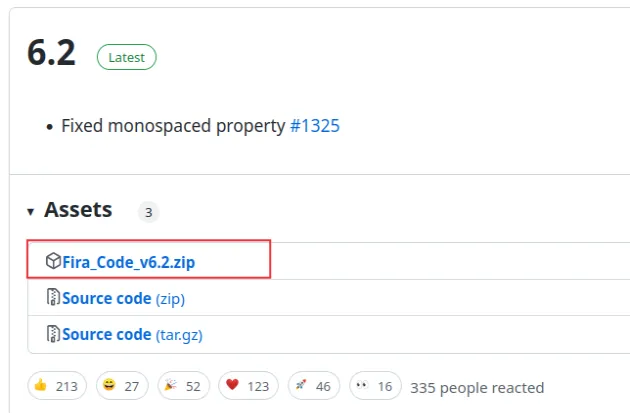
- Open the releases page of the GitHub repo.
- Click on the
Fira_Code_vX.Y.zipfile to download it.
- Extract the file.
- Select all
ttffont files. - Right-click and select Open (or Open With Font Book).
- Select Install Font.
# Installing Fira Code on Linux
Follow the instructions in this section of the docs for your flavor of Linux.
For example, on Ubuntu, run the following command.
sudo apt install fonts-firacode
# Enabling Font Ligatures in Visual Studio Code
To enable font ligatures in Visual Studio Code:
- Press
Ctrl+Shift+P(orCommand+Shift+Pon macOS).
F1 to open the Command Palette.- Type user settings and select Preferences: Open User Settings.
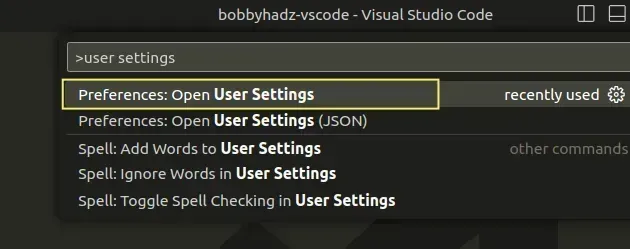
You can also open the settings screen by pressing Ctrl + , on Windows and
Linux or Cmd + , on macOS.
- Type Editor: font family and type 'Fira Code' in the field.
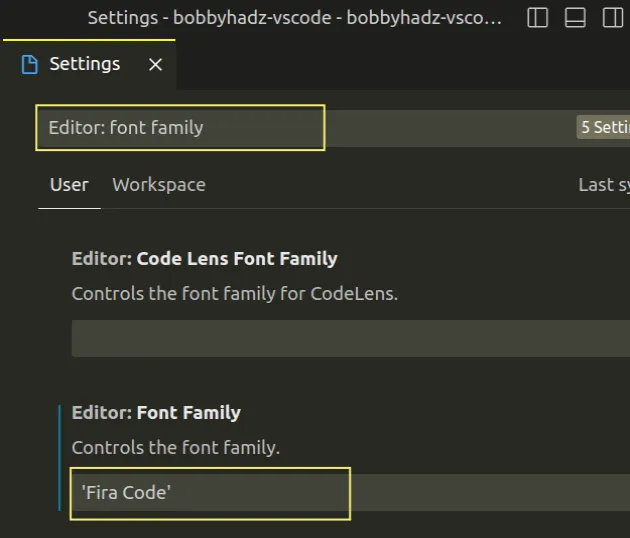
- If you want to provide a fallback font in case Fira Code is not installed,
use a comma, e.g.
'Fira Code', 'Cascadia Code', 'Consolas'.
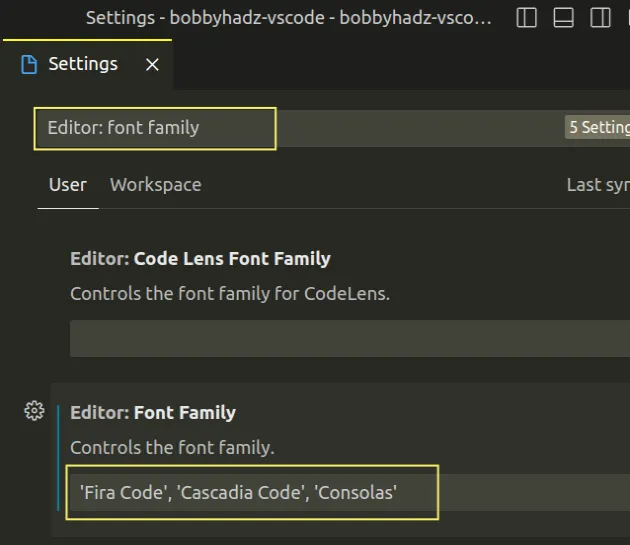
If Fira Code is not installed on the machine, VS Code falls back to the Cascadia Code font.
If Cascadia Code is not available as well, it falls back to the Consolas font.
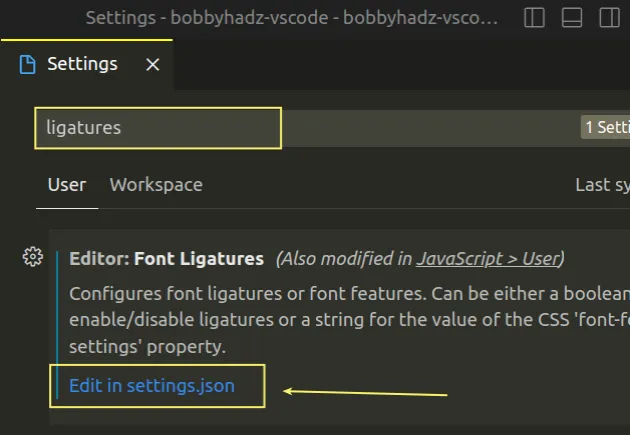
- Type ligatures in the search field and click on Edit in settings.json.
- Add the following code to your
settings.jsonfile.
// Font Family "editor.fontFamily": "'Fira Code', 'Cascadia Code', 'Consolas'", // Enable Font Ligatures "editor.fontLigatures": true,
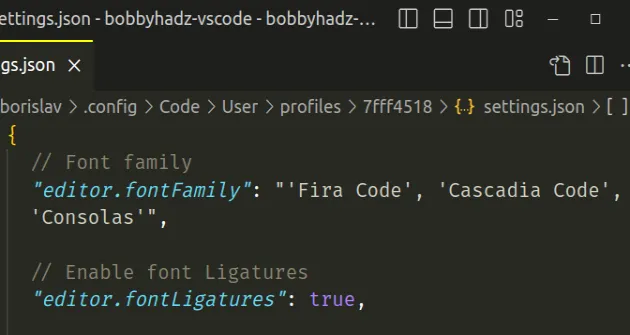
Make sure the properties are wrapped in an object in your settings.json file.
{ // Font Family "editor.fontFamily": "'Fira Code', 'Cascadia Code', 'Consolas'", // Enable Font Ligatures "editor.fontLigatures": true, // ... Your other config here }
Setting editor.fontLigatures to true enables font ligatures in VS Code.
Open a file, e.g. one called example.txt and paste the following text in it.
=> -> --> >= <= === /= ~> >-> <-< <> |>
If ligatures are enabled, you should be able to see the following output.

If you still don't see font ligatures:
- Make sure the font you set the
editor.fontFamilyproperty to is installed on your machine. - Try to restart Visual Studio Code.
# Enabling font ligatures in a local .vscode/settings.json file
An alternative approach to enable font ligatures is to use a local
.vscode/settings.json file.
The local file applies the specified configuration only to the current project and overrides any global settings.
In the root directory of your project, create a .vscode folder.
Create a
settings.jsonfile in the.vscodefolder.Add the following code to your
settings.jsonfile.
{ // Font Family "editor.fontFamily": "'Fira Code', 'Cascadia Code', 'Consolas'", // Enable Font Ligatures "editor.fontLigatures": true }
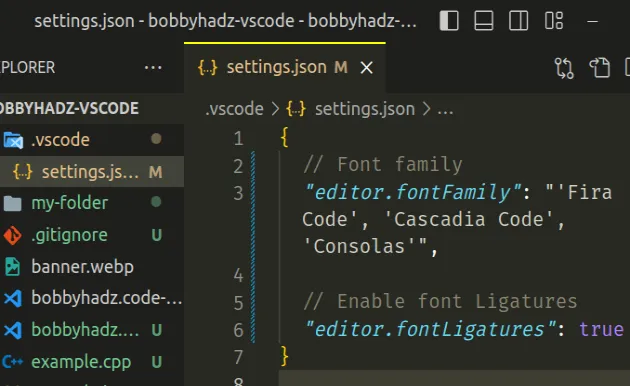
The configuration in your .vscode/settings.json file overrides any global
configuration and is project-specific.
Open a file, e.g. one called example.txt and paste the following text in it.
=> -> --> >= <= === /= ~> >-> <-< <> |>
If ligatures are enabled, you should be able to see the following output.

If you still don't see font ligatures:
- Make sure the font you set the
editor.fontFamilyproperty to is installed on your machine. - Try to restart Visual Studio Code.
# Additional Resources
You can learn more about the related topics by checking out the following tutorials:

