How to change the Style of the `title` Attribute using CSS
Last updated: Apr 5, 2024
Reading time·6 min

# Table of Contents
- How to change the Style of the
titleAttribute using CSS - Styling the element's hover and
::afterseparately - Using a different style for the custom title
- Showing an element on hover to simulate a custom title
# How to change the Style of the title Attribute using CSS
To change the style of the title attribute using CSS:
- Set the
data-titleattribute on the element to the value of thetitleattribute. - When the user hovers over the element, use
::afterto create a pseudo-element that shows the custom title.
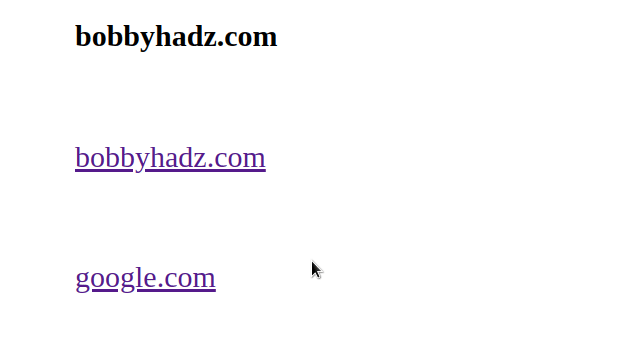
<!DOCTYPE html> <html lang="en"> <head> <meta charset="UTF-8" /> <style> body { margin: 100px; } a { position: relative; display: inline-block; margin-top: 50px; font-size: 1.5em; } a[data-title]:hover::after { content: attr(data-title); position: absolute; top: -100%; left: 0; z-index: 100; background-color: aquamarine; width: 250px; } </style> </head> <body> <h2>bobbyhadz.com</h2> <a href="https://bobbyhadz.com" data-title="Example title" >bobbyhadz.com</a > </body> </html>

We first set the data-title attribute on the element to the value of the title
we want to show when the user hovers over the element.
<a href="https://bobbyhadz.com" data-title="Example title" >bobbyhadz.com </a>
We set the position of the a element to relative, so we can set the position
of the tooltip to absolute.
a { position: relative; display: inline-block; margin-top: 50px; font-size: 1.5em; }
The next step is to use the
attr() CSS function to
get the value of the data-title attribute directly in the stylesheet.
a[data-title]:hover::after { content: attr(data-title); position: absolute; top: -100%; left: 0; z-index: 100; background-color: aquamarine; width: 250px; }
You can also set the color of the title text.
a[data-title]:hover::after { content: attr(data-title); position: absolute; top: -100%; left: 0; z-index: 100; background-color: aquamarine; width: 250px; /* 👇️ set color of title text */ color: black; }
::after is used to create a pseudo-element that is the last child of the selected element.
The content of the pseudo-element is the text of the data-title attribute.
<a href="https://bobbyhadz.com" data-title="Example title" >bobbyhadz.com </a>
The next step is to set the position of the element to absolute, so we can use
the top and left properties.
If the width of your title text exceeds the width of your element, you might
have to increase the value of the width property on hover.
a[data-title]:hover::after { content: attr(data-title); position: absolute; top: -100%; left: 0; z-index: 100; background-color: aquamarine; /* increase width */ width: 250px; }
You can also increase the width directly on the element.
a { position: relative; display: inline-block; margin-top: 50px; font-size: 1.5em; width: 250px; }
We used the custom data-title attribute so that the native title won't
display eventually and interfere with the custom title.
The native title attribute can't be styled directly using CSS.
However, you can create a custom title that you can style.
The style of the native title attribute is defined by each browser and might
slightly vary between browsers.
# Styling the element's hover and ::after separately
In some cases, you might want to style the element's :hover and ::after
separately.
Here is an example that uses a box-shadow when styling the custom title.
<!DOCTYPE html> <html lang="en"> <head> <meta charset="UTF-8" /> <style> body { margin: 100px; } a { position: relative; display: inline-block; margin-top: 50px; font-size: 1.5em; } a[data-title]::after { content: attr(data-title); background-color: pink; color: black; font-size: 1.2em; position: absolute; padding: 1px 5px 2px 5px; bottom: 1.1em; left: 50%; white-space: nowrap; box-shadow: 1px 1px 4px #242424; opacity: 0; border: 1px solid #1b1b1b; z-index: 9999999; visibility: hidden; } a[data-title]:hover::after { visibility: visible; opacity: 1; transition: all 0.1s ease 0.4s; } </style> </head> <body> <h2>bobbyhadz.com</h2> <a href="https://bobbyhadz.com" data-title="Example title" >bobbyhadz.com</a > </body> </html>

The ::after pseudo-element is styled separately.
a[data-title]::after { content: attr(data-title); background-color: pink; color: black; font-size: 1.2em; position: absolute; padding: 1px 5px 2px 5px; bottom: 1.1em; left: 50%; white-space: nowrap; box-shadow: 1px 1px 4px #242424; opacity: 0; border: 1px solid #1b1b1b; z-index: 9999999; visibility: hidden; }
We used the attr() function to get the value of the data-title attribute
just like in the previous example.
This time we also used the box-shadow CSS property to display a shadow.
We initially set the element's opacity to 0 and its visibility to
hidden.
When the user hovers over the element, the pseudo-element's visibility is set
to visible and its opacity is set to 1.
a[data-title]:hover::after { visibility: visible; opacity: 1; transition: all 0.1s ease 0.4s; }
We also set up a transition to make the tooltip visible with a quick animation.
You can play around with the values of the bottom and left CSS properties if
you need to position the custom title somewhere else.
a[data-title]::after { content: attr(data-title); background-color: pink; color: black; font-size: 1.2em; position: absolute; padding: 1px 5px 2px 5px; bottom: -1.6em; left: 70%; white-space: nowrap; box-shadow: 1px 1px 4px #242424; opacity: 0; border: 1px solid #1b1b1b; z-index: 9999999; visibility: hidden; }

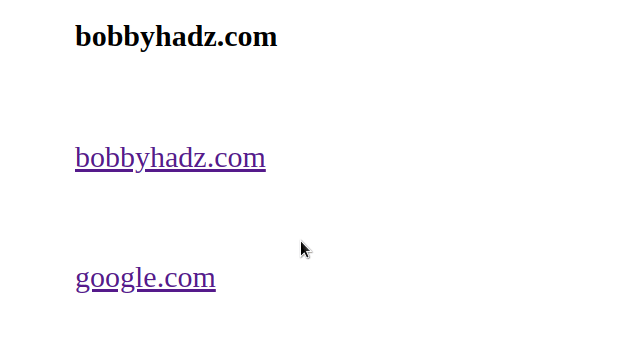
Here is an example that shows the difference between the custom title and using
the native title attribute.
<!DOCTYPE html> <html lang="en"> <head> <meta charset="UTF-8" /> <style> body { margin: 100px; } a { position: relative; display: inline-block; margin-top: 50px; font-size: 1.5em; } a[data-title]::after { content: attr(data-title); background-color: pink; color: black; font-size: 1.2em; position: absolute; padding: 1px 5px 2px 5px; bottom: -1.6em; left: 70%; white-space: nowrap; box-shadow: 1px 1px 4px #242424; opacity: 0; border: 1px solid #1b1b1b; z-index: 9999999; visibility: hidden; } a[data-title]:hover::after { visibility: visible; opacity: 1; transition: all 0.1s ease 0.4s; } </style> </head> <body> <h2>bobbyhadz.com</h2> <!-- 👇️ CUSTOM TITLE --> <a href="https://bobbyhadz.com" data-title="Example title" >bobbyhadz.com</a > <br /> <br /> <!-- 👇️ NATIVE TITLE --> <a href="https://bobbyhadz.com" title="Example title" >google.com</a > </body> </html>

# Using a different style for the custom title
Here is an example that uses a style that more closely resembles the style of a
native title attribute.
<!DOCTYPE html> <html lang="en"> <head> <meta charset="UTF-8" /> <style> body { margin: 100px; } a { position: relative; display: inline-block; margin-top: 50px; font-size: 1.5em; } a[data-title]::after { content: attr(data-title); background-color: rgb(255, 226, 231); color: black; font-size: 1.1em; position: absolute; padding: 2px 6px 2px 5px; bottom: -1.6em; left: 70%; white-space: nowrap; box-shadow: 1px 1px 4px #242424; opacity: 0; border: 1px solid #1b1b1b; border-radius: 6px; z-index: 9999999; visibility: hidden; background-image: -moz-linear-gradient( top, #f8f8f8, #bebebe ); background-image: -webkit-gradient( linear, left top, left bottom, color-stop(0, #f8f8f8), color-stop(1, #bebebe) ); background-image: -webkit-linear-gradient( top, #f8f8f8, #bebebe ); background-image: -moz-linear-gradient( top, #f8f8f8, #bebebe ); background-image: -ms-linear-gradient( top, #f8f8f8, #bebebe ); background-image: -o-linear-gradient( top, #f8f8f8, #bebebe ); } a[data-title]:hover::after { visibility: visible; opacity: 1; transition: all 0.1s ease 0.4s; } </style> </head> <body> <h2>bobbyhadz.com</h2> <a href="https://bobbyhadz.com" data-title="Example title" >bobbyhadz.com</a > <br /> <br /> <a href="https://bobbyhadz.com" title="Example title" >google.com</a > </body> </html>
The code sample uses the background-image CSS property to set the background
of the custom title to a gradient.
# Showing an element on hover to simulate a custom title
You can also show an element on hover to simulate a custom title.
<!DOCTYPE html> <html lang="en"> <head> <meta charset="UTF-8" /> <style> body { margin: 100px; } a { position: relative; display: inline-block; margin-top: 50px; font-size: 1.5em; } a span { display: none; } a:hover span { position: absolute; top: 30px; padding: 5px 10px 5px 5px; display: block; z-index: 999999; left: 60%; margin: 8px; width: 200px; text-decoration: none; background-color: #f5f5f5; color: black; border: 1px solid gray; } </style> </head> <body> <h2>bobbyhadz.com</h2> <a href="https://bobbyhadz.com" data-title="Example title" >bobbyhadz.com <span>Example title text</span></a > <br /> <br /> <a href="https://bobbyhadz.com" title="Example title" >google.com</a > </body> </html>
Notice that we didn't create a pseudo-element using ::after this time.
Instead, we have a hidden span element nested within the a tag.
<a href="https://bobbyhadz.com" data-title="Example title" > bobbyhadz.com <span>Example title text</span> </a>
We set the position of the a element to relative.
a { position: relative; display: inline-block; margin-top: 50px; font-size: 1.5em; }
The next step is to hide the span element by setting its
display attribute to none.
a span { display: none; }
When the user hovers over the a element, the display property of the span
is set to block to show the custom title.
a:hover span { position: absolute; top: 30px; left: 60%; padding: 5px 10px 5px 5px; display: block; z-index: 999999; margin: 8px; width: 200px; text-decoration: none; background-color: #f5f5f5; color: black; border: 1px solid gray; }
You can use the top and left CSS properties if you need to position the
title text somewhere else.
You might also have to adjust the value of the width property depending on the
width of your title text.
# Additional Resources
You can learn more about the related topics by checking out the following tutorials:
- How to edit the Title of an Alert Box in JavaScript
- Display a Variable value in an Alert box in JavaScript
- How to create an Alert/Admonition Box in GitHub Markdown
- Set styles on the Body Element using JavaScript
- Tailwind CSS extending colors not working [Solutions]
- How to set the width and height of a Span in CSS
- How to Limit text length to N lines using CSS [3 Ways]

