Pass a Variable from one HTML page to Another in JavaScript
Last updated: Apr 4, 2024
Reading time·6 min

# Table of Contents
- Pass a Variable from one HTML page to Another in JavaScript
- Pass a Variable from one HTML page to Another using Query parameters
# Pass a Variable from one HTML page to Another in JavaScript
There are 2 common ways to pass a variable from one HTML page to another:
- Using
localStorage()to set the variable on the first page and access it on the second. - Using query parameters for passing around primitive values such as strings and numbers.
The most intuitive approach is to use the localStorage API.
Here is an example that passes a primitive from one HTML page to another.
This is the code for the index.html file.
<!DOCTYPE html> <html lang="en"> <head> <meta charset="UTF-8" /> <script> window.addEventListener('load', () => { // 👇️ for primitive variables const website = 'bobbyhadz.com'; localStorage.setItem('website', website); // 👇️ for arrays, objects, etc const tasks = ['develop', 'test', 'ship']; localStorage.setItem('tasks', JSON.stringify(tasks)); }); </script> </head> <body> <h2>bobbyhadz.com | Home</h2> <a href="/about">About page</a> </body> </html>
The file uses the addEventListener() method to add a listener for the load event.
window.addEventListener('load', () => { // 👇️ for primitive variables const website = 'bobbyhadz.com'; localStorage.setItem('website', website); // 👇️ for arrays, objects, etc const tasks = ['develop', 'test', 'ship']; localStorage.setItem('tasks', JSON.stringify(tasks)); });
The load event is triggered when the whole page has loaded, including all
dependent resources like stylesheets, scripts, iframes and images.
The localStorage.setItem() method takes 2 parameters:
- A string containing the name of the key you want to create or update.
- A string containing the value you want to set for the given key.
localStorage.setItem() method has to be a string.When you store values such as arrays or objects in local storage, you have to use the JSON.stringify method to convert the array or object to a string.
// 👇️ for arrays, objects, etc const tasks = ['develop', 'test', 'ship']; localStorage.setItem('tasks', JSON.stringify(tasks));
This is not necessary when storing primitive values such as strings and numbers.
And here is the code for the about.html file.
<!DOCTYPE html> <html lang="en"> <head> <meta charset="UTF-8" /> <title>About Page - bobbyhadz.com</title> <script> window.addEventListener('load', () => { const website = localStorage.getItem('website'); console.log(website); const tasks = JSON.parse(localStorage.getItem('tasks')); console.log(tasks); }); </script> </head> <body> <h2>About page: bobbyhadz.com</h2> </body> </html>
The about.html file calls the
localStorage.getItem()
method in the load event listener.
window.addEventListener('load', () => { const website = localStorage.getItem('website'); console.log(website); const tasks = JSON.parse(localStorage.getItem('tasks')); console.log(tasks); });
The only parameter the localStorage.getItem() method takes is the name of the
key you want to retrieve from local storage.
Notice that we had to use the JSON.parse()
method to parse the tasks JSON string into a native JavaScript array.
const tasks = JSON.parse(localStorage.getItem('tasks')); console.log(tasks);
This is necessary because we previously used the JSON.stringify() method when
setting the local storage key.
The example project has the following file structure.
my-project/ └── index.html └── about.html
You can open your terminal in the my-project directory and run the following
command to start a development server.
npx serve .
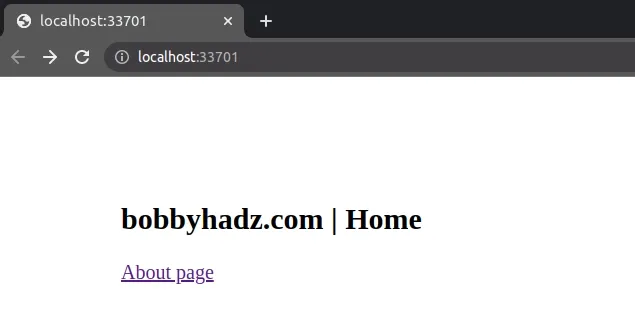
The root URL looks as follows.
To inspect the values that are present in local storage, you can:
- Open your browser's developer tools by pressing
F12. - Click on the Application tab.
- Select Local Storage in the left sidebar.
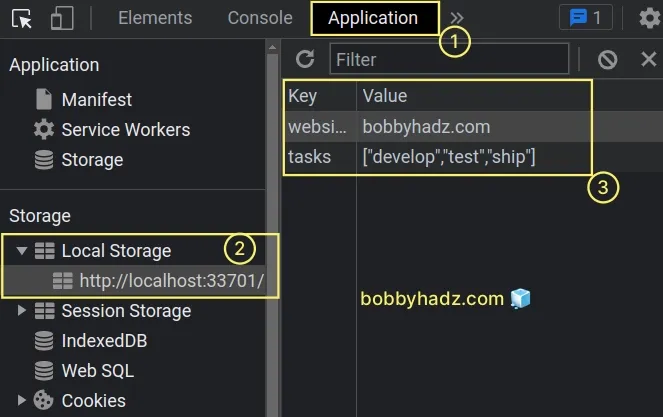
As shown in the screenshot, the website and tasks keys are set in local
storage.
Now click on the About page link or visit the /about route and open the
Console tab in your developer tools.
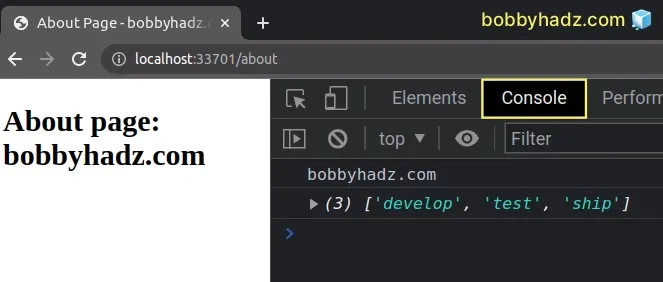
This is the most intuitive approach to pass variable values from one page to another.
Local storage has a relatively high limit of about 5 MB.
# Pass a Variable from one HTML page to Another using Query parameters
You can also use query parameters to pass variables from one HTML page to another.
The first page has to set the query parameters on an <a> tag or directly
redirect to the second page with query params in the URL.
Here is the code for the index.html file.
<!DOCTYPE html> <html lang="en"> <head> <meta charset="UTF-8" /> </head> <body> <h2>bobbyhadz.com | Home</h2> <a id="about" href="/about">About page</a> <script> window.addEventListener('load', () => { const aboutLink = document.getElementById('about'); const website = 'bobbyhadz.com'; const number = 100; aboutLink.href = `${aboutLink.href}?website=${website}&number=${number}`; console.log(aboutLink.href); }); </script> </body> </html>
We used the document.getElementById()
method to select the <a> tag and then updated its href attribute.
Query parameters have the form of ?key1=value2&key2=value2.
Or if you only have to set one key-value pair: ?key1=value1.
We used a
template literal string to
interpolate variables in the value of the href attribute.
Note that template strings are wrapped in backticks ` and not single quotes.
The href attribute of the <a> tag in the example looks similar to the
following.
http://localhost:33701/about?website=bobbyhadz.com&number=100
Here is the code for the about.html file.
<!DOCTYPE html> <html lang="en"> <head> <meta charset="UTF-8" /> <title>About Page - bobbyhadz.com</title> </head> <body> <h2>About page: bobbyhadz.com</h2> <script> window.addEventListener('load', () => { const urlParams = new URLSearchParams( window.location.search, ); const website = urlParams.get('website'); console.log(website); const number = urlParams.get('number'); console.log(number); }); </script> </body> </html>
We used the
URLSearchParams()
constructor to create a URLSearchParams object.
We can then access the query parameters from the URL by using the URLSearchParams.get() method.
If you load the root URL and click on the link to the About page, you will see that the query parameters are logged to the console.
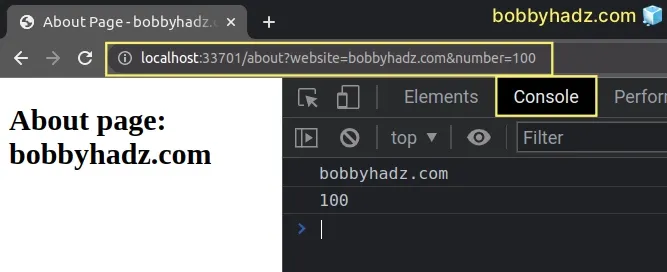
Notice that the query parameters are also contained in the URL.
This approach is suitable when you have to pass primitive values from one page to another.
However, note that the length of the URL must not exceed 2,048 characters.
# Automatically redirecting the user to a page with query parameters
You can also automatically redirect the user to the About page with query parameters.
<!DOCTYPE html> <html lang="en"> <head> <meta charset="UTF-8" /> </head> <body> <h2>bobbyhadz.com | Home</h2> <script> window.addEventListener('load', () => { const website = 'bobbyhadz.com'; const number = 100; window.location.href = `/about?website=${website}&number=${number}`; }); </script> </body> </html>
When the user accesses the root URL, they get redirected to /about with query
parameters.
Depending on the server you use, you might have to explicitly set the extension
of the file, e.g. /about.html.
<script> // ... window.location.href = `/about.html?website=${website}&number=${number}`; </script>
The code for the "about page" remains the same.
<!DOCTYPE html> <html lang="en"> <head> <meta charset="UTF-8" /> <title>About Page - bobbyhadz.com</title> </head> <body> <h2>About page: bobbyhadz.com</h2> <script> window.addEventListener('load', () => { const urlParams = new URLSearchParams( window.location.search, ); const website = urlParams.get('website'); console.log(website); const number = urlParams.get('number'); console.log(number); }); </script> </body> </html>
Now when the user visits the root URL, they immediately get redirected to the about page with query parameters.
# Redirecting the user to a page with query parameters when a button is clicked
You can also pass variables to the other page using query parameters when a button is clicked.
Here is the updated code for the index.html file.
<!DOCTYPE html> <html lang="en"> <head> <meta charset="UTF-8" /> </head> <body> <h2>bobbyhadz.com | Home</h2> <button id="btn">Pass variable to About page</button> <script> window.addEventListener('load', () => { const button = document.getElementById('btn'); button.addEventListener('click', () => { const website = 'bobbyhadz.com'; const number = 100; window.location.href = `/about?website=${website}&number=${number}`; }); }); </script> </body> </html>
We set a click event listener on the button element.
Every time the button is clicked, the user gets redirected to the About page with query parameters.
You might have to adjust to URL to /about.html?... depending on how your
server handles this.
The code for the about.html page remains the same.
<!DOCTYPE html> <html lang="en"> <head> <meta charset="UTF-8" /> <title>About Page - bobbyhadz.com</title> </head> <body> <h2>About page: bobbyhadz.com</h2> <script> window.addEventListener('load', () => { const urlParams = new URLSearchParams( window.location.search, ); const website = urlParams.get('website'); console.log(website); const number = urlParams.get('number'); console.log(number); }); </script> </body> </html>
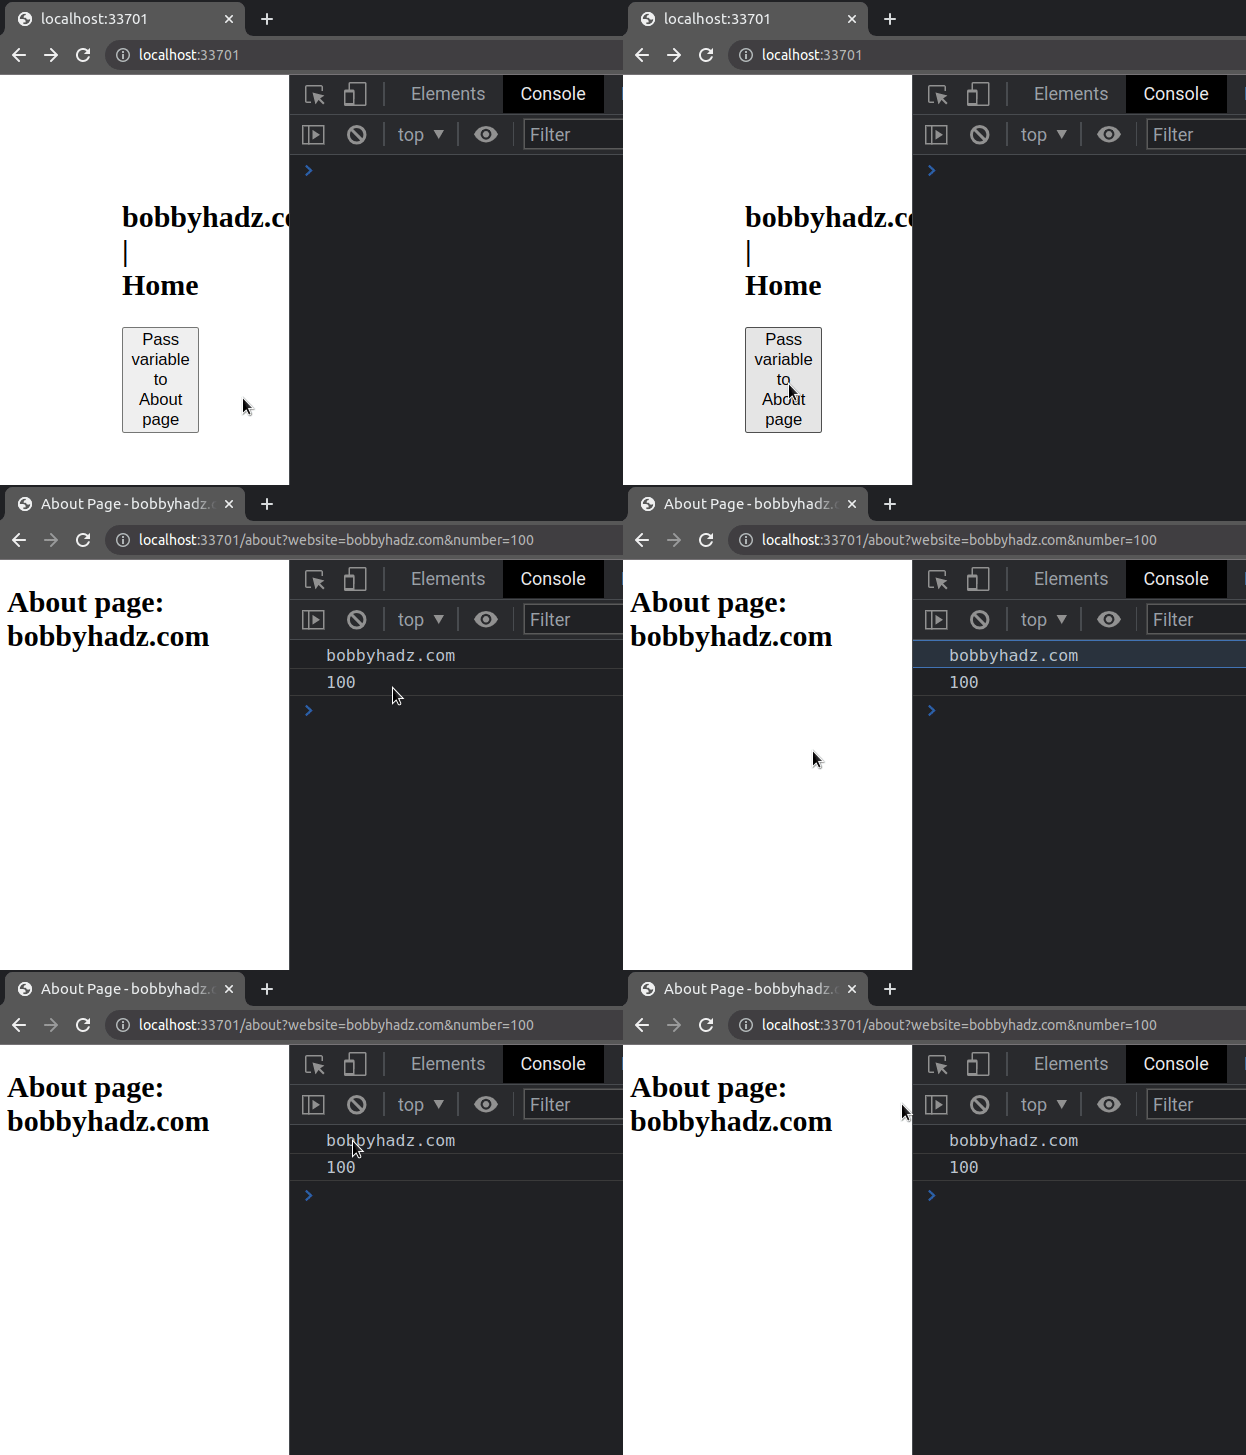
When the button is clicked, the user gets redirected to the about page with
query parameters.
The variables are easily accessible via the URLSearchParams() constructor.
# Additional Resources
You can learn more about the related topics by checking out the following tutorials:

