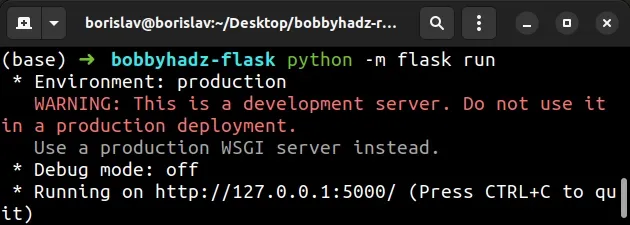
WARNING: This is a development server. Do not use it in a production deployment
Last updated: Apr 10, 2024
Reading time·3 min

# WARNING: This is a development server. Do not use it in a production deployment
The warning "This is a development server. Do not use it in a production deployment" occurs when we start a Flask application using the development server.
To resolve the issue, install and use the waitress module to host your Flask
application in production.

You can use the development server when working on your project on localhost.
For example, if you have the following code stored in a file app.py.
from flask import Flask app = Flask(__name__) @app.route("/") def hello_world(): return "<p>Hello World</p>"
You can run the development server with the following command.
flask run python -m flask run python3 -m flask run py -m flask run
# Using a production-ready server
If you need a production-ready server, install the waitress module.
Open your terminal and run the following command.
pip install waitress # 👇️ For Python 3 pip3 install waitress # 👇️ If you don't have pip in your PATH environment variable python -m pip install waitress # 👇️ For Python 3 python3 -m pip install waitress # 👇️ Using py alias py -m pip install waitress # 👇️ If you get a permissions error pip install waitress --user # 👇️ For Anaconda conda install -c conda-forge waitress
Once you install the waitress module, you can adjust your code to the
following.
from flask import Flask app = Flask(__name__) @app.route("/") def hello_world(): return "<p>Hello World</p>" if __name__ == "__main__": from waitress import serve serve(app, host="0.0.0.0", port=8080)
Now you can start your production-ready server with python app.py.
python app.py
The server will be accessible at http://localhost:8080.
The default Flask server is not suitable for production, but the WSGI server from the waitress module is.
This section of the Flask documentation has more information on the recommended options for self-hosting.
# Creating a virtual environment
If you don't already have a virtual environment, you can create one with the following commands.
# 👇️ Might also be: "python3 -m venv venv" python -m venv venv # 👇️ Activate on Windows (PowerShell) venv\Scripts\Activate.ps1 # 👇️ Activate on Windows (cmd.exe) venv\Scripts\activate.bat # 👇️ Activate on Unix or MacOS source venv/bin/activate # 👇️ Install Flask in your virtual environment pip install flask pip install waitress
If the python -m venv venv command doesn't work, try the following 2 commands:
py -m venv venv.python3 -m venv venv
Now you can start your server with python app.py.
# Using the gevent module
Alternatively, you can use the gevent module.
First, install gevent by running the following command in your virtual
environment.
pip install gevent # 👇️ For Python 3 pip3 install gevent # 👇️ If you don't have pip in your PATH environment variable python -m pip install gevent # 👇️ For Python 3 python3 -m pip install gevent # 👇️ Using py alias py -m pip install gevent # 👇️ If you get a permissions error pip install gevent --user # 👇️ For Anaconda conda install -c anaconda gevent
Now, tweak your app.py file to the following.
from flask import Flask from gevent.pywsgi import WSGIServer app = Flask(__name__) @app.route("/") def hello_world(): return "<p>Hello World</p>" if __name__ == '__main__': http_server = WSGIServer(("127.0.0.1", 8080), app) http_server.serve_forever()
You can start your server with the python app.py command.
python app.py
The server will be accessible at http://localhost:8080.
You can check out the other options for production-ready WSI servers in this section of the docs.
# Additional Resources
You can learn more about the related topics by checking out the following tutorials:
- How to change the Port and Host in a Flask application
- ModuleNotFoundError: No module named 'flask' in Python
- ModuleNotFoundError: No module named 'flask_cors' in Python
- Get a list of all routes defined in a Flask application
- How to access the HTTP request Headers in a Flask app
- How to auto-reload a Flask app when code changes
- Python OSError: [Errno 98] Address already in use [Solved]
- RuntimeError: Either 'SQLALCHEMY_DATABASE_URI' or 'SQLALCHEMY_BINDS' must be set

