How to auto-reload a Flask app when code changes
Last updated: Apr 11, 2024
Reading time·4 min

# Table of Contents
- How to auto-reload a Flask app when code changes
- Auto-reload a Flask app by setting
debugtoTrueinapp.py - Auto-reload a Flask app by setting
FLASK_DEBUGenvironment variable
# How to auto-reload a Flask app when code changes
Set the --debug option when calling the flask run command to enable
auto-reloading on coe changes in Flask.
When the --debug option is set, the Flask application is started in debug
mode and listens for code changes.
Suppose we have the following app.py file.
from flask import Flask app = Flask(__name__) @app.route('/') def main(): return "<p>Home: bobbyhadz.com</p>"
You can start your Flask app in debug mode by issuing the following command.
flask --app app.py --debug run
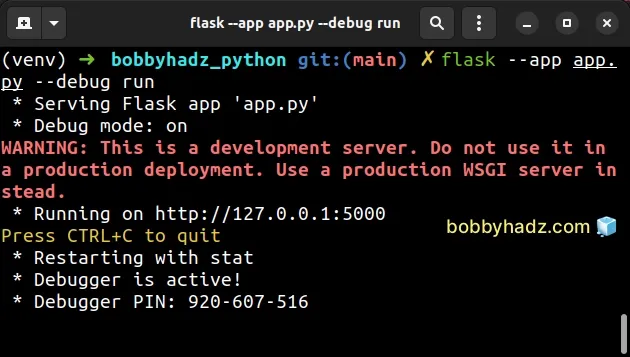
The entry file in the example is called app.py but it may have a different
name in your case (e.g. main.py).
Make sure you have flask installed to be able to run the command.
pip install Flask # 👇️ Or with pip3 pip3 install Flask
If I open the page at http://localhost:5000, I can see that the response
message is displayed.

Now let's make a small change to the string that is returned by the view function.
from flask import Flask app = Flask(__name__) @app.route('/') def main(): return "<p>New: bobbyhadz.com</p>"
If I switch over to my terminal, I can see that the Flask development server has
detected the change in my app.py file.
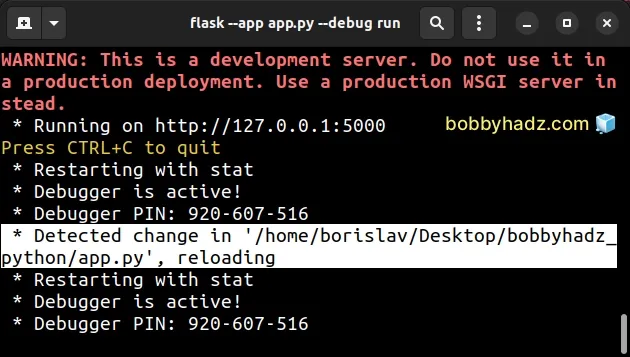
If I now refresh the page at http://localhost:5000, I can see that the message
is updated without me having to restart the server.

You can use the flask run --help command to print all of the available options
of the flask run command.
flask run --help
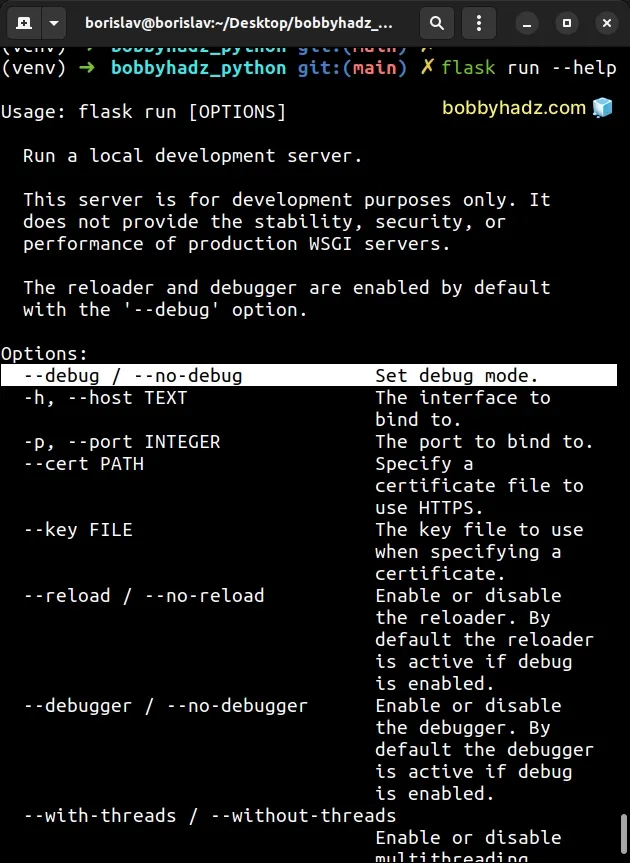
As shown in the screenshot, the --debug option is used to enable debug mode.
flask --app app.py --debug run
You can also set the --app option to module_name:app, e.g. app:app in our
case.
flask --app app:app --debug run

The app before the colon is the name of the file (app.py in our case) and
the app after the colon is the name of the Flask instance (app in our case).
from flask import Flask # 👇️ Flask instance named `app` app = Flask(__name__) @app.route('/') def main(): return "<p>Home: bobbyhadz.com</p>"
In other words, the format is flask --app module_name:app --debug run.
# Auto-reload a Flask app by setting debug to True in app.py
You can also auto-reload your Flask application when code changes by setting
debug to True when calling app.run() in your app.py file.
Suppose we have the following app.py file.
from flask import Flask app = Flask(__name__) @app.route('/') def main(): return "<p>Home: bobbyhadz.com</p>" if __name__ == '__main__': app.run(debug=True)
Now you can start your Flask server with the python app.py command.
python app.py # Or with python3 python3 app.py
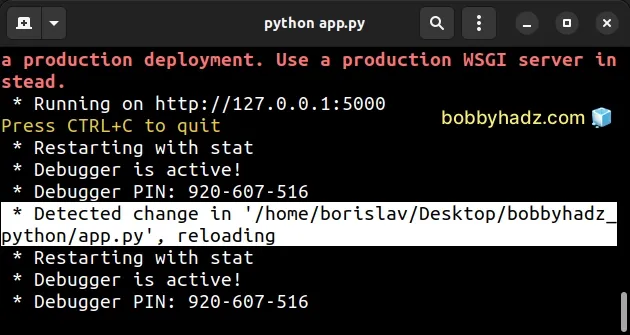
If I make a small change to the code and save the changes, I can see that the
Flask server has detected the change and has automatically restarted itself.
I've also written an article on how to change the port and host in a Flask application.
# Auto-reload a Flask app by setting FLASK_DEBUG environment variable
You can also auto-reload a Flask app by setting the FLASK_DEBUG environment
variable before issuing flask run.
Suppose we have the following app.py file.
from flask import Flask app = Flask(__name__) @app.route('/') def main(): return "<p>Home: bobbyhadz.com</p>"
On macOS and Linux, use the export command to set the environment variable.
export FLASK_DEBUG=1 flask run
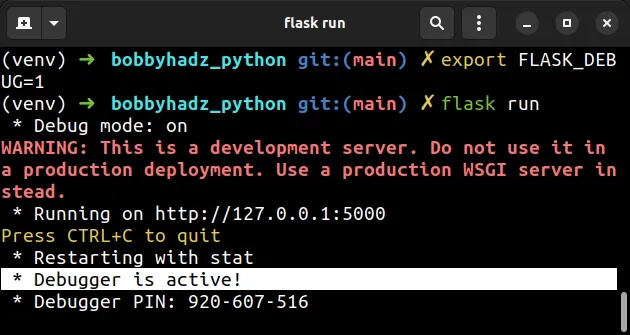
If you are on Windows, use the set command instead.
set FLASK_DEBUG=1 flask run
When the FLASK_DEBUG environment variable is set to 1, the Flask development
server is started in debug mode.
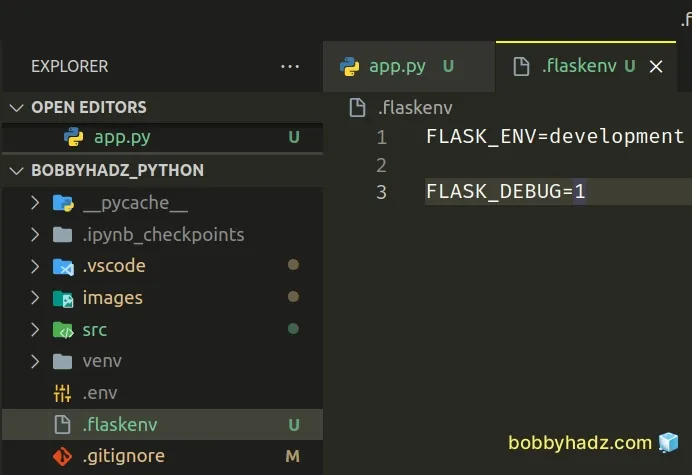
You can also set the environment variable in a .flaskenv file.
- Create a
.flaskenvin the root directory of your Flask project.
FLASK_ENV=development FLASK_DEBUG=1
- Open your terminal in your project's root directory and install the python-dotenv module.
pip install python-dotenv # Or with pip3 pip3 install python-dotenv
- Initialize the
python-dotenvmodule in yourapp.pyfile.
from flask import Flask from dotenv import load_dotenv # Take environment variables from .flaskenv load_dotenv() app = Flask(__name__) @app.route('/') def main(): return "<p>Home: bobbyhadz.com</p>"
- Issue the
flask runcommand in your terminal.
flask run
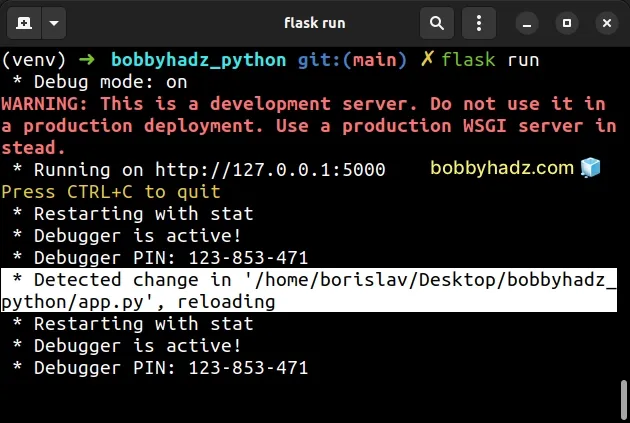
As shown in the screenshot, the command started the Flask development server in debug mode.
Flask will listen for any changes to your files and once you save a file, it will automatically restart the server.
# Additional Resources
You can learn more about the related topics by checking out the following tutorials:
- ModuleNotFoundError: No module named 'flask' in Python
- ModuleNotFoundError: No module named 'flask_cors' in Python
- Get a list of all routes defined in a Flask application
- How to access the HTTP request Headers in a Flask app
- RuntimeError: Either 'SQLALCHEMY_DATABASE_URI' or 'SQLALCHEMY_BINDS' must be set

