More than one module matches. Use skip-import option to skip importing the component into the closest module
Last updated: Apr 4, 2024
Reading time·6 min
# Table of Contents
- AngularJS: More than one module matches. Use skip-import option to skip importing the component into the closest module
- NestJS: Unknown argument skipImport. Did you mean skip-import
Note: if you got the "Unknown argument skipImport. Did you mean skip-import" error when using
NestJS, click on the second subheading.
# More than one module matches. Use skip-import option to skip importing the component into the closest module
The error "More than one module matches. Use skip-import option to skip importing the component into the closest module" occurs when you try to generate a new Angular component but the CLI finds multiple matching modules.
To solve the error, issue the ng generate command with the --module
option.
The ng generate component command can be passed a --module option to set the
declaring NgModule.
If the declaring NgModule in your case is app.module.ts, you would issue the
following command.
npx ng generate component component-name --module app
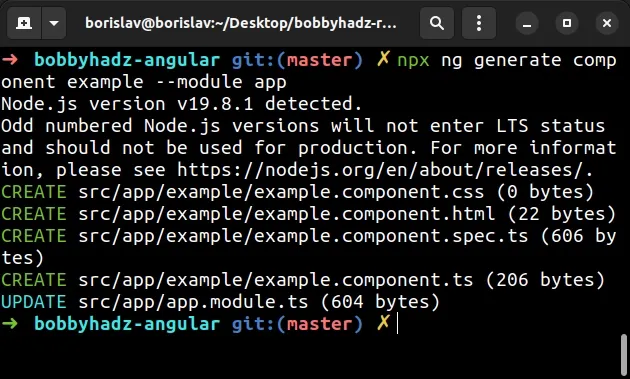
Make sure to replace the component-name placeholder with the actual name of
the component.
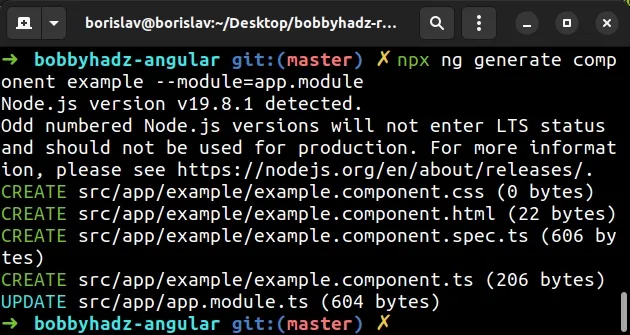
If you get an error when setting the --module option, try using the following
syntax instead.
npx ng generate component component-name --module=app.module
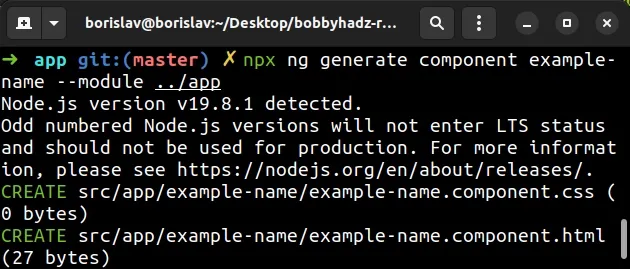
If your terminal is located in another directory, e.g. app, you would specify
a relative path for the --module option.
npx ng generate component component-name --module ../app
When setting the --module option, you basically specify the name of the module
you want to import the newly generated component into.
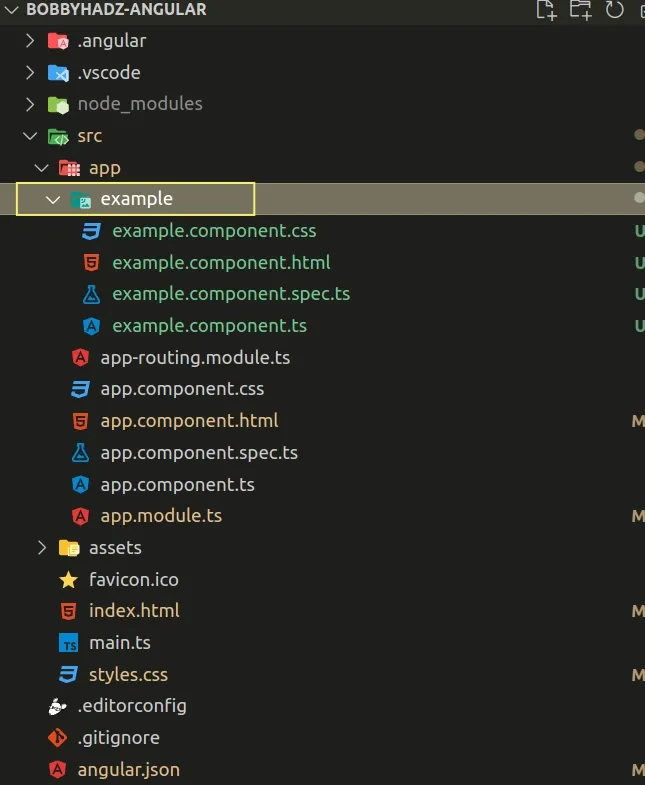
I generated a component named example, so an example/ directory got created
in the app/ directory.
The --module option is used to set the declaring NgModule.
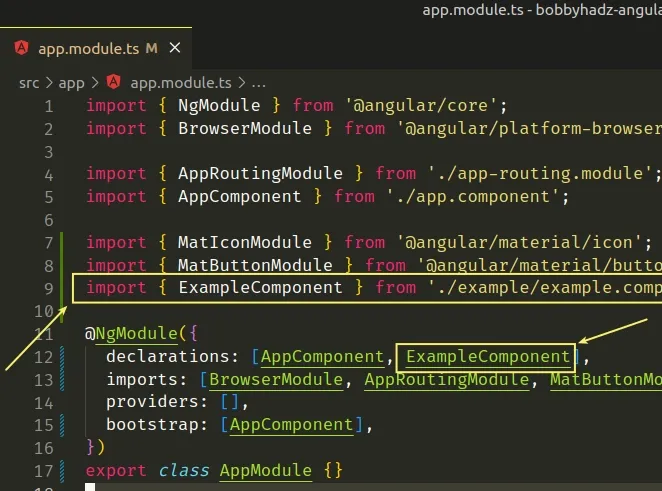
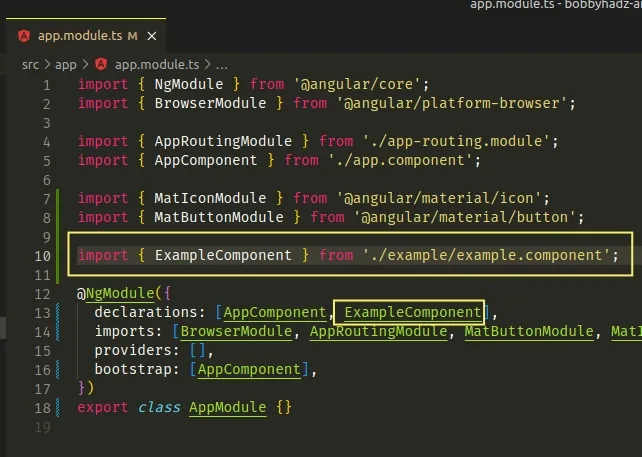
I used app as the declaring ng module, so if I open the
src/app/app.module.ts file, I can see that ExampleComponent has been
imported and added to the declarations array`.
import { ExampleComponent } from './example/example.component'; @NgModule({ declarations: [AppComponent, ExampleComponent], // 👈️ imports: [BrowserModule, AppRoutingModule, MatButtonModule, MatIconModule], providers: [], bootstrap: [AppComponent], })
The angular CLI automatically imports and adds the new component to the
declaring NgModule.
The error occurs when the CLI tries to add the component to multiply declaring NgModules.
Note: if you got the "Unknown argument skipImport. Did you mean skip-import" error when using
NestJS, click on the following subheading.
# Having multiple modules in your src/app folder
The error often occurs when you have multiple modules in your src/app folder.
When you try to generate a new component, the Angular CLI gets confused about which module should the newly generated component be imported into.
The easiest way to get around this is to only have 1 module in your root
src/app directory.
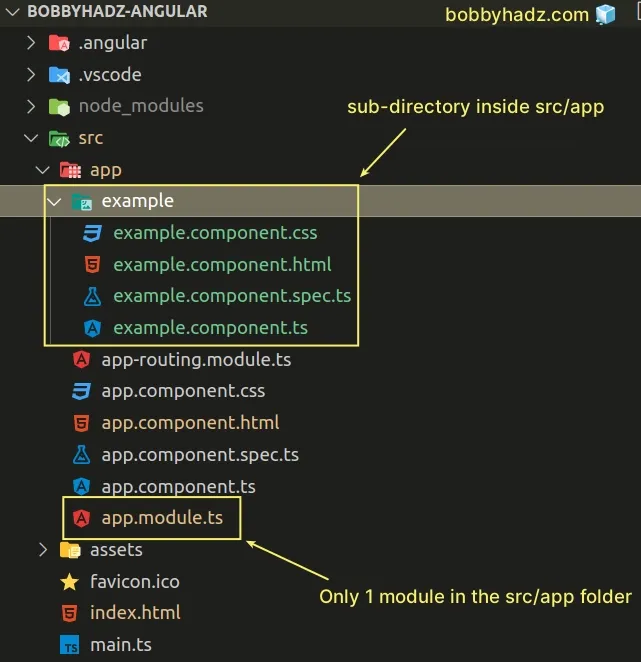
The screenshot shows what your folder structure should look like.
Notice that only the app.module.ts file is located in the src/app directory.
You should only have 1 module in the root src/app folder.
If you have other modules in the src/app directory, e.g. example.module.ts,
you should move them into a sub-directory to resolve the error.
The only way to get around the error if you have multiple modules in the
src/app directory is to use the --module option as shown in the previous
subheading.
npx ng generate component component-name --module app
To not have to set the --module option every time you generate a component,
you could move the other modules into sub-directories.
Your folder structure might look similar to the following.
angular-project/ └── src/ └── app/ └── app.module.ts └── example/ └── example.module.ts └── another/ └── another.module.ts
Make sure to fix your import statement if necessary because your IDE might not be able to autocorrect all imports if you move files around.
# Using the --skip-import option to resolve the issue
If the error persists, you could set the --skip-import option as stated in the
error message:
"More than one module matches. Use skip-import option to skip importing the component into the closest module"
When the --skip-import option is set, the newly generated component is not
imported automatically into the owning NgModule (e.g. app.module.ts).
This means that you have to import the module manually and add it to the
declarations array.
npx ng generate component component-name --skip-import
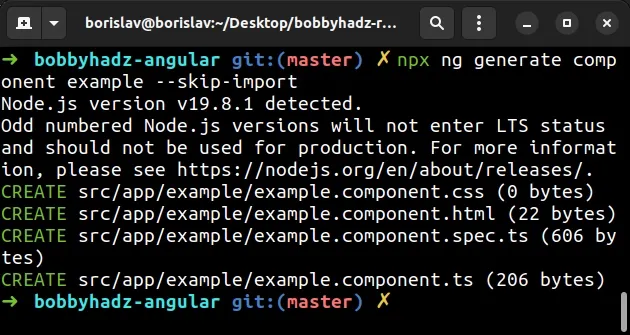
Make sure to replace the component-name placeholder with the actual name of
your component.
ng generate component command with the --skip-import option, however, you have to manually import the generated component into your app.module.ts file.Open the src/app/app.module.ts file and:
- Import your newly generated component.
- Add the component to the
declarationsarray.
I generated a component named example, so the relevant code looks as follows
in my case.
import { ExampleComponent } from './example/example.component'; @NgModule({ declarations: [AppComponent, ExampleComponent], // 👈️ imports: [BrowserModule, AppRoutingModule, MatButtonModule, MatIconModule], providers: [], bootstrap: [AppComponent], })
Once you import the component, you might have to restart your development server and your IDE and the issue should be resolved.
# NestJS: Unknown argument skipImport. Did you mean skip-import
The NestJS CLI error "Unknown argument skipImport. Did you mean skip-import" occurs because of a bug with the Nest CLI.
To solve the error:
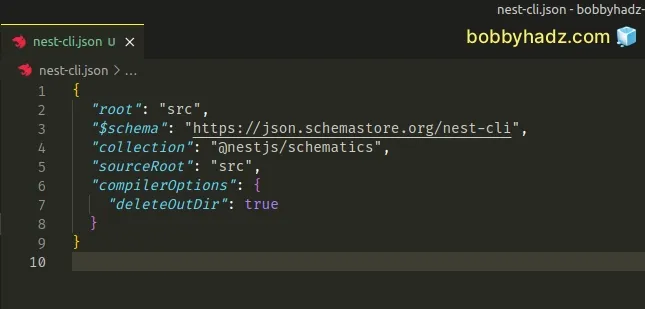
- Set the
rootproperty tosrcin yournest-cli.jsonfile.
{ "root": "src" }
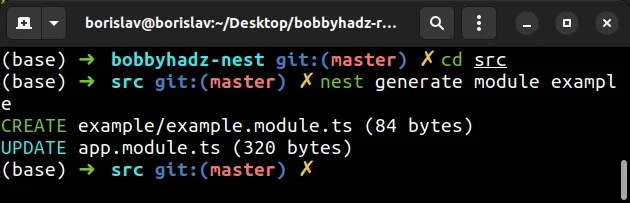
- Change your terminal into the
srcdirectory.
cd src
- Issue the
nest generate modulecommand.
nest generate module example
- If the error persists, try to pin your versions of the
@nestjs/cliand@nestjs/schematicsmodules.
Open your package.json file and pin your versions of the two modules as
follows.
{ "devDependencies": { "@nestjs/cli": "8.2.6", "@nestjs/schematics": "8.0.11", } }
Make sure to replace the versions of the existing entries in your
devDependencies object.
- Run the
npm installoryarn installcommand to install the updated versions.
# with NPM npm install # with YARN yarn install
- If the issue persists, try to reinstall the CLI and pin its version to
8.2.6.
npm uninstall -g @nestjs/cli npm install -g @nestjs/cli@8.2.6
- If the issue persists, try to update the modules to the latest version.
npm install --save-dev @nestjs/cli@latest @nestjs/schematics@latest
And update the Nest CLI to the latest version.
npm uninstall -g @nestjs/cli npm install -g @nestjs/cli@latest
If you get a permissions error when running the installation command, you might
have to prefix the command with sudo (on macOS or Linux).
sudo npm install -g @nestjs/cli@latest
If you get a permissions error on Windows:
- Click on the search field and type CMD.
- Right-click on the CMD application and select Run as an administrator.
- Issue the following command.
npm install -g @nestjs/cli@latest
# Delete your node_modules and reinstall your dependencies
If the error persists, try to delete your node_modules folder and your
package-lock.json file.
if you are on Windows, open CMD and run the following commands.
# for Windows rd /s /q "node_modules" del package-lock.json del -f yarn.lock # 👇️ clean your npm cache npm cache clean --force # 👇️ install packages npm install
If you are on macOS or Linux, issue the following commands in bash or zsh.
# for macOS and Linux rm -rf node_modules rm -f package-lock.json rm -f yarn.lock # 👇️ clean your npm cache npm cache clean --force # 👇️ install packages npm install
Try to use the Nest CLI after reinstalling your Node modules.
If you get the error This command is not available when running the Angular CLI outside a workspace, click on the link and follow the instructions.
# Additional Resources
You can learn more about the related topics by checking out the following tutorials:

