Remove __pycache__ folders and .pyc files in Python Project
Last updated: Apr 13, 2024
Reading time·4 min

# Remove __pycache__ folders and .pyc files in Python Project
To remove the __pycache__ folders and .pyc files in a Python project:
- Open your terminal in your project's root directory.
- Issue the following command.
find . | grep -E "(/__pycache__$|\.pyc$|\.pyo$)" | xargs rm -rf

The command uses a regular expression to find and remove the __pycache__
directories, .pyc and .pyo files.
__pycache__ directories and .pyc files, recursively, so make sure to open your terminal in your project's root directory before running it.If you are on Linux, you can also use the find command with a regular
expression.
find . -regex '^.*\(__pycache__\|\.py[co]\)$' -delete

# Using the -name parameter to delete __pycache__ and .pyc files
You can also use the -name parameter to delete the __pycache__ directories
and the .pyc files.
- Open your terminal in your project's root directory.
- Issue the following command.
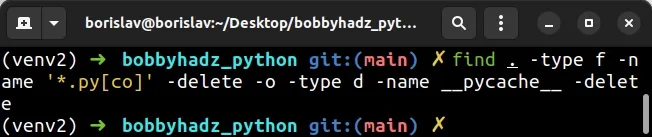
find . -type f -name '*.py[co]' -delete -o -type d -name __pycache__ -delete
You can also try the following command for deleting all __pycache__
directories.
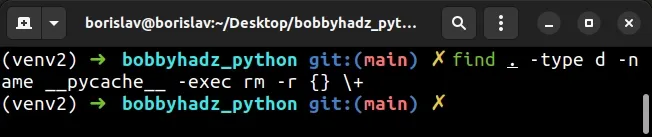
find . -type d -name __pycache__ -exec rm -r {} \+
# Adding the command to your ~/.bashrc or ~/.zshrc file
If you have to do this often, add the command to your ~/.bashrc or ~/.zshrc
profile file.
For example, you can edit your ~/.bashrc file by using one of the following
commands.
# with `gedit` sudo gedit ~/.bashrc # or with `nano` sudo nano ~/.bashrc
And you can edit your ~/.zshrc profile file by issuing one of the following
commands.
sudo gedit ~/.zshrc sudo nano ~/.zshrc
Once you open the profile file in your preferred text editor, add the following command to it.
rm-pycache () { find . -type f -name '*.py[co]' -delete -o -type d -name __pycache__ -delete }
Save the file and close it.
Anytime you make changes to your profile file, you have to source it.
# BASH source ~/.bashrc source ~/.bash_profile # ZSH source ~/.zshrc
Once you've sourced your profile file (or restarted your terminal), you can use
the rm-pycache command.
- Open your terminal in your project's root directory.
- Issue the
rm-pycachecommand.
rm-pycache

You can name the command as you see fit, it doesn't have to be named
rm-pycache.
However, make sure to source your profile file anytime you make changes to it.
# Using the python interpreter to delete all __pycache__ folders and .pyc files
You can also use the python interpreter to delete all __pycache__ folders
and .pyc files.
- Open your terminal in your project's root directory.
- Issue the following commands.
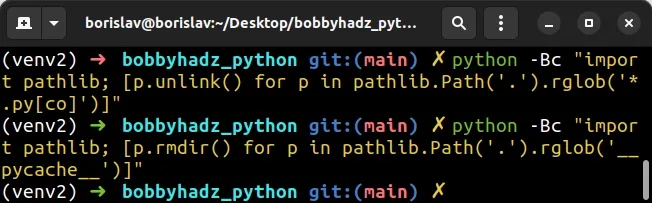
python -Bc "import pathlib; [p.unlink() for p in pathlib.Path('.').rglob('*.py[co]')]" python -Bc "import pathlib; [p.rmdir() for p in pathlib.Path('.').rglob('__pycache__')]"
Depending on your Python installation, you might have to use python3 instead
of python.
python3 -Bc "import pathlib; [p.unlink() for p in pathlib.Path('.').rglob('*.py[co]')]" python3 -Bc "import pathlib; [p.rmdir() for p in pathlib.Path('.').rglob('__pycache__')]"
If you are on Windows, you might have to use the py alias.
py -Bc "import pathlib; [p.unlink() for p in pathlib.Path('.').rglob('*.py[co]')]" py -Bc "import pathlib; [p.rmdir() for p in pathlib.Path('.').rglob('__pycache__')]"
The first command finds and deletes all .pyc and .pyo files and the second
deletes all __pycache__ directories.
# Using the py3clean command to delete __pycache__ and .pyc files
You can also use the py3clean command to delete __pycache__ directories and
.pyc files.
- Open your terminal in your project's root directory.
- Run the
py3clean .command.
py3clean .

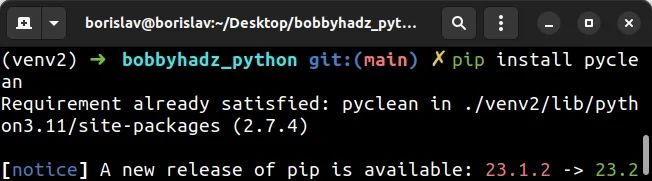
You can also try to use the pyclean module.
First, install the module by running the following command.
pip install pyclean # Or with pip3 pip3 install pyclean
Open your terminal in your project's root directory and run the following command.
pyclean -v .
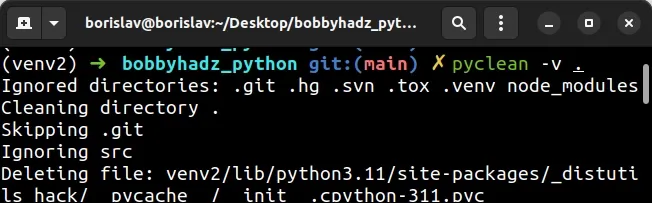
The -v flag stands for "verbose".
You can remove the flag if you don't want to get the output in verbose mode.
pyclean .
# Setting the PYTHONPYCACHEPREFIX environment variable
Since Python 3.8, you can also set the PYTHONPYCACHEPREFIX environment variable.
If the environment variable is set, Python writes .pyc files in a mirror
directory tree at the specified path, instead of in __pycache__ directories
within the source tree.
For example, on macOS and Linux, you could add something like this to your
profile file(~/.bashrc or ~/.zshrc).
export PYTHONPYCACHEPREFIX="$HOME/.cache/pycache"
Make sure the specified directory exists.
Now, Python won't write your .pyc files in a __pycache__ directory within
the source tree.
Instead, your .pyc files will be in a mirror directory tree at the specified
path.
# Additional Resources
You can learn more about the related topics by checking out the following tutorials:
- Check if Python is running as 32-bit or 64-bit
- Count number of unique Words in a String or File in Python
- Create a file name using Variables in Python
- How to get the File path of a Class in Python
- Taking a file path from user input in Python
- ValueError: invalid mode: 'rU' while trying to load binding.gyp
- How to Copy Files and Rename them in Python [4 Ways]
- Python: Not all parameters were used in the SQL statement

