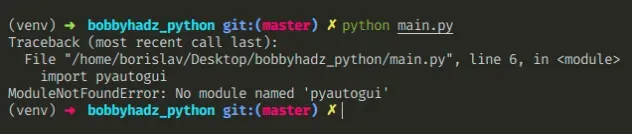
ModuleNotFoundError No module named 'pyautogui' in Python
Last updated: Apr 8, 2024
Reading time·12 min

# ModuleNotFoundError: No module named 'pyautogui' in Python
The Python "ModuleNotFoundError: No module named 'pyautogui'" occurs when we
forget to install the pyautogui module before importing it or install it in an
incorrect environment.
To solve the error, install the module by running the pip install pyautogui
command.
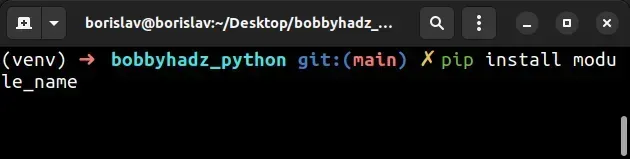
Open your terminal in your project's root directory and install the pyautogui
module.
# 👇️ In a virtual environment or using Python 2 pip install pyautogui # 👇️ For Python 3 (could also be pip3.10 depending on your version) pip3 install pyautogui # 👇️ If you get a permissions error sudo pip3 install pyautogui pip install pyautogui --user # 👇️ If you don't have pip in your PATH environment variable python -m pip install pyautogui # 👇️ For Python 3 (could also be pip3.10 depending on your version) python3 -m pip install pyautogui # 👇️ Using py alias (Windows) py -m pip install pyautogui # 👇️ For Anaconda conda install -c conda-forge pyautogui # 👇️ For Jupyter Notebook !pip install pyautogui
After you install the pyautogui package, try importing it as follows.
import pyautogui screenWidth, screenHeight = pyautogui.size() print(screenWidth) print(screenHeight)
# Common causes of the error
The error occurs for multiple reasons:
- Not having the
pyautoguipackage installed by runningpip install pyautogui. - Installing the package in a different Python version than the one you're using.
- Installing the package globally and not in your virtual environment.
- Your IDE running an incorrect version of Python.
- Naming your module
pyautogui.pywhich would shadow the official module. - Declaring a variable named
pyautoguiwhich would shadow the imported variable.
If the error persists, get your Python version and make sure you are installing the package using the correct Python version.
python --version

For example, my Python version is 3.10.4, so I would install the pyautogui
package with pip3.10 install pyautogui.
pip3.10 install pyautogui # 👇️ If you get a permissions error use pip3 (NOT pip3.X) sudo pip3 install pyautogui
Notice that the version number corresponds to the version of pip I'm using.
If the PATH for pip is not set up on your machine, replace pip with
python3 -m pip:
# 👇️ Make sure to use your version of Python, e.g. 3.10 python3 -m pip install pyautogui
If the error persists, try restarting your IDE and development server/script.
# Check if the package is installed
You can
check if you have the pyautogui package installed
by running the pip show pyautogui command.
# 👇️ Check if you have pyautogui installed pip show pyautogui # 👇️ If you don't have pip set up in PATH python -m pip show pyautogui
The pip show pyautogui command will either state that the package is not
installed or show a bunch of information about the package, including the
location where the package is installed.
# Make sure your IDE is using the correct Python version
If the package is not installed, make sure your IDE is using the correct version of Python.
pyautogui package using the incorrect version or your IDE might be set up to use a different version.For example, In VSCode, you can press CTRL + Shift + P or (⌘ + Shift + P
on Mac) to open the command palette.
Then type "Python select interpreter" in the field.
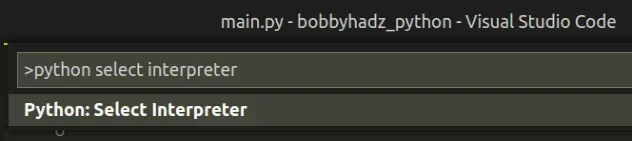
Then Select the correct Python version from the dropdown menu.
# Install the package in a Virtual Environment
If you are using a virtual environment, make sure you are installing pyautogui
in your virtual environment and not globally.
You can try creating a virtual environment if you don't already have one.
# 👇️ Use the correct version of Python when creating VENV python3 -m venv venv # 👇️ Activate on Unix or MacOS source venv/bin/activate # 👇️ Activate on Windows (cmd.exe) venv\Scripts\activate.bat # 👇️ Activate on Windows (PowerShell) venv\Scripts\Activate.ps1 # 👇️ Install pyautogui in your virtual environment pip install pyautogui
If the python3 -m venv venv command doesn't work, try the following 2
commands:
python -m venv venvpy -m venv venv
Your virtual environment will use the version of Python that was used to create it.
pyautogui.py because that would shadow the original pyautogui module.You also shouldn't be declaring a variable named pyautogui as that would also
shadow the original module.
# Try reinstalling the package
If the error is not resolved, try to uninstall the pyautogui package and then
reinstall it.
# 👇️ Check if you have pyautogui installed pip show pyautogui # 👇️ If you don't have pip set up in PATH python -m pip show pyautogui # 👇️ Uninstall pyautogui pip uninstall pyautogui # 👇️ If you don't have pip set up in PATH python -m pip uninstall pyautogui # 👇️ Install pyautogui pip install pyautogui # 👇️ If you don't have pip set up in PATH python -m pip install pyautogui
Try restarting your IDE and development server/script.
You can also try to upgrade the version of the pyautogui package.
pip install pyautogui --upgrade # 👇️ If you don't have pip set up in PATH python -m pip install pyautogui --upgrade
# Import "pyautogui" could not be resolved from source Pylance
The error "Import "pyautogui" could not be resolved from source Pylance"
occurs when the pyautogui module is not installed or you have selected the
incorrect Python interpreter in your IDE (e.g. Visual Studio Code).
To solve the error, install pyautogui and select the correct Python
interpreter in your IDE.

Import "pyautogui" could not be resolved from source Pylance(reportMissingModuleSource) [Ln 1, Col 8]
# Make sure the correct Python interpreter is selected in your IDE
If you have multiple Python versions installed on your machine, you might have
installed the pyautogui package using the incorrect version or your IDE might
be set up to use a different version.
For example, In Visual Studio Code you can:
- Press
CTRL + Shift + Por (⌘+Shift+Pon macOS) to open the command palette.
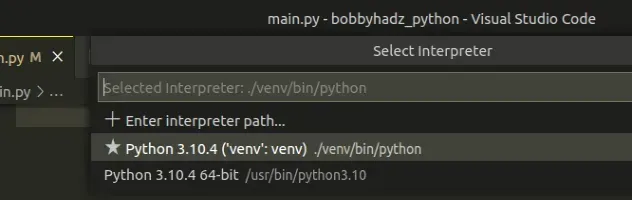
Then type "Python select interpreter" in the search field.
- Select the correct Python version from the dropdown menu.
If the error persists, try restarting your IDE and development server/script. VSCode often glitches and a reboot resolves the issue.
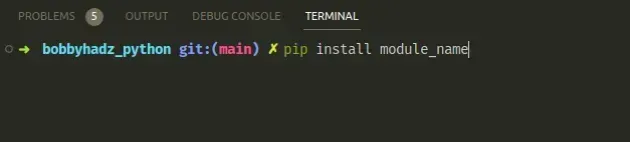
If the error is not resolved, try to use the Visual Studio Code terminal to
install the pyautogui module.
You can press CTRL + ` (Backtick) on your keyboard to open the Visual Studio code terminal.
CTRL+Shift+P and then type "View: Toggle Terminal".
Once you open the terminal, Visual Studio Code will automatically activate your virtual environment (if you have one).
Run the pip install pyautogui command.
pip install pyautogui
If the error persists, try to select the Python interpreter by specifying the path:
- Press
CTRL + Shift + Por (⌘+Shift+Pon Mac) to open the command palette. - Type "Python select interpreter" in the field.
- Select "Enter interpreter path...".
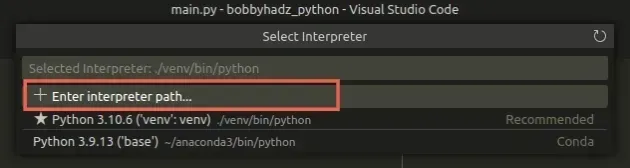
- Click on "Find".
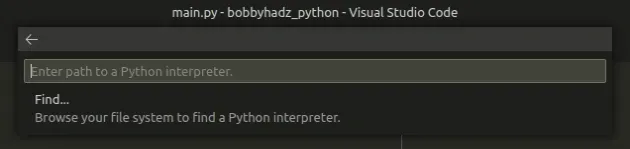
- In the window that opens, navigate to your Python executable:
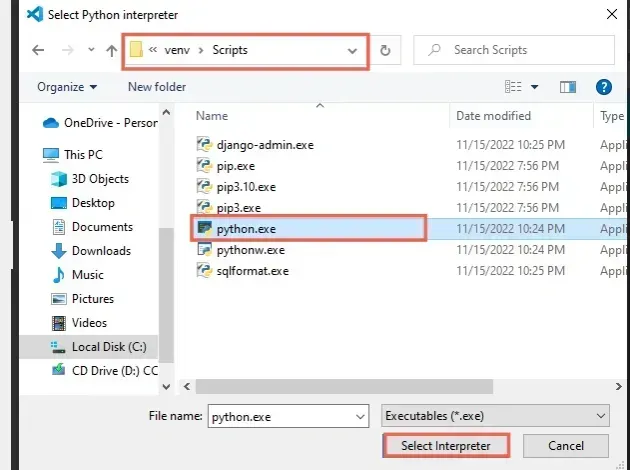
- If you have a virtual environment on Windows, click on your
venvfolder, then double-click on theScriptsfolder, select thepython.exefile and then Select interpreter.
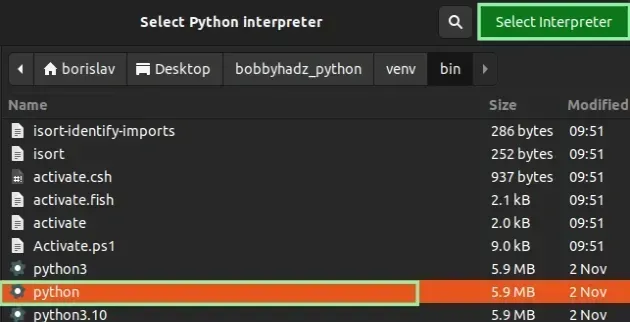
- If you have a virtual environment on macOS or Linux, click on your
venvfolder, then double-click on thebinfolder, select thepythonfile and then Select interpreter.
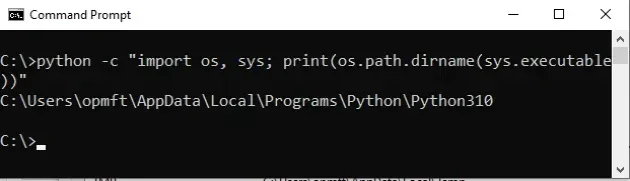
- If you don't have a virtual environment, use one of the following commands to
get your path to your
python.exeorpythonexecutable, specify the path to the file and select the executable.
where python python -c "import sys; print(sys.executable)"
If the error persists, try restarting your IDE and development server/script.
# Alternatively, use a comment to disable the warning
If none of the suggestions helped, you can use a comment to disable the Pylance warning in your IDE.
import pyautogui # type: ignore print(pyautogui)
You simply have to add the # type: ignore command on the same line as the
import statement to disable the check for the specific import.
pyautogui.# Table of Contents
- Install PyAutoGUI on Windows
- Install PyAutoGUI on macOS or Linux
- Install PyAutoGUI in Visual Studio Code
- Install PyAutoGUI in PyCharm
- Install PyAutoGUI in Anaconda
- Install PyAutoGUI in Jupyter Notebook
# Install PyAutoGUI on Windows
To install the PyAutoGUI module on Windows:
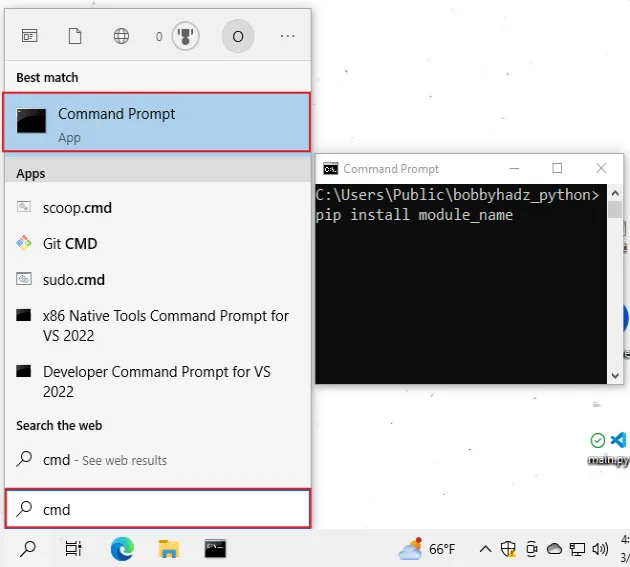
- Type CMD in the search bar and open the Command Prompt application.
- Type
pip install pyautoguiand press Enter.
pip install pyautogui # 👇️ For Python 3 pip3 install pyautogui # 👇️ If you don't have pip in your PATH environment variable python -m pip install pyautogui # 👇️ For Python 3 python3 -m pip install pyautogui # 👇️ Using py alias py -m pip install pyautogui # 👇️ If you get a permissions error pip install pyautogui --user # 👇️ For Anaconda conda install -c conda-forge pyautogui
After you install the pyautogui package, try importing it as follows.
import pyautogui screenWidth, screenHeight = pyautogui.size() print(screenWidth) print(screenHeight)
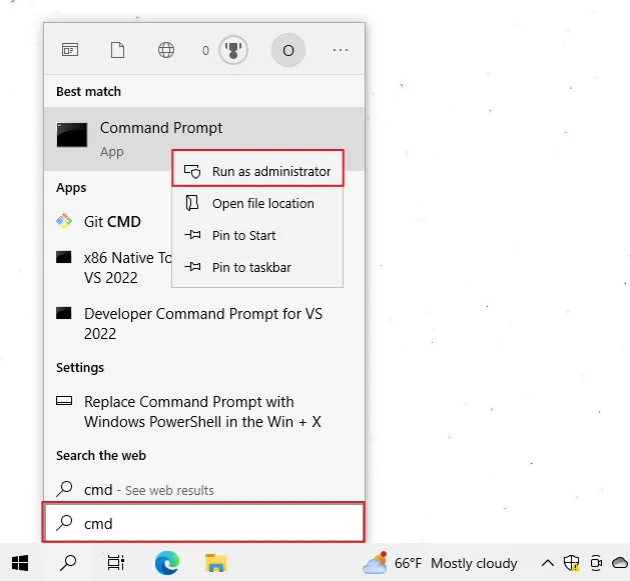
If the installation command doesn't succeed, try running CMD as an administrator.
If you get the error
'pip' is not recognized as an internal or external command,
use the python -m command when installing pyautogui.
python -m pip install pyautogui python3 -m pip install pyautogui py -m pip install pyautogui
Alternatively, you can install the pyautogui module in a virtual environment:
- Open the root directory of your project.
- Press
Shiftand right-click in Explorer.
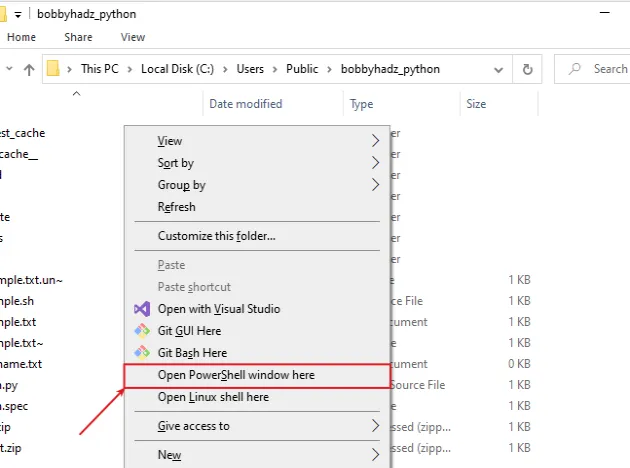
- Click on "Open PowerShell window here".
- Run the following commands.
# 👇️ Might also be: "python3 -m venv venv" python -m venv venv # 👇️ Activate on Windows (PowerShell) venv\Scripts\Activate.ps1 # 👇️ Activate on Windows (cmd.exe) venv\Scripts\activate.bat # 👇️ Install pyautogui in your virtual environment pip install pyautogui
If the python -m venv venv command doesn't work, try the following 2 commands:
python3 -m venv venvpy -m venv venv.
If you see an error message that ps1 cannot be loaded because running scripts is disabled on this system, run the following command, type "yes" when prompted and rerun the activation command.
Set-ExecutionPolicy RemoteSigned -Scope CurrentUser
pyautogui module is installed by using the pip show pyautogui command.pip show pyautogui pip3 show pyautogui python -m pip show pyautogui python3 -m pip show pyautogui
The pip show pyautogui command will either state that the package is not
installed or show a bunch of information about the package, including the
location where the package is installed.
# Install PyAutoGUI on macOS or Linux
To install PyAutoGUI on macOS or Linux:
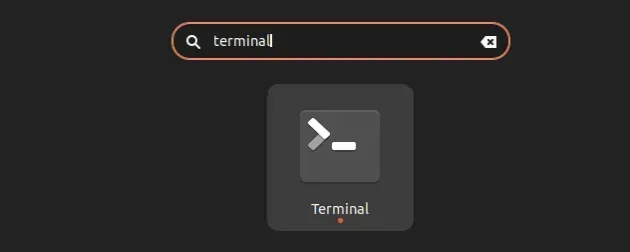
- Search for "terminal" and start the application.
- Type
pip install pyautoguiand press Enter.
pip install pyautogui # 👇️ For Python 3 pip3 install pyautogui # 👇️ If you get a permissions error sudo pip3 install pyautogui # 👇️ If you don't have pip in your PATH environment variable python -m pip install pyautogui # 👇️ For Python 3 python3 -m pip install pyautogui # 👇️ Alternative if you get a permissions error pip install pyautogui --user # 👇️ For Anaconda conda install -c conda-forge pyautogui
After you install the pyautogui package, try importing it as follows.
import pyautogui screenWidth, screenHeight = pyautogui.size() print(screenWidth) print(screenHeight)
If you get an error that pip isn't found, use the python -m command.
python -m pip install pyautogui python3 -m pip install pyautogui
If you get a permissions error, prefix the command with sudo.
sudo pip install pyautogui sudo pip3 install pyautogui
Alternatively, you can install the pyautogui package in a virtual environment:
- Open your terminal in the root directory of your project.
- Run the following commands.
# 👇️ Could also be "python -m venv venv" python3 -m venv venv # 👇️ Activate virtual env on macOS or Linux source venv/bin/activate # 👇️ Install pyautogui in your virtual environment pip install pyautogui
Your virtual environment will use the version of Python that was used to create it.
python3 -m venv venv command doesn't work, use python -m venv venv instead.You can use the pip show command to verify
pyautogui has been installed
successfully.
pip show pyautogui pip3 show pyautogui python -m pip show pyautogui python3 -m pip show pyautogui
The pip show pyautogui command will either state that the package is not
installed or show a bunch of information about the package.
# Install PyAutoGUI in Visual Studio Code
To install PyAutoGUI in Visual Studio Code:
- Press CTRL + ` (Backtick) on your keyboard to open the terminal.
- Run the
pip install pyautoguicommand to install thepyautoguimodule.
pip install pyautogui # 👇️ For Python 3 pip3 install pyautogui # 👇️ If you get a permissions error sudo pip3 install pyautogui # 👇️ If you don't have pip in your PATH environment variable python -m pip install pyautogui # 👇️ For Python 3 python3 -m pip install pyautogui # 👇️ Using py alias py -m pip install pyautogui # 👇️ Alternative if you get a permissions error pip install pyautogui --user
CTRL+Shift+P and then type "View: Toggle Terminal".After you install the pyautogui package, try importing it as follows.
import pyautogui screenWidth, screenHeight = pyautogui.size() print(screenWidth) print(screenHeight)
When installing Python modules in Visual Studio code, make sure that your IDE is configured to use the correct Python version.
Press CTRL+Shift+P or (⌘ + Shift + P on Mac) to open the command
palette.
Then type "Python select interpreter" in the field.
Then Select the correct Python version from the dropdown menu.
You can use the python --version command if you need to get your version of
Python.
python --version python3 --version
You can also try creating a virtual environment if you don't already have one.
# 👇️ Could also be "python -m venv venv" or "py -m venv venv" python3 -m venv venv # 👇️ Activate on Unix or MacOS source venv/bin/activate # 👇️ Activate on Windows (cmd.exe) venv\Scripts\activate.bat # 👇️ Activate on Windows (PowerShell) venv\Scripts\Activate.ps1 # 👇️ Install pyautogui in your virtual environment pip install pyautogui
Your virtual environment will use the version of Python that was used to create it.
# Install PyAutoGUI in PyCharm
To install PyAutoGUI in PyCharm:
- Press
Alt+F12on your keyboard to open the terminal. - Run the
pip install pyautoguicommand to install thepyautoguimodule.
pip install pyautogui # 👇️ For Python 3 pip3 install pyautogui # 👇️ If you get a permissions error sudo pip3 install pyautogui # 👇️ If you don't have pip in your PATH environment variable python -m pip install pyautogui # 👇️ For Python 3 python3 -m pip install pyautogui # 👇️ Using py alias py -m pip install pyautogui # 👇️ Alternative if you get a permissions error pip install pyautogui --user

After you install the pyautogui package, try importing it as follows.
import pyautogui screenWidth, screenHeight = pyautogui.size() print(screenWidth) print(screenHeight)
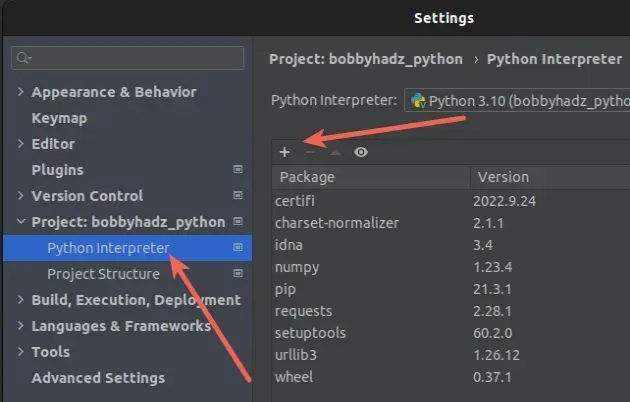
Alternatively, you can use the IDE itself to install the module.
- Click on "File" > "Settings" > "Project" > "Python Interpreter".
- Click on the
+icon and typePyAutoGUI. - Click on "Install Package".
Click on "File" > "Settings" > "Project" > "Python Interpreter".
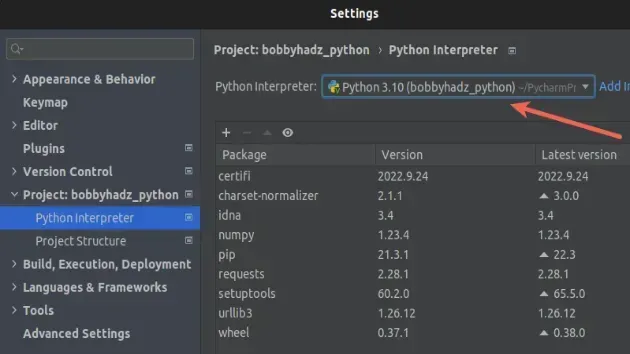
Then Select the correct Python version from the dropdown menu.
You can use the python --version command if you need to get your version of
Python.
python --version python3 --version
# Install PyAutoGUI in Anaconda
You can install the pyautogui package with a command.
If you are on Windows, search for "Anaconda Prompt" and open the application.
If you are on macOS or Linux, open your terminal.
Run the following command to install the pyautogui package.
# 👇️ Using conda conda install -c conda-forge pyautogui # 👇️ Alternatively use `pip` pip install pyautogui # 👇️ For Python 3 pip3 install pyautogui # 👇️ If you get a permissions error sudo pip3 install pyautogui # 👇️ If you don't have pip in your PATH environment variable python -m pip install pyautogui # 👇️ For Python 3 python3 -m pip install pyautogui # 👇️ Using py alias py -m pip install pyautogui # 👇️ Alternative if you get a permissions error pip install pyautogui --user
After you install the pyautogui package, try importing it as follows.
import pyautogui screenWidth, screenHeight = pyautogui.size() print(screenWidth) print(screenHeight)
Click on the following article if you need to install a specific version of the package using Anaconda.
# Install PyAutoGUI in Jupyter Notebook
To install PyAutoGUI in Jupyter Notebook:
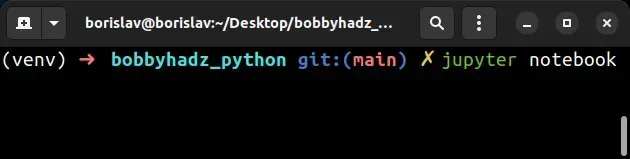
- Open your terminal and type "jupyter notebook".
- Click on "New" and then "Terminal" in the browser tab.
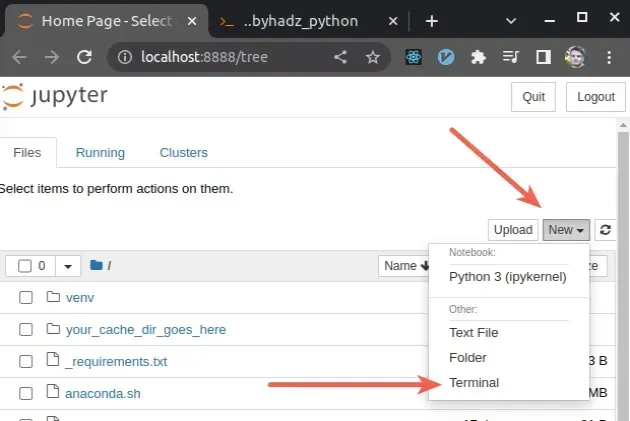
- Type
pip install pyautoguiand press Enter.
# 👇️ Using pip pip install pyautogui # 👇️ For Python 3 pip3 install pyautogui # 👇️ If you get a permissions error sudo pip3 install pyautogui # 👇️ If you don't have pip in your PATH environment variable python -m pip install pyautogui # 👇️ For Python 3 python3 -m pip install pyautogui # 👇️ Using py alias py -m pip install pyautogui # 👇️ Using conda conda install -c conda-forge pyautogui # 👇️ Alternative if you get a permissions error pip install pyautogui --user
After you install the pyautogui package, try importing it as follows.
import pyautogui screenWidth, screenHeight = pyautogui.size() print(screenWidth) print(screenHeight)
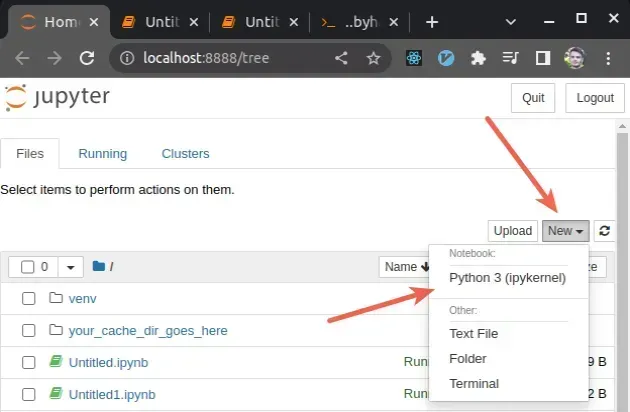
Alternatively, you can use the Python ipykernel.
- Open your terminal and type "jupyter notebook".
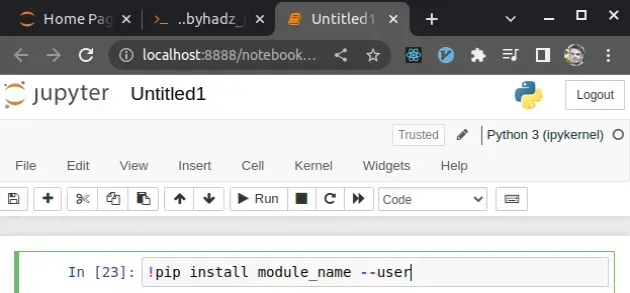
Click on "New" and then click on "Python 3 (ipykernel)".
Type
!pip install pyautoguiand click on "Run".
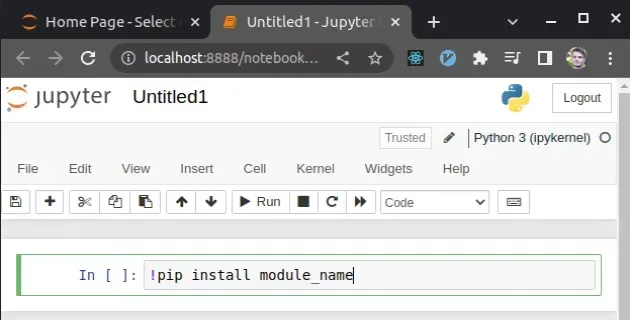
Note that the pip install command must be prefixed with an exclamation mark if
you use this approach.
!pip install pyautogui
Once you type the command, click "Run" to install the pyautogui module.
If you get a permissions error, e.g. "[WinError: 5] Access is denied", add the
--user option to the installation command.
!pip install pyautogui --user
If the error persists, try to restart the Jupyter Kernel and rerun the command.

