process.env.NODE_ENV is undefined issue [Solved]
Last updated: Apr 5, 2024
Reading time·5 min

# Table of Contents
- process.env.NODE_ENV is undefined issue
- Using the cross-env module to set the NODE_ENV environment variable
- Using the dotenv module to set the NODE_ENV environment variable
- Linux and macOS: Setting the NODE_ENV environment variable in your profile file
- Windows: Setting the NODE_ENV environment variable permanently
- Notes on solving the issue with undefined environment variables
# process.env.NODE_ENV is undefined issue [Solved]
The process.env.NODE_ENV environment variable is undefined when it hasn't
been set in the environment.
Regardless if you are trying to access the environment variable in Node.js, in a React or a Vue application, you have to set the environment variable before starting your server.
If you are on macOS or Linux, issue the following command to set the environment variable.
# on macOS and Linux export NODE_ENV=development

If you are on Windows, run the following command in CMD.
# on Windows, CMD SET NODE_ENV=development

If you are on Windows and use PowerShell, use the following command instead.
# on Windows, PowerShell $env:NODE_ENV="development"

Once you set the environment variable, you will be able to access it as follows.
console.log(process.env.NODE_ENV);
If I run the code from the terminal in which I set the environment variable, I
get the development value back.

When you use this approach to set the environment variable, it is only set for the current shell session.
If you want to specify a default value if the environment variable is not set, use the logical OR (||) operator.
const environment = process.env.NODE_ENV || 'development'; console.log(environment);
If you need to check if the environment variable is set to a specific value, use
an if statement.
if (process.env.NODE_ENV === 'development') { // development-only code below }
If you aren't able to read environment variables in a React.js application, check out the following article:
# Using the cross-env module to set the NODE_ENV environment variable
You can also use the cross-env module
to set the NODE_ENV environment variable.
The module enables you to set an environment variable in a universal way that works on all operating systems.
First, install the module by running the following command.
# 👇️ with NPM npm install cross-env # 👇️ with YARN yarn add cross-env
Now, set the command as a script in your package.json file.
The following example sets the NODE_ENV environment variable to development
and issues the node index.js command.
{ "scripts": { "start": "cross-env NODE_ENV=development node index.js" } }
Make sure to update the value of the environment variable and the command that starts your server.
For example, if your main .js file is called app.js, replace index.js with
app.js in the command.
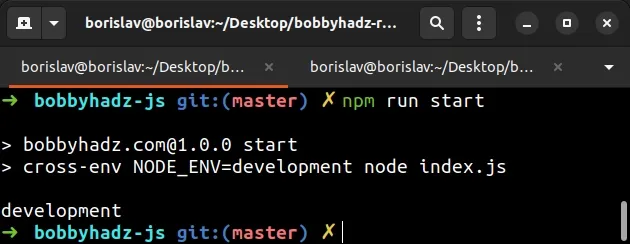
Now if I issue the npm run start command, the NODE_ENV environment variable
will be set to development.

Hardcoding operating system-specific code to set environment variables in
package.json is discouraged, especially if you collaborate with other
developers.
The crosss-env module works on all operating systems.
The module simply sets the environment variable before starting your server.
# Using the dotenv module to set the NODE_ENV environment variable
If the issue persists and you use Node.js, you can install the
dotenv module to set the NODE_ENV
environment variable.
- Open your terminal in your project's root directory and run the following command.
# with NPM npm install dotenv # with YARN yarn add dotenv
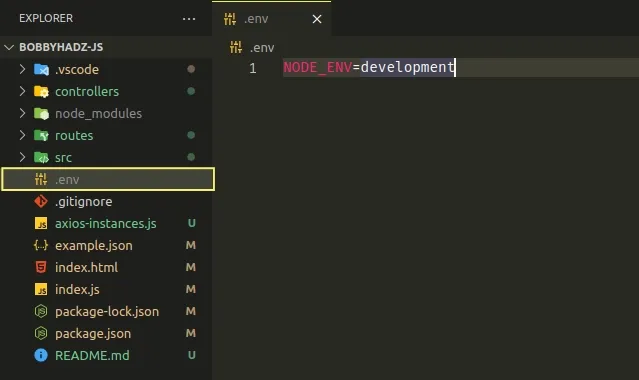
- Create a
.envfile in the root directory of your project (right next to yourpackage.jsonfile) and set theNODE_ENVenvironment variable.
NODE_ENV="development"

At the top of your entry .js file (e.g. app.js or index.js), add the
following code to initialize the dotenv module.
require('dotenv').config() // 👇️ confirm the NODE_ENV environment variable is set console.log(process.env) console.log(process.env.NODE_ENV); // your other code below
If you use ES6 imports/export use the following syntax instead.
import * as dotenv from 'dotenv' dotenv.config() console.log(process.env.NODE_ENV); // your other code below
Make sure to add the import statement and the dotenv.config() call at the top
of your entry .js file.
If you try to access environment variables before calling dotenv.config(),
they will be undefined.
# Linux and macOS: Setting the NODE_ENV environment variable in your profile file
If you want to permanently set the NODE_ENV or other environment variables on
macOS and Linux, you can add them to your profile file.
For example, if you use bash, you can add the variables to ~/.bashrc or
~/.bash_profile.
# with `gedit` sudo gedit ~/.bashrc # or with `nano` sudo nano ~/.bashrc
Add the following line at the bottom of your ~/.bashrc file.
export NODE_ENV=development
The same approach can be used to set any other environment variables. Save the changes and close the file.
Then, source the updated ~/.bashrc file and restart your server.
# BASH source ~/.bashrc source ~/.bash_profile
If you use zsh, you have to add the environment variable to your ~/.zshrc
file instead.
sudo gedit ~/.zshrc sudo nano ~/.zshrc
Paste the following line at the bottom of your ~/.zshrc file.
export NODE_ENV=development
Source your ~/.zshrc file and restart your server.
source ~/.zshrc
Note that this approach is not recommended when collaborating with other developers.
Instead, you should use the dotenv package or cross-env as shown in the
previous subheadings.
# Windows: Setting the NODE_ENV environment variable permanently
If you want to set the NODE_ENV environment variable or other environment
variables permanently on Windows:
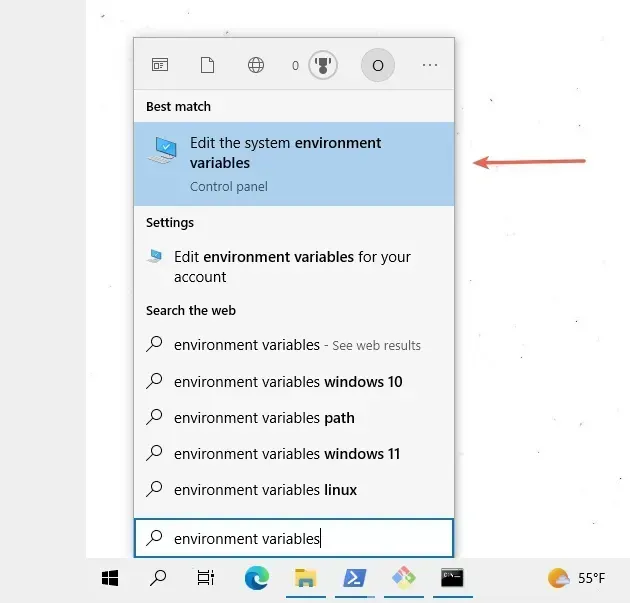
- Click on the Search bar and type "environment variables".
- Click on "Edit the system environment variables".

Click on the "Environment Variables" button.
In the "System variables" section, click on the New... button.
Set
NODE_ENVas the name of the variable and set its value (e.g.development).Click on OK to apply the changes and restart your terminal and development server.
# Notes on solving the issue with undefined environment variables
- If you get the issue in a React.js application, check out the following article:
- If you get the issue in a Node.js application when using the
dotenvmodule, you have to make sure to run thedotenv.config()line at the top of your file.
require('dotenv').config() // 👇️ confirm the NODE_ENV environment variable is set console.log(process.env) console.log(process.env.NODE_ENV); // your other code below
If you use ES6 imports/export use the following syntax instead.
import * as dotenv from 'dotenv' dotenv.config() console.log(process.env.NODE_ENV); // your other code below
If you run the config() method after importing a module that tries to access
environment variables, the environment variables will be undefined.
Make sure you haven't misspelled the environment variables that you're trying to set.
Restart your development server. Your dev server reads your
.envfile only on boot.
The server doesn't watch for changes in your .env file, so if you make any
changes to the file, you have to restart it.
# Additional Resources
You can learn more about the related topics by checking out the following tutorials:

