Please clean your repository working tree before checkout
Last updated: Apr 6, 2024
Reading time·4 min
# Please clean your repository working tree before checkout
The VS Code Git error "Please clean your repository working tree before checkout" occurs when you make changes locally without committing them and try to sync with the remote repository.
To solve the error, stash your changes or commit them before syncing with the remote.
# Commit your changes before syncing
If you are able to, commit your changes before syncing with the remote:
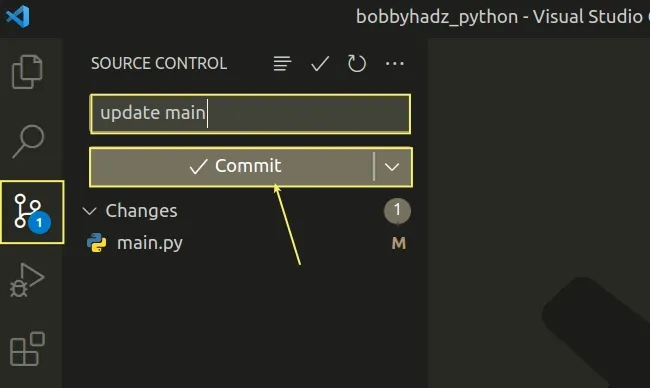
Click on the Source Control icon in the left sidebar or press
Ctrl+Shift+G.Type a commit message and click on the Commit button.
You can also use commands to commit your changes.
# Add the changes to the staging area git add . # Commit your changes git commit -m 'your commit message'
Once you commit your changes, you will be able to sync with the remote.
However, in some cases, you might not want to commit your changes yet.
# Stash your changes
To stash your changes:
- Click on the Source Control icon in the left sidebar or press
Ctrl+Shift+G.

Click on the ellipsis (
...) icon in the Source Control panel.Hover over Stash and select Stash (Include Untracked).
You can also use the Command Palette to stash your changes.
- Press:
Ctrl+Shift+Pon Windows and Linux.Command+Shift+Pon macOS.
F1 to open the Command Palette.- Type git stash.
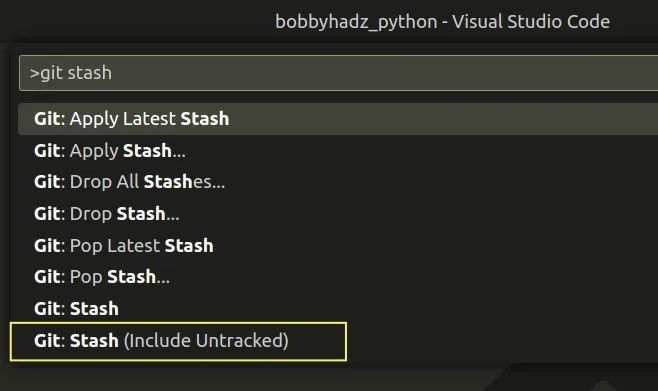
- Select Git stash (Include untracked).
You can also use the command line to stash your changes.
Open your terminal and issue the following command.
git stash
# Sync with the remote
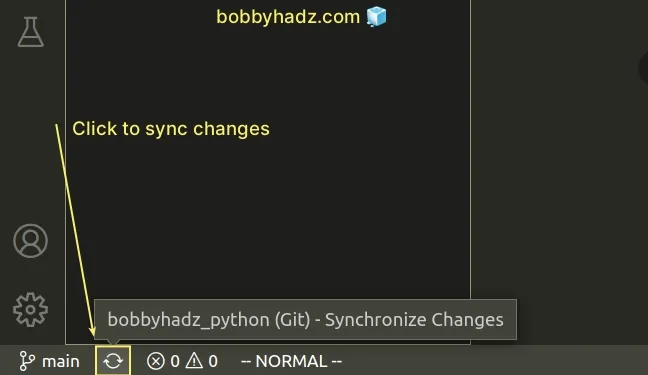
Once you stash your changes, sync the changes from the remote repository by clicking on the Synchronize Changes button in the bottom left corner.
You can also use the Command Palette to sync your changes:
- Press:
Ctrl+Shift+Pon Windows and Linux.Command+Shift+Pon macOS.
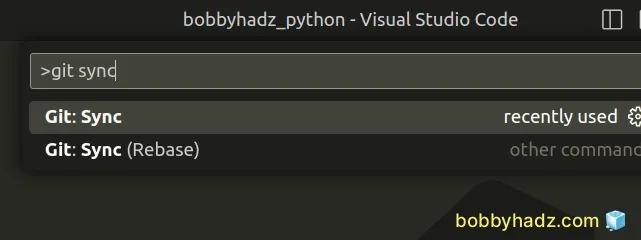
F1 to open the Command Palette.- Type git sync and select the Git: Sync command.
# Pop the Stashed changes
Once you sync with the remote, you have to pop the stashed changes.
- Click on the Source Control icon in the left sidebar or press
Ctrl+Shift+G.
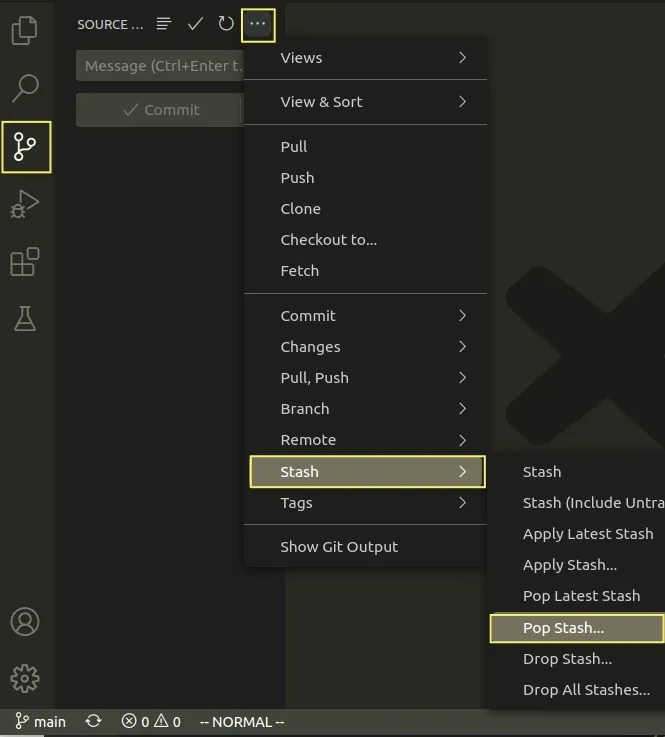
Click on the ellipsis (
...) icon in the Source Control panel.Hover over Stash and select Pop Stash....
Select the stash from the dropdown menu.
The stash will get applied and you will be able to see the changes you previously stashed.
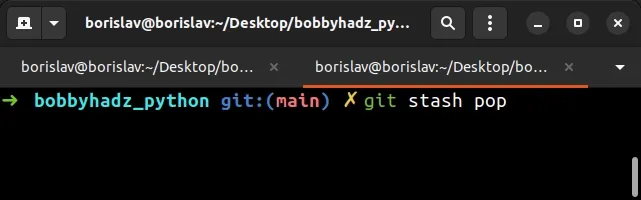
You can also use a command to pop the stash.
git stash pop
# Alternatively, you can create a temporary branch
- Click on the Source Control icon in the left sidebar or press
Ctrl+Shift+G.
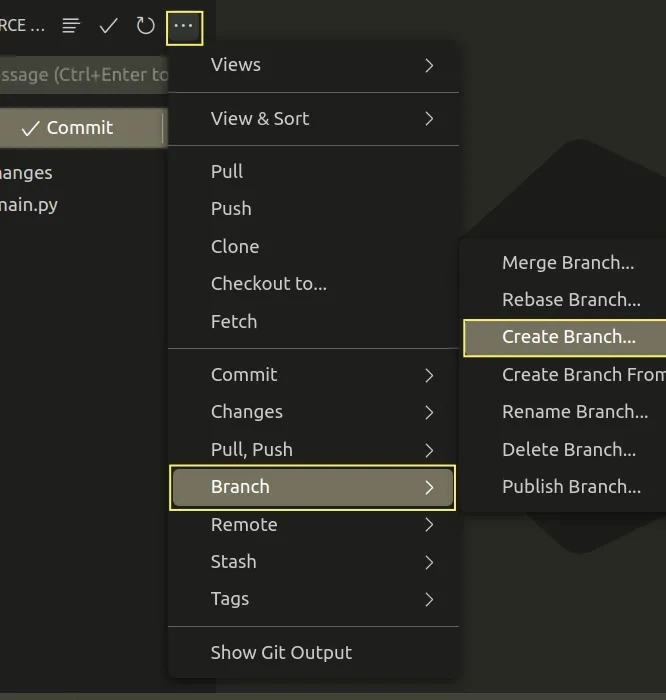
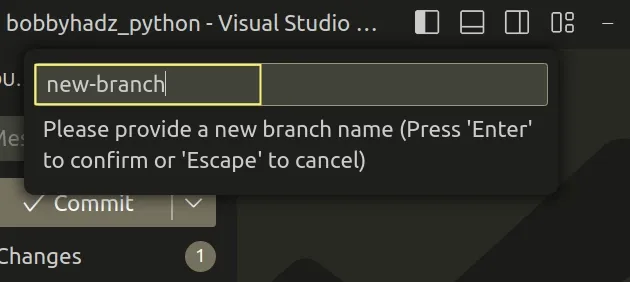
Click on the ellipsis (
...) icon in the Source Control panel.Type a name for your new branch and hit
Enter.
You can also create a temporary branch by using the command line.
git checkout -b new-branch
Once you create the new branch, make sure you've switched to it.
Now you have to commit your changes.
Click on the Source Control icon in the left sidebar or press
Ctrl+Shift+G.Type a commit message and click on the Commit button.
You can also use commands to commit your changes.
# Add the changes to the staging area git add . # Commit your changes git commit -m 'your commit message'
Now you can switch to your previous branch and sync with the remote.
- Press:
Ctrl+Shift+Pon Windows and Linux.Command+Shift+Pon macOS.
F1 to open the Command Palette.- Type git checkout and select Git checkout to:.
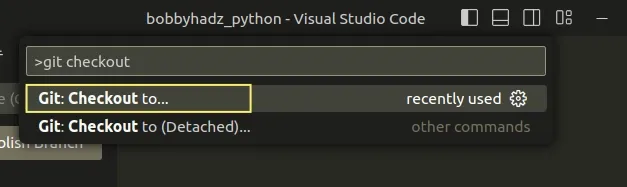
- Select the branch you want to switch to.
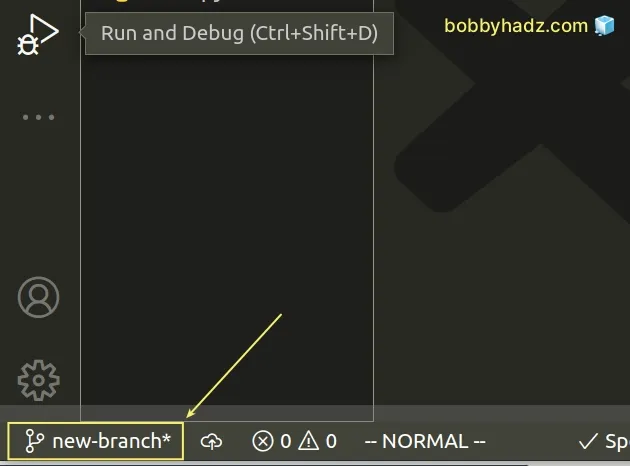
You can also switch to a different branch by clicking on the name of the current branch in the bottom left corner.
Once you switch to your previous branch, sync the changes from the remote repository by clicking on the Synchronize Changes button in the bottom left corner.
You can also use the Command Palette to sync your changes:
- Press:
Ctrl+Shift+Pon Windows and Linux.Command+Shift+Pon macOS.
F1 to open the Command Palette.- Type git sync and select the Git: Sync command.
Once you sync your changes, you can merge the temporary branch into your existing branch if you want to apply the changes.
- Click on the Source Control icon in the left sidebar or press
Ctrl+Shift+G.
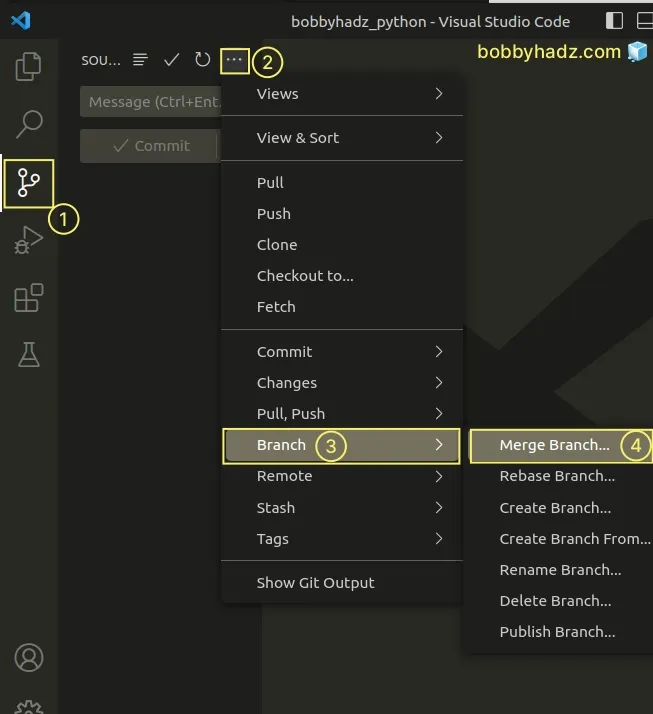
Click on the ellipsis (
...) icon in the Source Control panel.Hover over Branch and click on Merge Branch....
Select your temporary branch from the list.
Verify the branch has been merged successfully.
I've also written an article on how to delete git branches in VS Code.
If you need to configure VS Code as your default Git editor, difftool and mergetool, click on the link and follow the instructions.
# Additional Resources
You can learn more about the related topics by checking out the following tutorials:
- Changing the Git user or the GitHub account in VS Code
- What is the .vscode folder and should you Commit it to Git
- VS Code: Git not found. Install it or configure it using the 'git.path' setting
- How to view the Git History in Visual Studio Code
- How to undo the last Git commit in VS Code.
- How to rename a Directory or a File on the GitHub website
- How to highlight modified lines in Visual Studio Code

