VS Code: view Local History & restore previous File Version
Last updated: Apr 6, 2024
Reading time·5 min

# Table of Contents
- VS Code: view Local History & restore previous File Version
- Restoring a previous File version in VS Code
- Where Local history files are stored
- Finding and restoring files that you've already deleted
- Restoring previously deleted files that are not in local history
# VS Code: view Local History & restore previous File Version
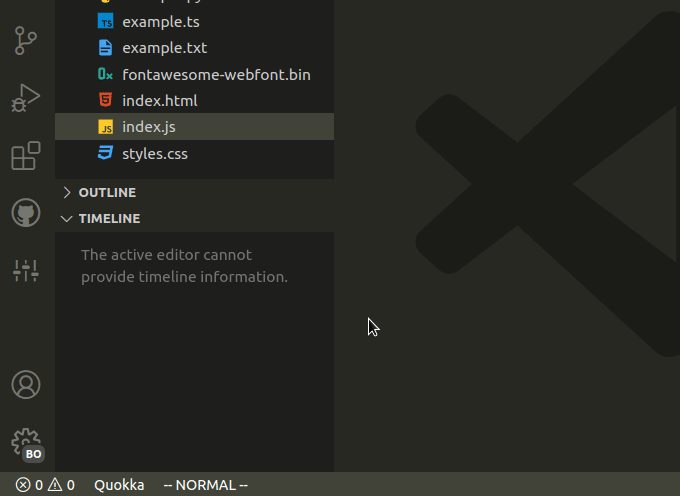
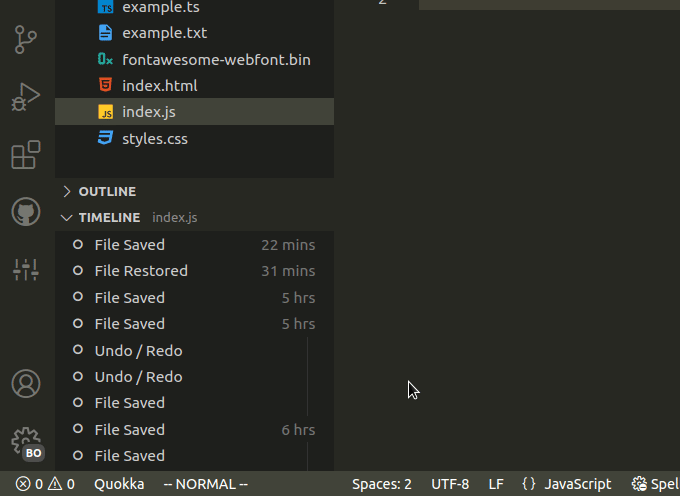
VS Code offers built-in local file history with the Timeline feature.
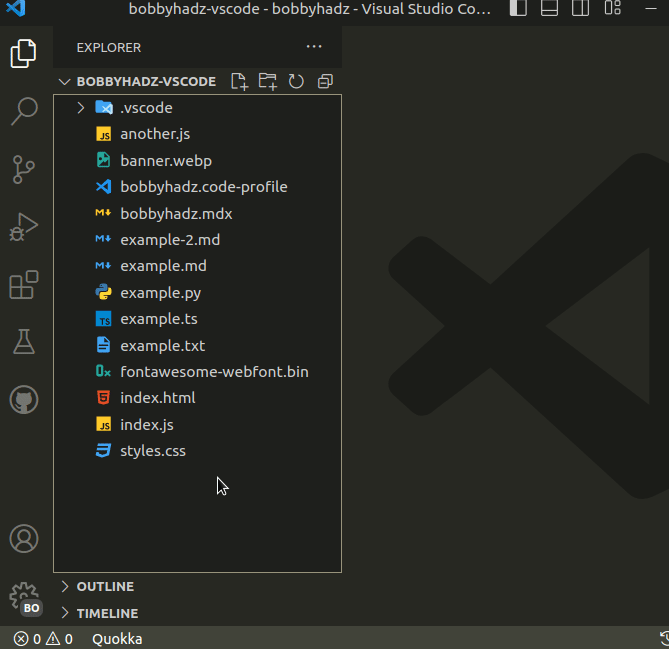
Open a specific file.
Click on TIMELINE in the Sidebar to expand the menu.
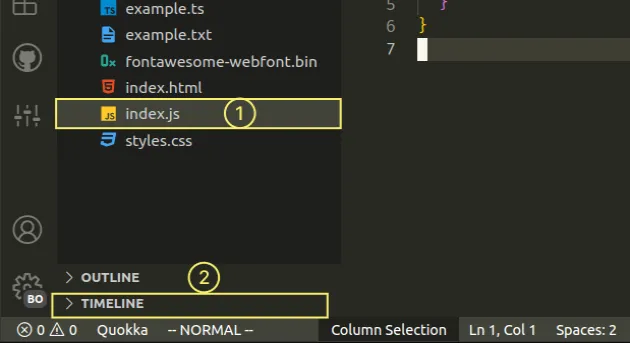
Make sure to select a file first and then expand the timeline menu.
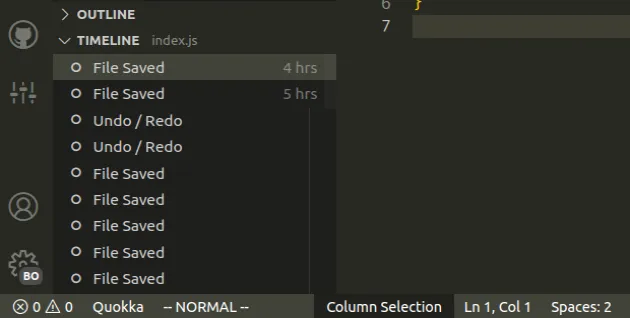
Anytime a file is saved, a new entry appears in the Timeline view.
Here is a short gif that demonstrates how to expand the Timeline view.
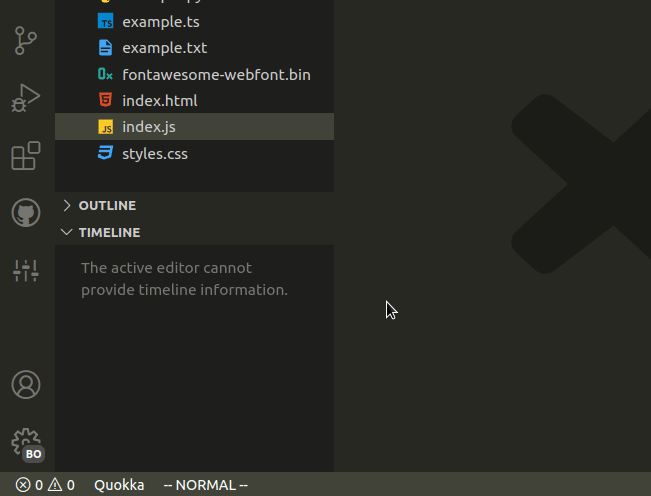
The timeline panel shows entries containing the file's contents every time it was saved.
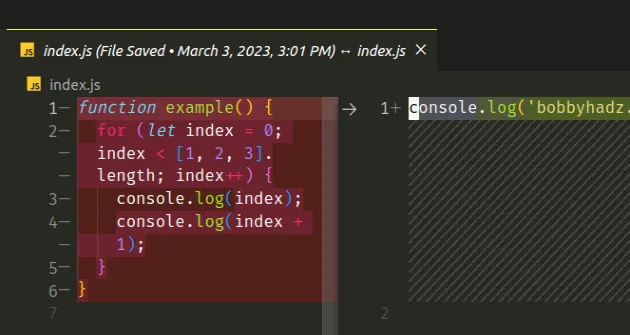
You are also able to compare versions of the file in a similar way to a git diff.
You can right-click on a specific entry to show the available options.
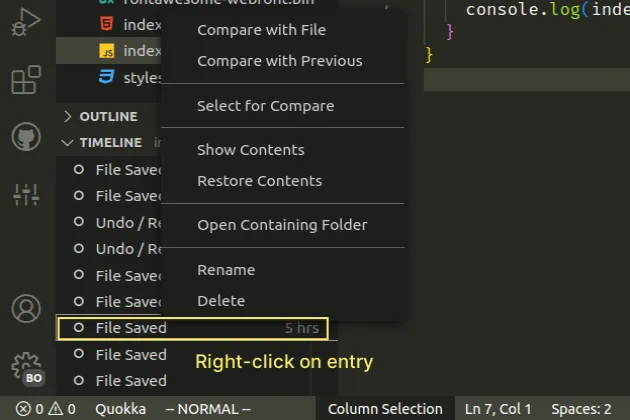
The options are:
- Compare with File - compare the contents of the entry with the contents of the current file.
- Compare with Previous - compare with the previous version of the file.
- Select for Compare - select the other file to compare with the entry.
- Show Contents - show the contents of this version of the file.
- Restore Contents - restore the contents of the file based on the selected version.
- Open Containing Folder - Open the History folder that contains the selected version.
- Rename - rename the entry.
- Delete - delete the entry.
If you have a git repository, you will also be able to see remote versions of the file.
You can click on the filter icon if you only want to show only local or remote versions of the file.
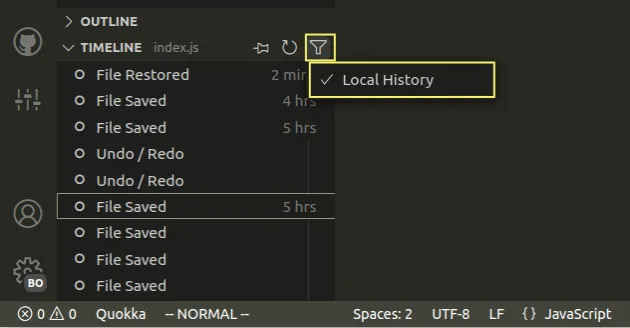
Note that the Local history filter of the TIMELINE feature only tracks files that you edit in VS Code.
If you edit the file using a different code editor, it won't be tracked and its versions won't get recorded.
I've also written an article on how to view the Git History in VS Code.
# Restoring a previous File version in VS Code
If you need to restore a previous version of a file:
- Select the file.
- Expand the TIMELINE menu from the sidebar.
- Right-click on the version that you'd like to restore.
- Click on Restore Contents.
Here is a short clip that demonstrates the process.
You can also use the command palette to select a file and find an entry to restore.
- Press:
Ctrl+Shift+Pon Windows and Linux.Command+Shift+Pon macOS.
F1 to open the Command Palette.- Type local history and select Local History: Find Entry to Restore.
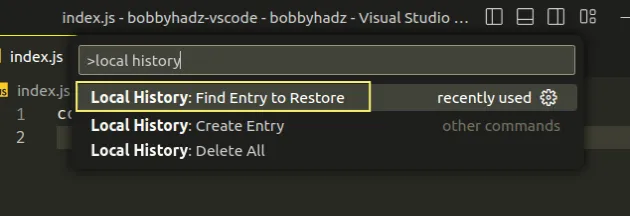
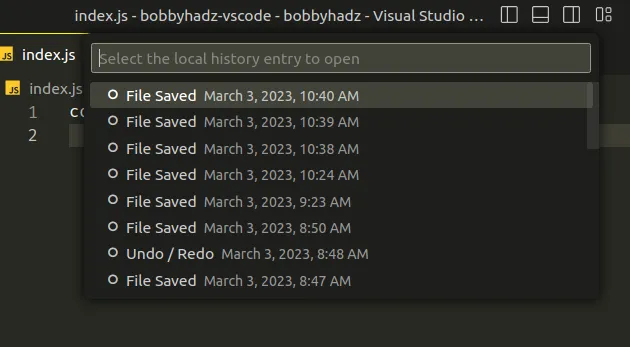
- A new menu is shown in which you can select the file to show local history for.
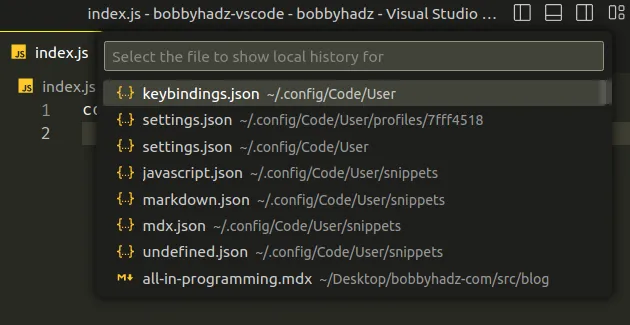
- The last step is to select the local history entry to open.
# Where Local history files are stored
The location where local history files are stored depends on your operating system:
On Windows, local history files are stored under:
%APPDATA%\Code\User\History
The path resolves to C:\Users\<username>\AppData\Roaming\Code\User\History.
Make sure to replace the <username> placeholder with your actual username.
On macOS, local history files are stored under:
$HOME/Library/Application\ Support/Code/User/History.
On Linux, profiles are stored under:
$HOME/.config/Code/User/History
You can also find where local history files are stored by:
- Expanding the TIMELINE menu from the Side Bar.
- Right-clicking on an entry.
- Clicking Open Containing Folder.
Once you open the folder that contains the specific entry, go one directory back
into the History folder.
# Finding and restoring files that you've already deleted
If you've already deleted the file, it won't be displayed in the TIMELINE menu.
One way to try to restore the file from local history is to use the grep
command on macOS or Linux or the findStr command on Windows.
Once you locate the correct version of the file, you can restore it.
# Windows example using findstr
Here is an example that looks for the string bobbyhadz.com using grep on
Windows.
findstr /i /s bobbyhadz.com %APPDATA%\Code\User\History
The /i parameter is used to ignore the case of the characters when searching
for the string.
The /s parameter is used to search directories recursively.
# macOS example using grep
Here is an example that looks for the string bobbyhadz.com using grep on
macOS.
grep -r -i bobbyhadz.com "$HOME/Library/Application\ Support/Code/User/History"
The -r option is used to search directories recursively.
The -i option is used to perform a case-insensitive search.
# Linux example using grep
Here is an example that looks for the string bobbyhadz.com using grep on
Linux.
grep -r -i bobbyhadz.com "$HOME/.config/Code/User/History"
The -r option is used to search directories recursively.
The -i option is used to perform a case-insensitive search.
# Restoring previously deleted files that are not in local history
If you need to restore a deleted file that is not tracked in local history, check the trash bin on your computer.
For example, on Windows:
- Open Recycle Bin.
- Find the VS Code file that you deleted.
- Right-click on the deleted file and click no Restore
- The file will get restored to the directory it was deleted from (in your VS Code project).
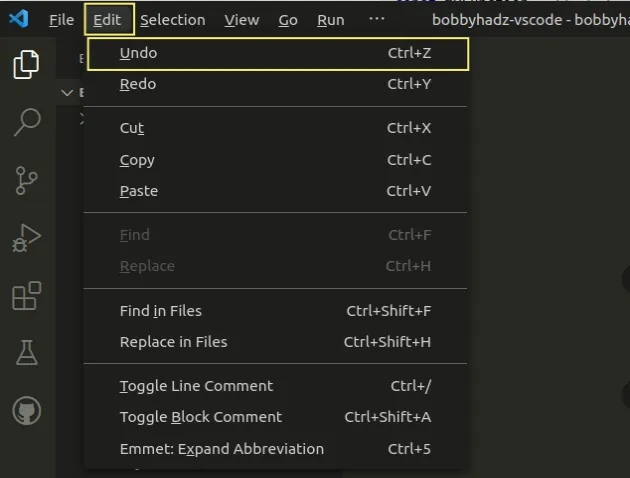
Alternatively, you can use the VS Code undo functionality.
After you delete a file:
Click on EXPLORER in the left sidebar to focus it.
Click on Edit in the top menu and then click Undo.
Note that you might have to click Alt to show the top menu on Windows and
Linux.
You can also left-click on explorer and press Ctrl + Z (or Cmd + Z) to
restore the deleted file.
However, note that you must focus Explorer first before using the Undo functionality because the main window has a separate stack for Undo.
Here is a short clip that shows how to restore a deleted file using Ctrl + Z
to undo.
And, here is a clip that shows how to use the top menu to restore a deleted file.
I've also written an article on how to undo the last Git commit in VS Code.
# Additional Resources
You can learn more about the related topics by checking out the following tutorials:
- How to view the Git History in Visual Studio Code
- What is the .vscode folder and should you Commit it to Git
- Using VS Code as default Git editor, difftool and mergetool
- VS Code: Git not found. Install it or configure it using the 'git.path' setting
- How to easily delete Git Branches in Visual Studio Code
- Changing the Git user or the GitHub account in VS Code

