Set the Position of an Element using JavaScript
Last updated: Mar 5, 2024
Reading time·3 min

# Table of Contents
# Set the Position of an Element using JavaScript
To set the position of an element:
- Select the element and set its position property to
absolute. - Use the
topproperty to set the element's vertical position, e.g.box.style.top = '150px'. - Use the
leftproperty to set the element's horizontal position, e.g.box.style.left = '150px'.
Here is the HTML for the examples.
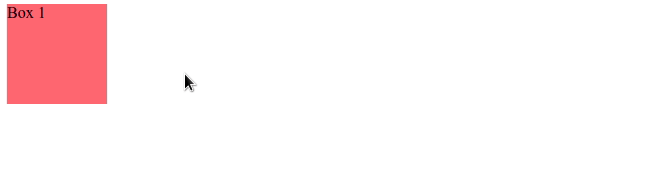
<!DOCTYPE html> <html lang="en"> <head> <meta charset="UTF-8" /> <title>bobbyhadz.com</title> </head> <body> <div id="box" style=" background-color: salmon; width: 100px; height: 100px; " > Box 1 </div> <script src="index.js"></script> </body> </html>
And here is the related JavaScript code.
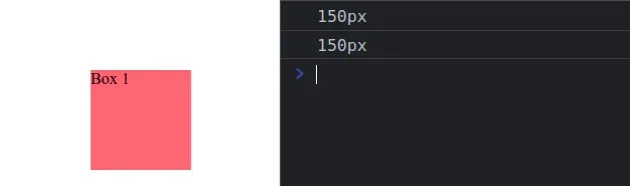
const box = document.getElementById('box'); box.style.position = 'absolute'; box.style.top = '150px'; box.style.left = '150px'; console.log(box.style.top); // 👉️ "150px" console.log(box.style.left); // 👉️ "150px"
We first set the element's
position to
absolute.
absolute, it is removed from the normal document flow.The element's final position is determined by the values of top, right,
bottom and left properties.
The top, right, bottom and left properties do not affect
non-positioned elements.
We set the element's top
CSS property to 150px.
The top property specifies the distance to the top edge of the element's
containing block.
const box = document.getElementById('box'); box.style.position = 'absolute'; box.style.top = '150px'; box.style.left = '150px'; console.log(box.style.top); // 👉️ "150px" console.log(box.style.left); // 👉️ "150px"
We then used the left property to set the distance to the left edge of the element's containing block.
function positionElement(el, x, y) { el.style.position = 'absolute'; el.style.left = x + 'px'; el.style.top = y + 'px'; } const box = document.getElementById('box'); console.log(positionElement(box, 50, 150)); console.log(box.style.left); // 👉️ "50px" console.log(box.style.top); // 👉️ "150px"
The function takes the element, the x and y position as parameters, sets the
element's position property to absolute and positions it.
# Position an Element under the Mouse on Click
To position an element under the mouse on click:
- Set the element's
positionproperty toabsolute. - Add a
clickevent listener to thedocumentobject. - Each time the mouse is clicked, set the element's
topandleftproperties to the coordinates of the mouse.
Here is the HTML for the next example.
<!DOCTYPE html> <html lang="en"> <head> <meta charset="UTF-8" /> <title>bobbyhadz.com</title> </head> <body> <div id="box" style="background-color: salmon; width: 100px; height: 100px"> Box 1 </div> <script src="index.js"></script> </body> </html>
And here is the related JavaScript code.
const box = document.getElementById('box'); box.style.position = 'absolute'; document.addEventListener('click', function handleClick(event) { box.style.top = event.clientY - 50 + 'px'; box.style.left = event.clientX - 50 + 'px'; });
We added a click event listener on the document object, which invokes a
function anytime the document is clicked.
event object to get the coordinates of the mouse when the event is dispatched.Your requirements may vary but to position the element in the center of the
cursor, we subtracted 50 from the
clientY
and
clientX
coordinates.
The clientY property provides the vertical coordinate at which the event
occurred.
And the clientX property provides the horizontal coordinate at which the
MouseEvent event occurred.
# Additional Resources
You can learn more about the related topics by checking out the following tutorials:

