Unable to verify the first certificate in Node.js & Postman
Last updated: Apr 5, 2024
Reading time·10 min
# Table of Contents
- Error: unable to verify the first certificate in Node.js
- SSL Error: Unable to verify the first certificate in Postman
Note: if you got the Unable to verify the first certificate error in
Postman, click on the second subheading.
# Error: unable to verify the first certificate in Node.js
The "unable to verify the first certificate" error means that the web server you are trying to connect to is misconfigured and didn't send the intermediate certificates in the certificate it sent you.
Add the missing certificate to resolve the error.
Error: unable to verify the first certificate at Error (native) at TLSSocket.<anonymous> (_tls_wrap.js) at TLSSocket.emit (events.js) at TLSSocket._finishInit (_tls_wrap.js)
When you make an HTTP request to a web server, it has to send the full certificate chain:
- Root certificate (part of the browser or other applications) - A self-signed public key certificate used to identify the root certificate authority.
- Intermediate certificates (installed on the server) - A dividing layer between the certificate authority and the end user's certificate.
- Server certificate (installed on the server) - used to verify the legitimacy of the web host.
Here is an example that makes an HTTP request to a server that doesn't send the intermediate certificates in the request.
const axios = require('axios'); // 👇️ uncomment if you use ES6 modules import/export syntax // import axios from 'axios'; axios .get('https://incomplete-chain.badssl.com') .then(res => { console.log(res); }) .catch(err => { console.log(err); });
The example uses Node.js and axios to make the request.
Make sure to install the axios module if you want to run the code.
# 👇️ Initialize package.json file npm init -y # 👇️ Install `axios` npm install axios # 👇️ Run the index.js file node index.js
The certificate chain sent by the site is missing an intermediate certificate.
This may cause any of the following errors:
- Error: unable to verify the first certificate
- UNABLE_TO_VERIFY_LEAF_SIGNATURE
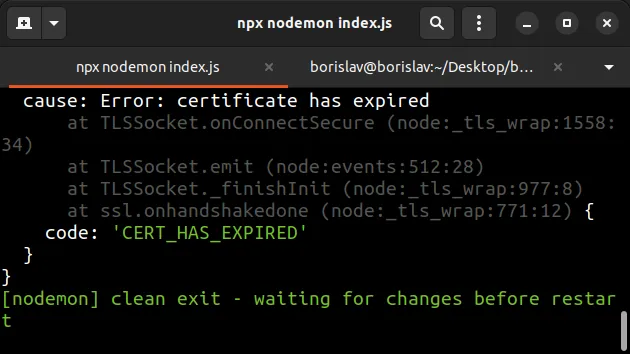
- Error: certificate has expired, code: 'CERT_HAS_EXPIRED'
- CERT_UNTRUSTED - the root certificate is missing
# Setting the NODE_TLS_REJECT_UNAUTHORIZED environment variable
One way to get around the error is to set the NODE_TLS_REJECT_UNAUTHORIZED
environment variable to 0.
const axios = require('axios'); // 👇️ Uncomment if you use ES6 modules import/export syntax // import axios from 'axios'; process.env['NODE_TLS_REJECT_UNAUTHORIZED'] = 0; axios .get('https://incomplete-chain.badssl.com') .then(res => { console.log(res); }) .catch(err => { console.log(err); });
Setting the environment variable to 0 suppresses the
"UNABLE_TO_VERIFY_LEAF_SIGNATURE" and "unable to verify the first certificate"
errors.
When you set the environment variable, you will get the following message in your terminal:
- (node:714741) Warning: Setting the NODE_TLS_REJECT_UNAUTHORIZED environment variable to '0' makes TLS connections and HTTPS requests insecure by disabling certificate verification.
0, API requests can be intercepted and modified between the client and the server.It practically disables rejecting unauthorized and incomplete certificates, so the request will complete even though the web server doesn't send the intermediate certificates in the response.

This approach makes your HTTP requests to the server insecure and should only be used as a quick and dirty solution.
Note: if you got the Unable to verify the first certificate error in
Postman, click on the following subheading.
# Setting the NODE_EXTRA_CA_CERTS environment variable
A more robust approach is to:
- Get the intermediate certificate file that the server isn't including in the response.
- Set the
NODE_EXTRA_CA_CERTS
environment variable to the intermediate
.pemfile.
# Downloading the intermediate certificate file
To get the intermediate certificate:
- Open
bash,zshor Git Bash. NOTE: if you are on Windows, open Git Bash to be able to use theopensslcommand.
Issue the following command.
openssl s_client -connect incomplete-chain.badssl.com:443 -servername incomplete-chain.badssl.com | tee server_certificate
incomplete-chain.badssl.com with the domain you are making an HTTP request to.Here is a code sample that uses the example.com domain instead.
openssl s_client -connect example.com:443 -servername example.com | tee server_cert_details

The command will download details about the server certificate and store them in
the file called server_cert_details.
- Run the following command from your terminal to get the URI of the intermediate certificates.
openssl x509 -in server_cert_details -noout -text | grep -i "issuer"
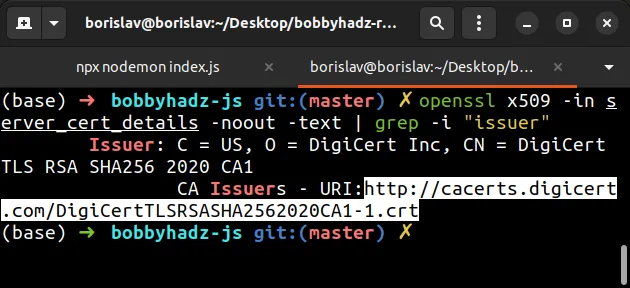
- Copy the URI from the output of the command. It should look similar to the following.
http://cacerts.digicert.com/DigiCertTLSRSASHA2562020CA1-1.crt
- Download the intermediate certificate. Note: make sure to specify the URI you got from the previous step.
curl --output intermediate.crt <YOUR_URI_HERE>
Make sure to replace the <YOUR_URI_HERE> placeholder with your actual URI,
e.g.:
curl --output intermediate.crt http://cacerts.digicert.com/DigiCertTLSRSASHA2562020CA1-1.crt
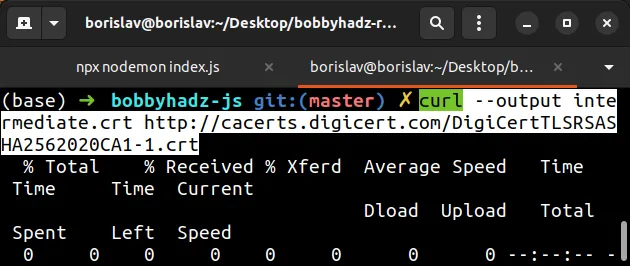
The command will download a file called intermediate.crt that stores the
intermediate certificates.
- Convert the certificate to a
.pemfile by issuing the following command.
openssl x509 -inform DER -in intermediate.crt -out intermediate.pem -text
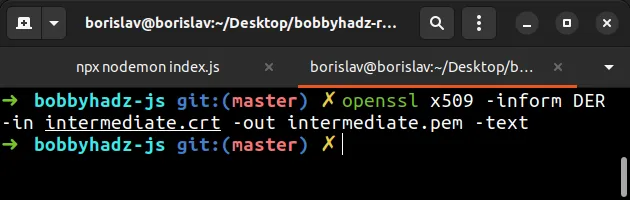
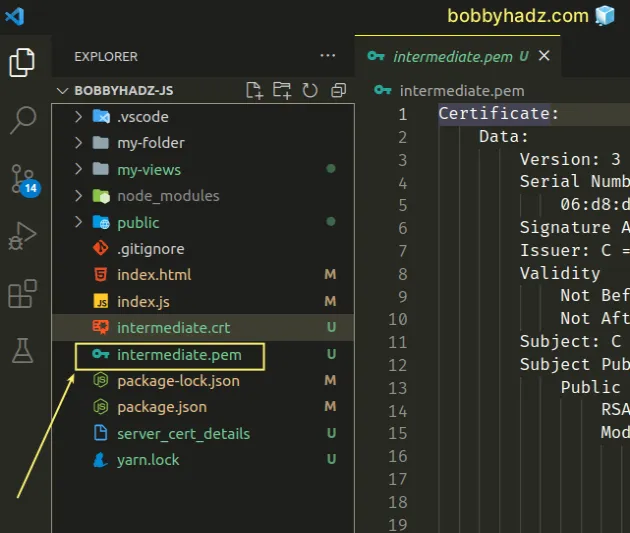
Now you should have an intermediate.pem file in the folder where your terminal
is positioned.
# Setting the NODE_EXTRA_CA_CERTS environment variable to the .pem file
The next step is to set the NODE_EXTRA_CA_CERTS environment variable to the
downloaded .pem file.
- First, install the cross-env package to be able to set the environment variable universally (for Windows, macOS and Linux).
npm install cross-env
- Open your
package.jsonfile and set theNODE_EXTRA_CA_CERTSto the complete path to the file.
On Windows, your start script might look something similar to the following.
{ "scripts": { "start": "start": "cross-env NODE_EXTRA_CA_CERTS=\"C:\\Users\\YOUR_USER\\Desktop\\bobbyhadz-js\\intermediate.pem\" node index.js", }, "dependencies": { "axios": "^1.3.4" }, "devDependencies": { "cross-env": "^7.0.3" } }
On macOS and Linux, your start script might look something similar to the
following.
{ "scripts": { "start": "cross-env NODE_EXTRA_CA_CERTS=\"/home/YOUR_USER/Desktop/bobbyhadz-js/intermediate.pem\" node index.js", }, "dependencies": { "axios": "^1.3.4" }, "devDependencies": { "cross-env": "^7.0.3" } }
Assuming your index.js file looks similar to the following.
const axios = require('axios'); // 👇️ Uncomment if you use ES6 modules import/export syntax // import axios from 'axios'; axios .get('https://incomplete-chain.badssl.com') .then(res => { console.log(res); }) .catch(err => { console.log(err); });
Run the npm start command.
npm start
You can also set the environment variable directly when issuing the node
command.
NODE_EXTRA_CA_CERTS='/path/to/intermediate.pem' node index.js
However, this will likely fail on Windows depending on your shell type.
You can use the npx cross-env command on Windows with CMD or PowerShell.
npx cross-env NODE_EXTRA_CA_CERTS='C:\\Users\\USER\\Desktop\\intermediate.pem' node index.js
NOTE: if you used the 'incomplete-chain.badssl.com' in the example, you might
get an error: CERT_HAS_EXPIRED.
This is because the owner of the domain hasn't renewed their SSL certificate.
In other words, this approach solves the "unable to verify the first
certificate" error but not the CERT_HAS_EXPIRED error.
As shown in the previous subheading, setting the
'NODE_TLS_REJECT_UNAUTHORIZED' environment variable to 0 makes the request
go through even if the certificate has expired.
const axios = require('axios'); // 👇️ Uncomment if you use ES6 modules import/export syntax // import axios from 'axios'; process.env['NODE_TLS_REJECT_UNAUTHORIZED'] = 0; axios .get('https://incomplete-chain.badssl.com') .then(res => { console.log(res); }) .catch(err => { console.log(err); });
# Using the ssl-root-cas module to solve the error
An alternative approach is to use the ssl-root-cas module.
Note that the previous approach with the environment variable should generally be preferred as it is more concise.
When using the ssl-root-cas module, you still have to have the
intermediate.pem file from the previous subheading.
The following example uses the ssl-root-cas module with a locally downloaded
intermediate.pem certificate file.
- First, open your terminal in your project's root directory and install the module.
npm install ssl-root-cas
- Add the following code to your
index.jsfile.
// 👇️ using require() CommonJS syntax const path = require('path'); const https = require('https'); const rootCas = require('ssl-root-cas'); const axios = require('axios'); rootCas.create(); rootCas.addFile(path.resolve(__dirname, 'intermediate.pem')); const httpsAgent = new https.Agent({ca: rootCas}); axios .get('https://example.com', {httpsAgent}) .then(res => { console.log(res); }) .catch(err => { console.log(err); });
Here is the equivalent code sample but using the ES6 modules import/export syntax.
// 👇️ using ES6 Modules syntax import path from 'path'; import https from 'https'; import {fileURLToPath} from 'url'; import axios from 'axios'; import rootCas from 'ssl-root-cas'; const __filename = fileURLToPath(import.meta.url); const __dirname = path.dirname(__filename); rootCas.create(); rootCas.addFile(path.resolve(__dirname, 'intermediate.pem')); const httpsAgent = new https.Agent({ca: rootCas}); axios .get('https://example.com', {httpsAgent}) .then(res => { console.log(res); }) .catch(err => { console.log(err); });
Make sure to replace the
example.comdomain with your specific domain.The example assumes that you have the
intermediate.pemfile in the root directory of your project (as shown in the previous subheading).Run the
node index.jscommand.
If you want to apply the intermediate certificate globally (to all HTTPS
requests) and not to a single request. set the https.globalAgent.options.ca
property.
const path = require('path'); const https = require('https'); const rootCas = require('ssl-root-cas'); const axios = require('axios'); rootCas.create(); rootCas.addFile(path.resolve(__dirname, 'intermediate.pem')); // 👇️ apply certificate to ALL HTTPS requests https.globalAgent.options.ca = rootCas; axios .get('https://example.com') .then(res => { console.log(res); }) .catch(err => { console.log(err); });
# Using the node_extra_ca_certs_mozilla_bundle package to solve the error
You can also use the node_extra_ca_certs_mozilla_bundle to solve the error.
The module doesn't require you to have a local intermediate.pem file.
- Install the module by running the following command.
npm install node_extra_ca_certs_mozilla_bundle
- Set the
NODE_EXTRA_CA_CERTSenvironment variable to the certificate that is stored in thenode_modulesdirectory.
For macOS and Linux:
# macOS and Linux NODE_EXTRA_CA_CERTS=node_modules/node_extra_ca_certs_mozilla_bundle/ca_bundle/ca_intermediate_root_bundle.pem node index.js
For Windows:
# Windows npx cross-env NODE_EXTRA_CA_CERTS=node_modules/node_extra_ca_certs_mozilla_bundle/ca_bundle/ca_intermediate_root_bundle.pem node index.js
If you need to use the certificate in a script, set the
https.globalAgent.options.ca property.
// using CommonJS syntax const fs = require('fs'); const https = require('https'); https.globalAgent.options.ca = fs.readFileSync( 'node_modules/node_extra_ca_certs_mozilla_bundle/ca_bundle/ca_intermediate_root_bundle.pem', );
Here is the equivalent code sample using the ES6 modules import/export syntax.
import fs from 'fs'; import https from 'https'; https.globalAgent.options.ca = fs.readFileSync( 'node_modules/node_extra_ca_certs_mozilla_bundle/ca_bundle/ca_intermediate_root_bundle.pem', );
This sets the certificate from the node_modules directory for all HTTPS
requests.
# SSL Error: Unable to verify the first certificate in Postman
The Postman "unable to verify the first certificate" error occurs when the web server you are trying to connect to is misconfigured and doesn't send the intermediate certificates in the certificate it sent you.
Disable SSL verification to solve the error.
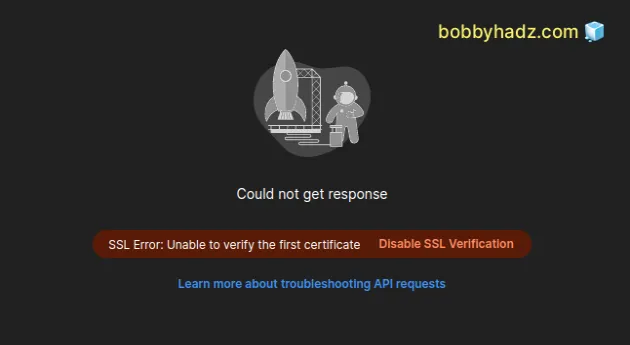
If you make an HTTP request to https://incomplete-chain.badssl.com in Postman,
the error is shown.
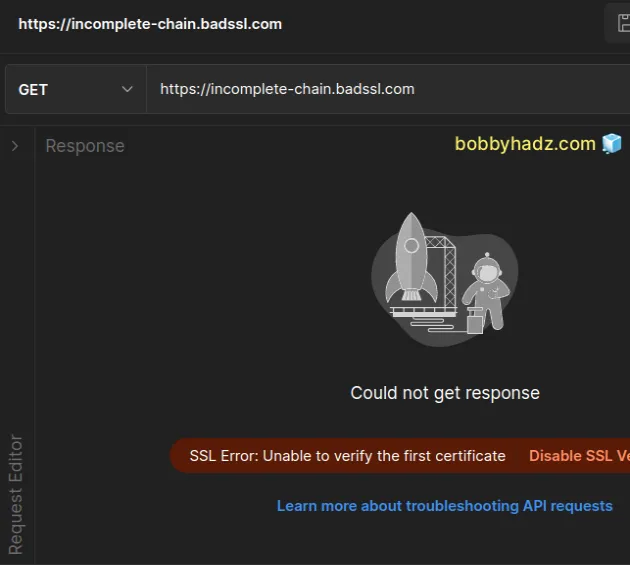
This is because the server is misconfigured and doesn't send the intermediate certificates in the response.
# Disable SSL verification for a given request
One way to disable SSL verification is to disable it on a per-Request level:
Click on Settings under the field with the URL.
Toggle the Enable SSL certificate verification button to turn it off.
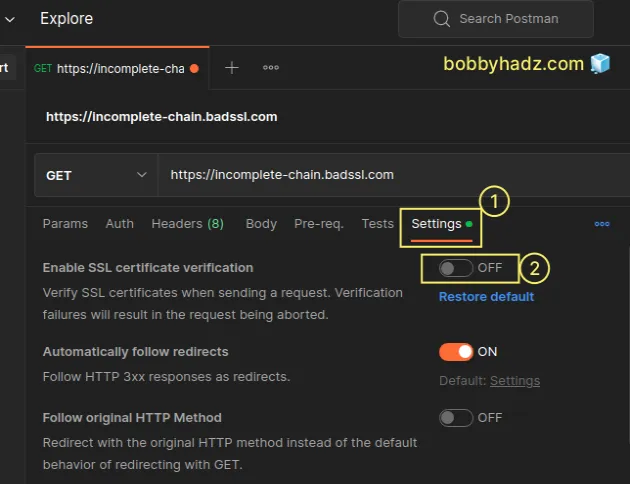
- Issue the HTTP request again and it should succeed.
You can use the https://incomplete-chain.badssl.com domain for testing.
Updating the settings for a given request has higher precedence than the global SSL certificate verification setting.
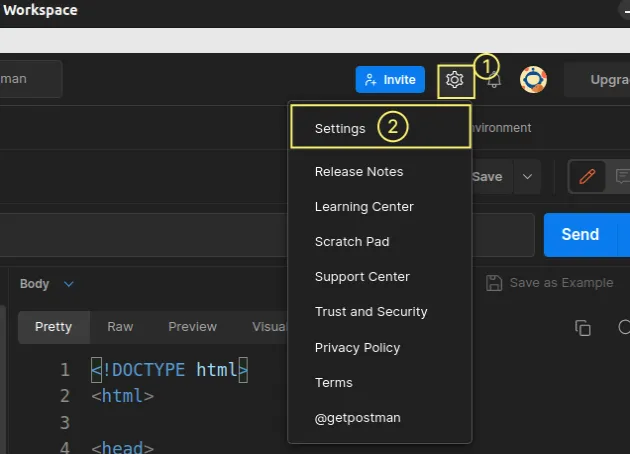
# Disable SSL verification globally
To disable SSL verification globally (for all requests):
Click on the cogwheel icon in the upper right corner.
Click on the Settings button and make sure you are positioned in the General tab.
- Turn off the SSL certificate verification setting.
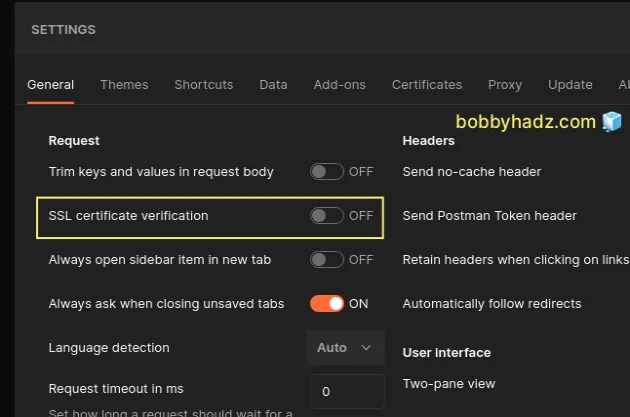
- Note that turning off the SSL certificate verification globally has no effect for a given request if the request's Enable SSL certificate verification setting is enabled.
For example, if you have the request-level setting enabled as shown in this screenshot:
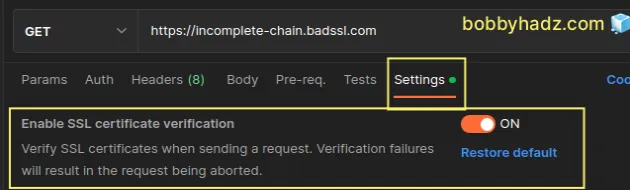
Then disabling SSL certificate verification globally doesn't affect this request.
You can click on the Restore default button under the toggle to restore the default (global) setting and apply it to the request.
# Removing the Client and CA Certificates
If the error persists:
Click on the cogwheel icon in the upper right corner.
Click on the Settings button.
Click on the Certificates button.
Make sure the CA Certificates and Client Certificates settings are turned off.
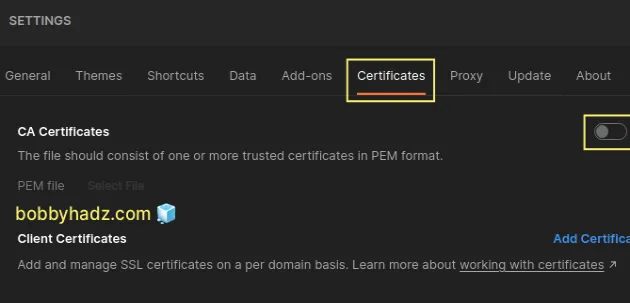
- Try to issue the HTTPS request again.
# Downloading the intermediate certificates
If the error persists, you can download the intermediary certificates and add them when making requests.
To get the intermediate certificate:
- Open
bash,zshor Git Bash. NOTE: if you are on Windows, open Git Bash to be able to use theopensslcommand.
Issue the following command.
openssl s_client -connect incomplete-chain.badssl.com:443 -servername incomplete-chain.badssl.com | tee server_certificate
Make sure to replace the placeholder domain incomplete-chain.badssl.com with
the domain you are making an HTTP request to.
Here is a code sample that uses the example.com domain instead.
openssl s_client -connect example.com:443 -servername example.com | tee server_cert_details
The command will download details about the server certificate and store them in
the file called server_cert_details.
- Run the following command from your terminal to get the URI of the intermediate certificates.
openssl x509 -in server_cert_details -noout -text | grep -i "issuer"
- Copy the URI from the output of the command. It should look similar to the following.
http://cacerts.digicert.com/DigiCertTLSRSASHA2562020CA1-1.crt
- Download the intermediate certificate. Note: make sure to specify the URI you got from the previous step.
curl --output intermediate.crt <YOUR_URI_HERE>
Make sure to replace the <YOUR_URI_HERE> placeholder with your actual URI,
e.g.:
curl --output intermediate.crt http://cacerts.digicert.com/DigiCertTLSRSASHA2562020CA1-1.crt
The command will download a file called intermediate.crt that stores the
intermediate certificates.
- Convert the certificate to a
.pemfile by issuing the following command.
openssl x509 -inform DER -in intermediate.crt -out intermediate.pem -text
Now you should have an intermediate.pem file in the folder where your terminal
is positioned.
Click on the cogwheel icon in the upper right corner.
Click on the Settings button.
Click on the Certificates button.
Enable the Ca Certificates setting and click on the Select File button.
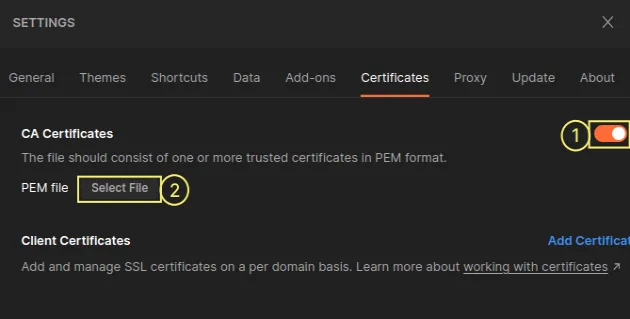
- Navigate to the
intermediate.pemfile and select it.
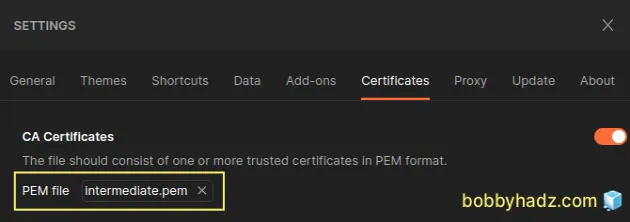
- Try to issue the HTTPS request again.
# Additional Resources
You can learn more about the related topics by checking out the following tutorials:
- How to clear all Cookies or a specific Cookie in Postman
- Error: write EPROTO error:100000f7:SSL routines:OPENSSL_internal:WRONG_VERSION_NUMBER
- The engine "node" is incompatible with this module
- Could not get any response Postman Error [Solved]
- Treating warnings as errors because process.env.CI = true
- Header name must be a valid HTTP token ["{"] [Solved]
- How to get the last modified Date of a File in Node.js

