EACCES: permission denied, access /usr/local/lib/node_modules
Last updated: Apr 5, 2024
Reading time·5 min
# Table of Contents
- EACCES: permission denied, access /usr/local/lib/node_modules
- VS CODE: EACCES: permission denied, unlink '/usr/local/bin/code'
Note: if you got the
VS Codeerror: EACCES: permission denied or "EACCES: permission denied, unlink '/usr/local/bin/code'", click on the second subheading.
# EACCES: permission denied, access /usr/local/lib/node_modules
The error "EACCES: permission denied, access '/usr/local/lib/node_modules'" occurs when the specified directory is owned by the root user.
To solve the error, change the owner of the directory to the current user.
npm ERR! path /usr/local/lib/node_modules npm ERR! code EACCES npm ERR! errno -13 npm ERR! syscall access npm ERR! Error: EACCES: permission denied, access '/usr/local/lib/node_modules' npm ERR! { Error: EACCES: permission denied, access '/usr/local/lib/node_modules' npm ERR! errno: -13, npm ERR! code: 'EACCES', npm ERR! syscall: 'access', npm ERR! path: '/usr/local/lib/node_modules' } npm ERR! npm ERR! Please try running this command again as root/Administrator.
# Running npm commands prefixed with sudo
You can install npm modules with the sudo prefix, such as:
sudo npm install -g live-server
Make sure to replace live-server with the name of the module you're trying to
install.
However, this is not a good practice because it often causes permission issues in the future.
npm is run with the sudo prefix, the root user has ownership over the created files.This causes issues when a non-root user tries to access the files.
The article offers some more long-term solutions.
# Correcting the permissions of the directory
Run the following command from your terminal to check which user owns the
/usr/local/lib/node_modules directory.
ls -la /usr/local/lib/node_modules
Your output should be something similar to the following.
drwxr-xr-x 3 root wheel 102 Mar 10 13:35 node_modules
Notice that the directory is owned by the root user.
To resolve the issue, we have to change the ownership of the directory to the current user.
sudo chown -R $USER /usr/local/lib/node_modules
The command changes the ownership of the directory to the current user.
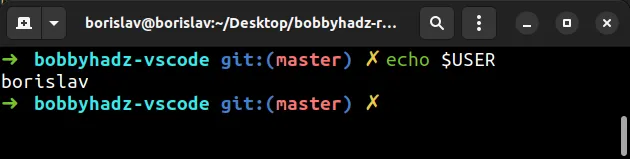
The $USER environment variable resolves to the current user.
echo $USER
You can also explicitly set the username when running the command.
sudo chown -R YOUR_USER /usr/local/lib/node_modules
Make sure to replace the YOUR_USER placeholder with your actual username.
# Changing NPM's default directory
An alternative approach to resolving the error is to change NPM's default directory.
Back up your computer. (Optional)
Create a directory for global installations.
mkdir ~/.npm-global
- Configure NPM to use the new directory.
npm config set prefix '~/.npm-global'
- Use your preferred text editor to create a
~/.profilefile and add the following line.
export PATH=~/.npm-global/bin:$PATH
For example, you can use gedit, nano or vim.
# using `gedit` gedit ~/.profile # using `nano` nano ~/.profile # using `vim` vim ~/.profile
- Source the
~/.profilefile from your terminal.
source ~/.profile
Try to install a package globally without using sudo to verify the error is
resolved.
npm install -g live-server
You can also use the NPM_CONFIG_PREFIX command if you don't want to override
the ~/.profile file.
NPM_CONFIG_PREFIX=~/.npm-global npm install -g live-server
Note: instead of installing modules globally, you can also use the npx
command.
The npx command uses a local installation of the specified module if it's
present, otherwise, it installs it.
For example, the following command works, even if you don't have
create-react-app installed.
npx create-react-app --version
# Using NVM to manage your Node.js version
An alternative approach is to use nvm to manage your Node.js version.
NVM is quite popular and easy to use as it allows you to switch your Node.js version with a single command.
sudo.You can run one of the following commands to install NVM on macOS or Linux.
# with `curl` curl -o- https://raw.githubusercontent.com/nvm-sh/nvm/v0.39.3/install.sh | bash
Alternatively, you can use wget.
# with `wget` wget -qO- https://raw.githubusercontent.com/nvm-sh/nvm/v0.39.3/install.sh | bash
The command clones the NVM repository and configures NVM on your machine.
You can use the following command to install the latest version of Node.js with NVM.
nvm install node
node is an alias for the latest version.
Run the following command to switch to the installed version.
nvm use node
You can also install a specific Node.js version using NVM.
# install Node.js 19.7 nvm install 19.7 # switch to Node.js 19.7 nvm use 19.7
Use the node --version command to check your Node.js version.
node --version
Try to install a global module without prefixing the command with sudo to
verify you don't get any permission errors.
npm install -g live-server
# If nothing else works, use the --unsafe-perm flag
If nothing else works, try to run the command with the --unsafe-perm when
installing the module.
sudo npm install -g live-server --unsafe-perm
Make sure to replace live-server with the name of the module you're trying to
install.
The --unsafe-perm flag forces npm to download the package's binary.
If the error persists, try to add the --allow-root flag.
sudo npm install -g live-server --unsafe-perm=true --allow-root
# VS CODE: EACCES: permission denied, unlink '/usr/local/bin/code'
The VS Code errors "EACCES: permission denied, unlink '/usr/local/bin/code'" or "EACCES: permission denied'" occur when we run VS Code as root or try to access a project that is owned by another user and not the currently logged-in user.
The first thing you should try is to reinstall the 'code' command in PATH.
In Visual Studio Code:
- Press:
Ctrl+Shift+Pon Windows and LinuxCommand+Shift+Pon macOS
F1 to open the Command Palette.- Type uninstall 'code' and select Shell Command: Uninstall 'code' command from PATH.
Now you have to install the 'code' command in PATH.
- Press:
Ctrl+Shift+Pon Windows and LinuxCommand+Shift+Pon macOS
- Type install 'code' and select Shell Command: Install 'code' command in PATH.
Try to restart VS Code if the issue persists.
# Changing the ownership of the /usr/local/bin/code directory
If the error persists, try changing the ownership of the /usr/local/bin/code
directory.
Run the following command from your terminal to check which user owns the
/usr/local/bin/code directory.
ls -la /usr/local/bin/code
Your output should be something similar to the following.
drwxr-xr-x 3 root wheel 102 Mar 10 13:35 code
Notice that the directory is owned by the root user.
To resolve the issue, we have to change the ownership of the directory to the current user.
sudo chown -R $USER /usr/local/bin/code
The command changes the ownership of the directory to the current user.
# Changing the ownership of your project's directory
If the error message contains a path to your project's directory, e.g. "EACCES: permission denied, open '/Users/MyUser/MyProject'", you have to change the ownership of the directory.
sudo chown -R $USER /path/to/the/directory
Make sure to replace the path placeholder with the actual path to the directory.
Alternatively, you can open your terminal in the parent directory and specify the directory's name.
# run from the parent directory sudo chown -R $USER <DIRECTORY_NAME>
The command changes the ownership of the directory to the current user, so you will be able to access it without root privileges.
The $USER environment variable resolves to the current user.
echo $USER
Alternatively, you can specify the user explicitly.
sudo chown -R <YOUR_USER> /path/to/the/directory
# Changing the ownership of the .vscode executable
If the error persists and you are on macOS or Linux, try to change the ownership
of the .vscode executable.
Try running the following command on macOS.
# macOS sudo chown -R $(whoami) /Users/$(whoami)/.vscode
Try running the following command on Linux.
# Linux sudo chown -R $(whoami) ~/.vscode/
# Reinstalling VS Code
If the error persists, try to reinstall VS Code.
You can download the installer from the official visualstudio.com website.
# Additional Resources
You can learn more about the related topics by checking out the following tutorials:

