Cannot find module 'webpack' error [Solved]
Last updated: Mar 6, 2024
Reading time·5 min

# Table of Contents
- Cannot find module 'webpack' error
- Cannot find module 'webpack-cli' error
- Cannot find module 'webpack/bin/config-yargs' error
# Cannot find module 'webpack' error
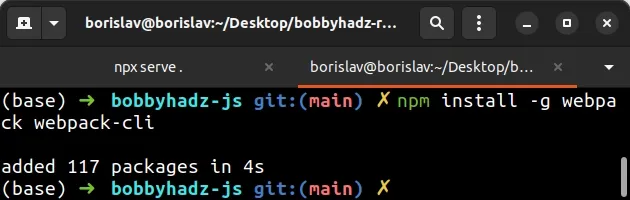
To solve the "Cannot find module 'webpack'" error, make sure to install
webpack globally by running the npm i -g webpack command and create a
symbolic link from the globally-installed package to node_modules by running
the npm link webpack command.
Open your terminal in your project's root directory (where your package.json
file is located) and run the following commands:
# ✅ Install Webpack globally npm install -g webpack webpack-cli # ✅ Create a symbolic link from the global package # to node_modules/ of current folder npm link webpack
Once you run the two commands, the error should be resolved.
webpack fails, you might have to run the command prefixed with sudo.# 👇️ If you got a permissions error, run with sudo sudo npm install -g webpack webpack-cli npm link webpack
The npm link command creates
a symbolic link from the globally installed package to the node_modules/
directory of the current folder.
If the error is not resolved, try installing webpack and webpack-cli
locally.
Open your terminal in your project's root directory (where your package.json
file is located) and run the following commands:
npm install --save-dev webpack webpack-cli
This will add webpack to the development dependencies of your project, so you
don't have to run the link command.
# Delete node_modules and reinstall dependencies
If the error is not resolved, try to delete your node_modules and
package-lock.json (not
package.json) files, re-run npm install and restart your IDE.
# 👇️ delete node_modules and package-lock.json rm -rf node_modules rm -f package-lock.json # 👇️ delete dist or build (the directory where Webpack outputs files) rm -rf dist # 👇️ clean npm cache npm cache clean --force npm install
If you are on Windows, issue the following commands in CMD.
# for Windows rd /s /q "node_modules" del package-lock.json # 👇️ delete dist or build (the directory where Webpack outputs files) rd /s /q "dist" # 👇️ clean npm cache npm cache clean --force # 👇️ install packages npm install
Make sure to also delete your dist or build folder if you have one. This is
where webpack outputs files.
# Make sure webpack is in your devDependencies object
If you still get the error, open your package.json file and make sure it
contains the webpack package in the devDependencies object.
{ // ... rest "devDependencies": { "webpack": "^5.70.0", "webpack-cli": "^4.9.2" // ... rest } }
You can try to manually add the line and re-run npm install.
npm install
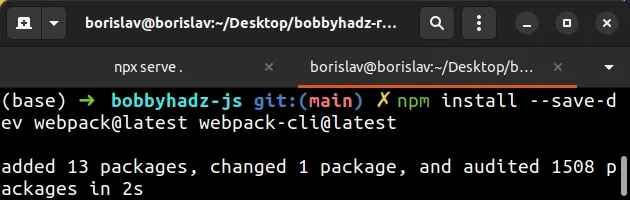
Or install the latest version of the packages:
npm install --save-dev webpack@latest webpack-cli@latest
# Cannot find module 'webpack-cli' error
To solve the "Cannot find module 'webpack-cli'" error, make sure to install
webpack-cli globally by running the npm i -g webpack-cli command and create
a symbolic link from the globally-installed package to node_modules by running
the npm link webpack-cli command.
Open your terminal in your project's root directory (where your package.json
file is located) and run the following commands:
# ✅ Install webpack-cli globally npm install -g webpack webpack-cli # ✅ Create a symbolic link from the global package # to node_modules/ of current folder npm link webpack npm link webpack-cli
Once you run the two commands, the error should be resolved.
sudo.# 👇️ If you got permissions error, run with sudo sudo npm install -g webpack webpack-cli npm link webpack npm link webpack-cli
The npm link command creates
a symbolic link from the globally installed package to the node_modules/
directory of the current folder.
webpack and webpack-cli locally.Open your terminal in your project's root directory (where your package.json
file is located) and run the following commands:
npm install --save-dev webpack webpack-cli
webpack-cli to the development dependencies of your project, so you don't have to run the link command.If the error is not resolved, try to delete your node_modules and
package-lock.json (not package.json) files, re-run npm install and restart
your IDE.
# 👇️ delete node_modules and package-lock.json rm -rf node_modules rm -f package-lock.json # 👇️ delete dist or build (the directory where Webpack outputs files) rm -rf dist # 👇️ clean npm cache npm cache clean --force npm install
Make sure to also delete your dist or build folder if you have one. This is
where webpack outputs files.
If you still get the error, open your package.json file and make sure it
contains the webpack-cli package in the devDependencies object.
{ // ... rest "devDependencies": { "webpack": "^5.70.0", "webpack-cli": "^4.9.2" // ... rest } }
You can try to manually add the line and re-run npm install.
npm install
# Cannot find module 'webpack/bin/config-yargs' error
To solve the error "Cannot find module 'webpack/bin/config-yargs'", make sure
you're running a recent version of webpack and replace the webpack-dev-server
command with webpack serve in your package.json file.
Open your package.json file and make sure your webpack command starts with
webpack serve, and NOT webpack-dev-server.
{ "scripts": { "dev": "webpack serve --config webpack.dev.js --progress", // ... rest }, // ... rest }
The Webpack team changed the command from webpack-dev-server to
webpack serve starting version 4 of webpack.
webpack, webpack-cli and webpack-dev-server locally.Open your terminal in your project's root directory (where your package.json
file is located) and run the following command:
npm install --save-dev webpack webpack-cli webpack-dev-server
This will add the webpack-dev-server package to the development dependencies
of your project.
If the error is not resolved, try to delete your node_modules and
package-lock.json (not package.json) files, re-run npm install and restart
your IDE.
# 👇️ delete node_modules and package-lock.json rm -rf node_modules rm -f package-lock.json # 👇️ delete dist or build (the directory where webpack outputs files) rm -rf dist # 👇️ clean npm cache npm cache clean --force npm install
Make sure to also delete your dist or build folder if you have one. This is
where webpack outputs files.
If you're still getting the error, open your package.json file and make sure
it contains the webpack package in the devDependencies object and is version
5 or more recent.
{ // ... rest "devDependencies": { "webpack": "^5.70.0", "webpack-cli": "^4.9.2", "webpack-dev-server": "^4.7.4" // ... rest } }
You can try to manually add the packages and re-run npm install.
npm install
Alternatively, you could install the latest version of the packages by running:
npm install --save-dev webpack@latest webpack-cli@latest webpack-dev-server@latest

