Could not install packages due to an OSError: [WinError 2] The system cannot find the file specified
Last updated: Apr 9, 2024
Reading time·5 min

# Could not install packages due to an OSError: [WinError 2] The system cannot find the file specified
The error "Could not install packages due to an OSError: [WinError 2] The system cannot find the file specified" occurs when we don't have the necessary permissions to install a package.
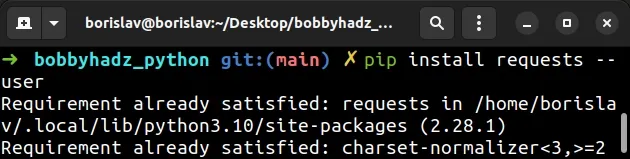
To solve the error, run the command with the --user option, e.g.
pip install numpy --user.
Could not install packages due to an OSError: [WinError 2] The system cannot find the file specified: 'C:\Python310\Scripts\f2py.exe' -> 'C:\Python310\Scripts\f2py.exe.deleteme'
# Install the package with the --user option
One way to solve the error is to install the package scoped to the current user, without requiring elevated privileges.
pip install <package-name> --user pip3 install <package-name> --user python -m pip install <package-name> --user python3 -m pip install <package-name> --user
Make sure to replace the <package-name> placeholder with the actual name of
the package, e.g. pip install numpy --user.
The --user option installs the package in the user's home directory.
However, the --user option wouldn't work if you have a virtual environment
active.
Another thing that often solves the error is upgrading your pip version before
installing the specific package.
python -m pip install --user --upgrade pip python -m pip install numpy python3 -m pip install --user --upgrade pip python3 -m pip install numpy
If that didn't help, run CMD as an administrator and install the package.
# Run CMD as an administrator
To run CMD as an administrator:
- Click on the search bar and type "cmd".
- Right-click on "Command Prompt".
- Click on "Run as administrator".
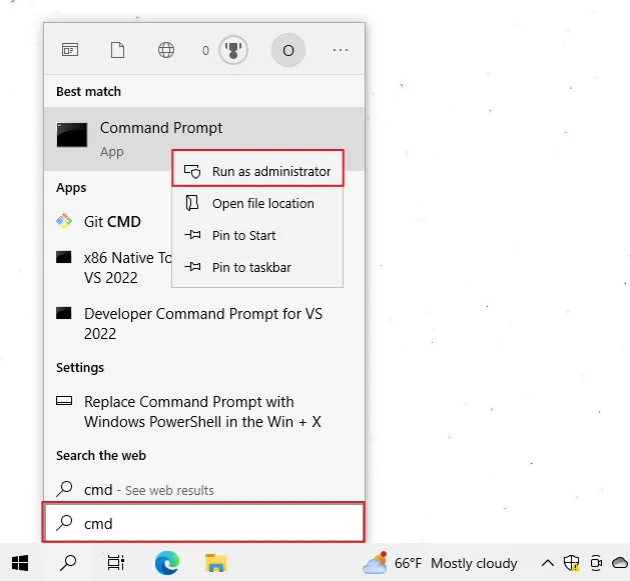
- Once you open the shell as an administrator, rerun the
pip installcommand.
pip install <package-name> pip3 install <package-name> python -m pip install <package-name> python3 -m pip install <package-name>
pip install command.If opening CMD as an administrator didn't help, try to open PowerShell as an administrator and run the command.
To run PowerShell as an administrator:
- Click on the search bar and type "PowerShell".
- Right-click on "Windows PowerShell".
- Click on "Run as administrator".

pip install command.Try to stop any other Python scripts while installing the package.
Windows throws "OSError: [WinError 2] The system cannot find the file specified" when the file is locked by another process.
# Having multiple versions of Python
If you have multiple versions of Python (2.X and 3.X) and have renamed your
python.exe executable file to python3.exe, try renaming the file back to
python.exe.
Try issuing a python command after renaming the file back to python.exe (if
you previously changed its name).
If the error persists, change the user's access permissions.
# Change the user's access permissions
The error is often caused because the user doesn't have access to modify the directory where the package should be installed.
To solve the error, allow the user full access to the Python directory.
To change the access permissions for the user:
- Open the folder where you installed Python e.g.
C:\Program Files (x86)\Python310.
You can find where Python is installed with either of the following 2 commands.
where python python -c "import os, sys; print(os.path.dirname(sys.executable))"
- Once you open the directory where Python is installed, right-click on the "Python" or "Python310" folder and click "Properties".
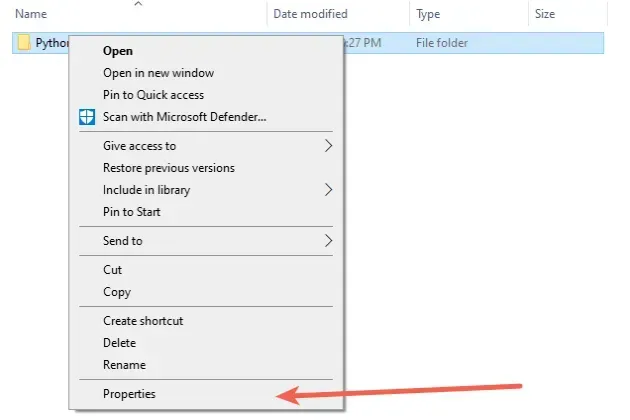
- Go to the "Security" tab and click on the "Edit" button.
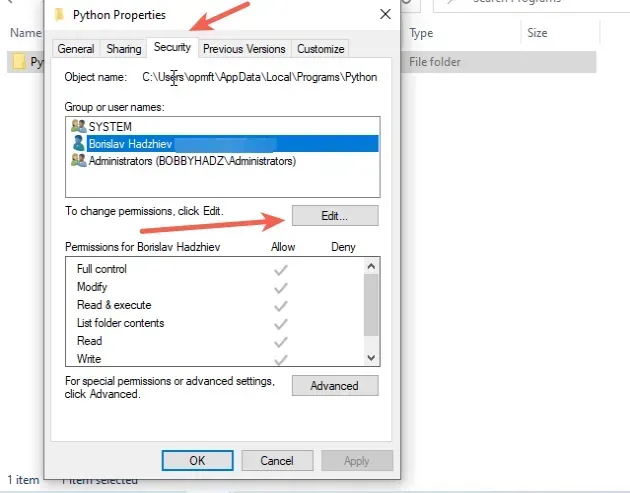
- Allow "Full control" to your user or the entire "Users" group.
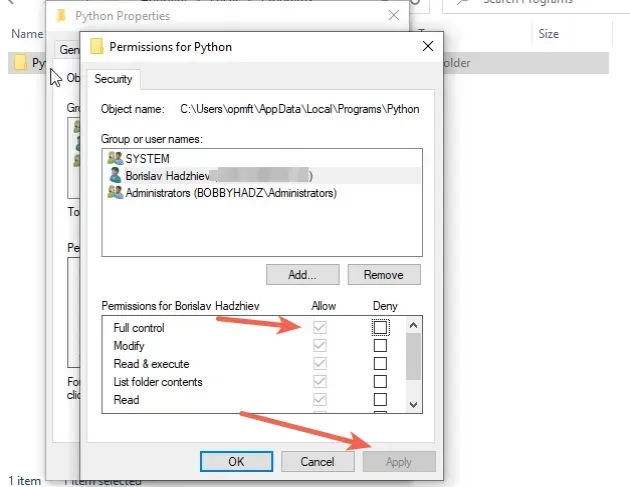
- Click on "Apply".
- Run the
pip install <package-name>command again.
Once you give "Full access" permissions to the user, you should be able to
pip install packages without getting any errors.
If you have a virtual environment active, your Python location will be scoped to the specific virtual environment.
You can run the where python command with your virtual environment active to
find the directory.
If that didn't resolve the error, try upgrading your version of pip.
# 👇️ If you have pip already installed pip install --upgrade pip # 👇️ If your pip is aliased as pip3 (Python 3) pip3 install --upgrade pip # 👇️ If you don't have pip in your PATH environment variable python -m pip install --upgrade pip # 👇️ If you don't have pip in your PATH environment variable python3 -m pip install --upgrade pip # 👇️ If you have easy_install easy_install --upgrade pip
If you get the error "ModuleNotFoundError: No module named 'pip' in Python", check out my other article:
If the commands from the code sample didn't work for you, click on the "Install pip in Python" link.
After you upgrade pip, upgrade setuptools as well.
pip install --upgrade setuptools pip3 install --upgrade setuptools python3 -m pip install --upgrade setuptools
The error is often solved by upgrading your pip version and re-running the
pip install command.
# Create a virtual environment
If the error persists, try creating a virtual environment.
- Create a virtual environment.
- Activate the virtual environment.
- Run the
pip installcommand with the virtual environment active.
# 👇️ Use the correct version of Python when creating VENV python3 -m venv venv # 👇️ Activate on Unix or MacOS source venv/bin/activate # 👇️ Activate on Windows (cmd.exe) venv\Scripts\activate.bat # 👇️ Activate on Windows (PowerShell) venv\Scripts\Activate.ps1 # 👇️ Install the specific package in the virtual environment pip install numpy
Make sure to use the correct command to activate your virtual environment depending on your operating system and your shell.
Your virtual environment will use the version of Python that was used to create it.
Make sure to not create your virtual environment as root, e.g. with sudo
because then you'd only permit root users to install packages.
If you created your virtual environment using sudo, try changing its
permissions or recreate it without sudo.
sudo chmod -R 777 venv
The command above assumes that your virtual environment is in a folder called
venv.
777 means granting all users full access to the contents of the directory.
# Set "include-system-site-packages" to "true" in your venv config file
If you use a virtual environment, another thing that might help is to:
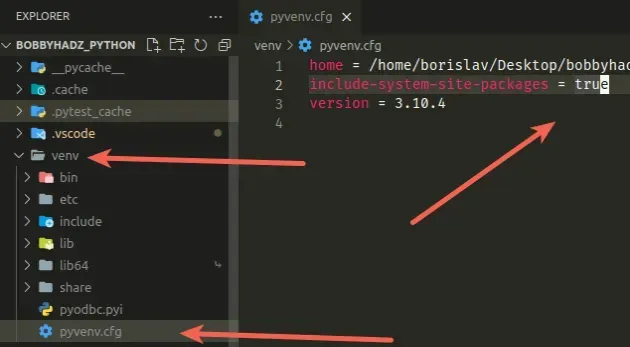
- Open your
venvfolder. - Click on the
pyvenv.cfgfile. - Set the
include-system-site-packagesproperty totrue. - Save the file.
- Rerun the
pip installcommand.
# Conclusion
The solve the "Could not install packages due to an OSError: [WinError 2] The system cannot find the file specified" error:
- Run the
pip installcommand with the--useroption. - Run CMD as an administrator before installing the package.
- Grant the user full access to the Python directory.

