npm WARN using --force Recommended protections disabled
Last updated: Apr 4, 2024
Reading time·3 min
# npm WARN using --force Recommended protections disabled
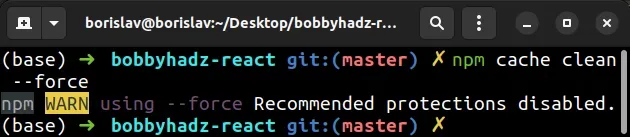
The warning "npm WARN using --force Recommended protections disabled" is shown
when we run the npm cache clean --force command.
If you need to verify that the cache has been cleared and the disk space has
been reclaimed, use the npm cache verify command.
The warning is most commonly raised when running the npm cache clean --force
command.
npm cache clean --force
Use the npm cache verify command if you need to verify the contents of the
cache have been cleared.
npm cache verify
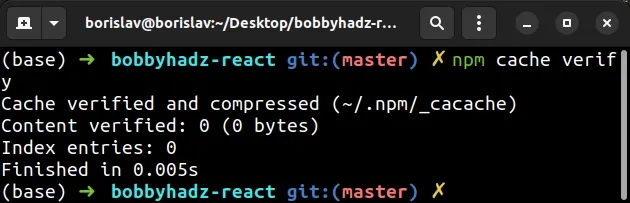
The npm cache verify command verifies the contents and the integrity of the
cache folder.
If you get the "npm WARN using --force Recommended protections disabled"
when issuing any command, make sure you haven't set the force behavior
globally.
npm config set force false npm config get force
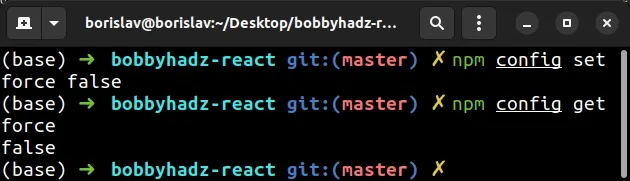
npm config set command will update the global value of the force flag setting it to false.# Delete your node_modules and reinstall your dependencies
If the warning is still shown when you issue npm commands, try to delete your
node_modules and
package-lock.json and rerun
npm install.
# 👇️ (Windows) delete node_modules and package-lock.json rd /s /q "node_modules" del package-lock.json # 👇️ (macOS/Linux) delete node_modules and package-lock.json rm -rf node_modules rm -f package-lock.json # 👇️ clean your npm cache npm cache clean --force # 👇️ install packages npm install
If you still get the warning every time you issue a command, try to update your
npm version.
npm install -g npm@latest # 👇️ If you get a permissions error on macOS / Linux sudo npm install -g npm@latest
If you get a permissions error on Windows, open CMD as an administrator and rerun the command.
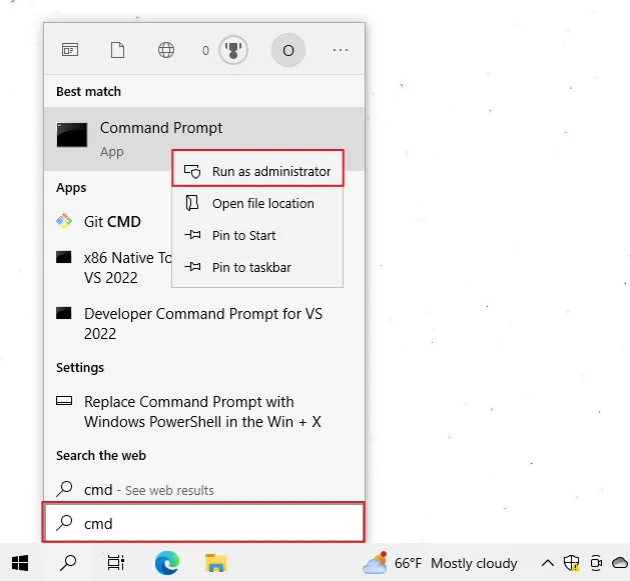
To open CMD as an administrator:
Click on the Search bar and type CMD.
Right-click on the Command Prompt application and click "Run as administrator".
- Rerun the command.
npm install -g npm@latest npm install -g npm@latest --force
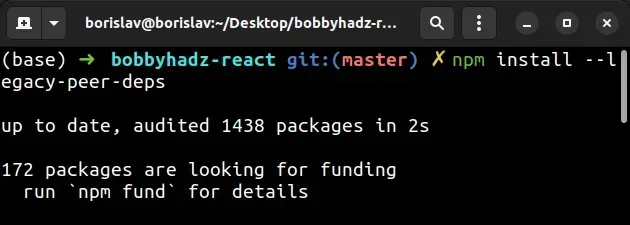
If that didn't work either, try using the --legacy-peer-deps flag.
# Try to run your npm install command with the --legacy-peer-deps flag
If none of the suggestions helped, try to run your npm install command with
the --legacy-peer-deps flag.
npm install --legacy-peer-deps
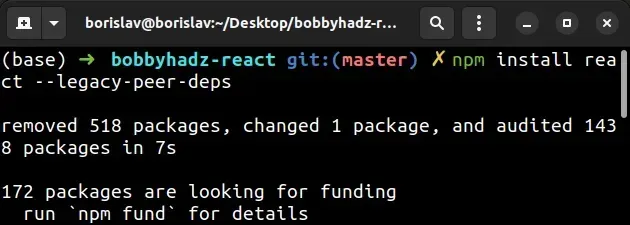
If you got the error when installing a specific module, add the
--legacy-peer-deps flag at the end of the command.
npm install react --legacy-peer-deps
Make sure to replace react with the name of the module you're trying to
install.
Starting with NPM v7, NPM installs peerDependencies by default, which means
that if you already have a peer dependency of the module installed, but not one
of the specified by the module versions, NPM throws an error.
The --legacy-peer-deps flag tells NPM to ignore peer dependencies and to
proceed with the installation anyway.
This was the default behavior in NPM versions 4 through 6.
In other words, NPM modules name specific versions of their peerDependencies.
If you have a different version of a peer dependency package installed, an error
is raised unless you set the --legacy-peer-deps flag.
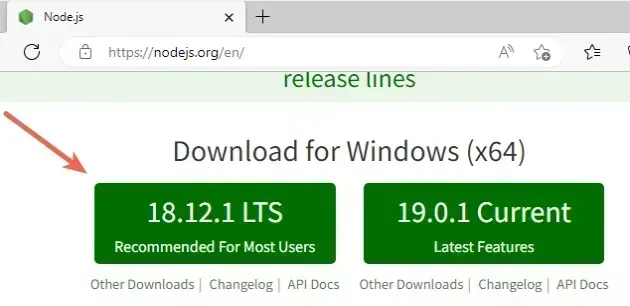
If that didn't help, try to download and install the long-term supported version of Node.js.
# Update your Node.js version to the LTS
To install the long-term supported version of Node.js:
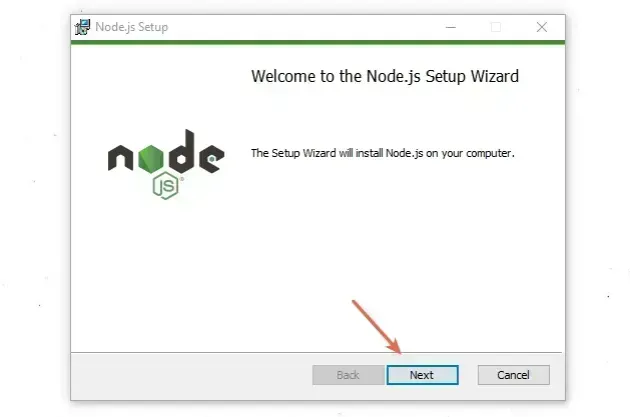
- Open the nodejs.org page and download the Windows installer for the LTS (long-term supported) version.
- Start the installer and click
Nexton the Welcome screen.
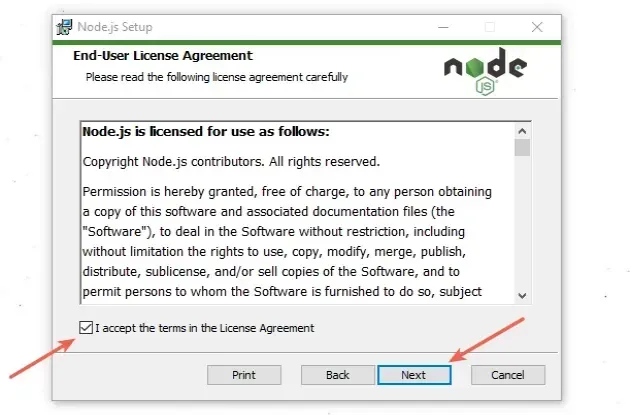
- Accept the end-user license agreement and click
Next.
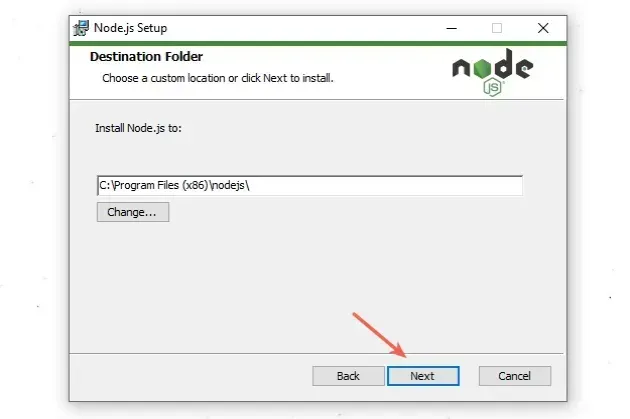
- Leave the default destination folder selected and click
Next.
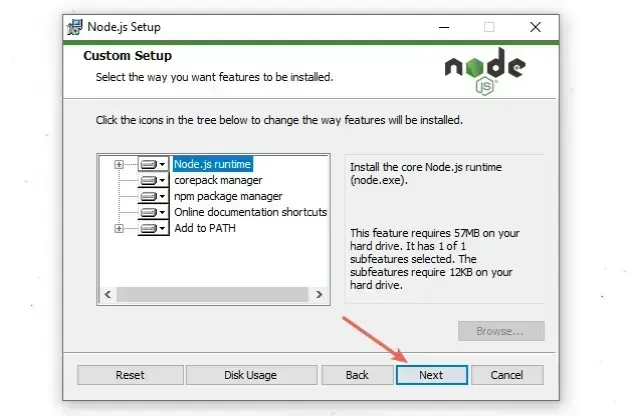
- On the "Custom Setup" screen, click
Next.
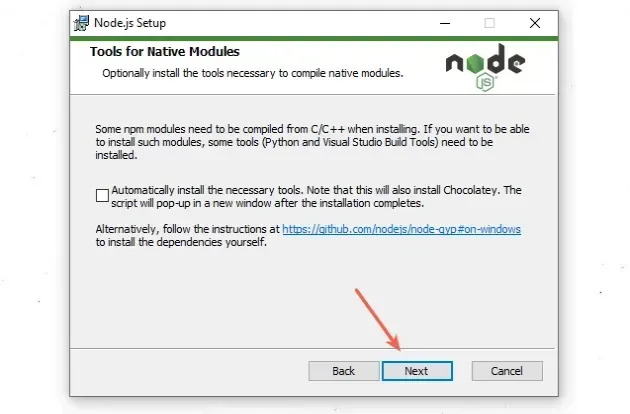
- You can optionally install tools for native modules, otherwise, click
Next.
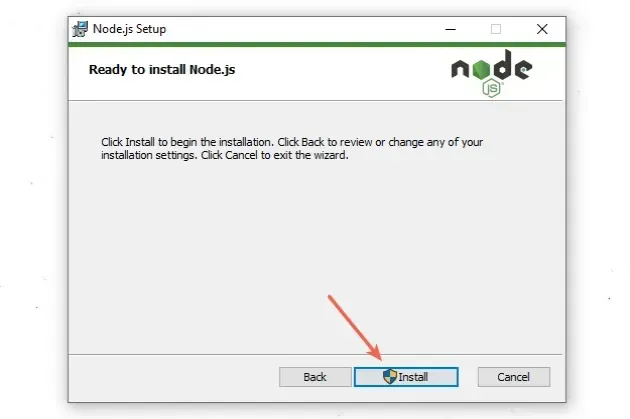
- On the next screen, click on the
Installbutton.
- Lastly, click on the
Finishbutton.

Make sure to close any existing shells for the
PATHenvironment variable to get updated.You can start a new shell and use the
npm --versioncommand to make sure Node is installed.
npm --version node --version npm install -g npm@latest

